

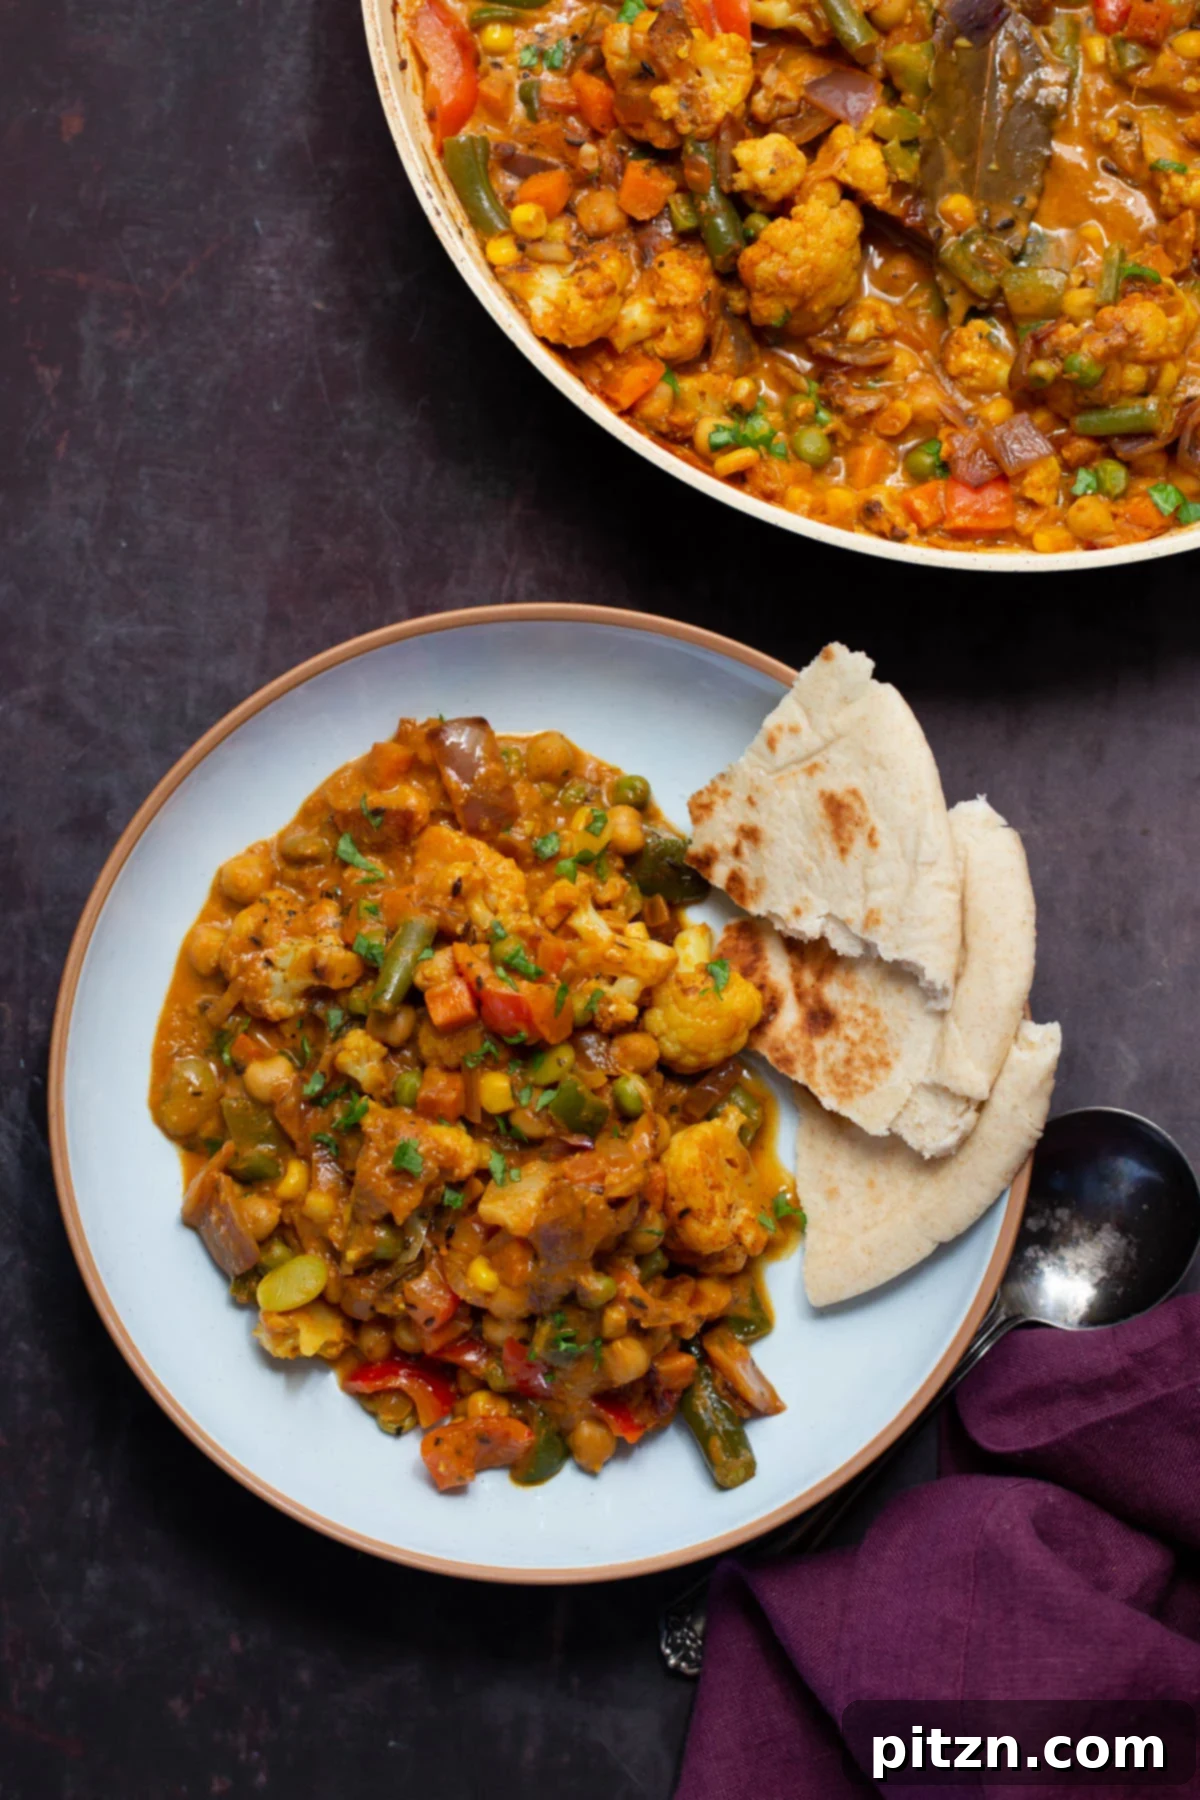
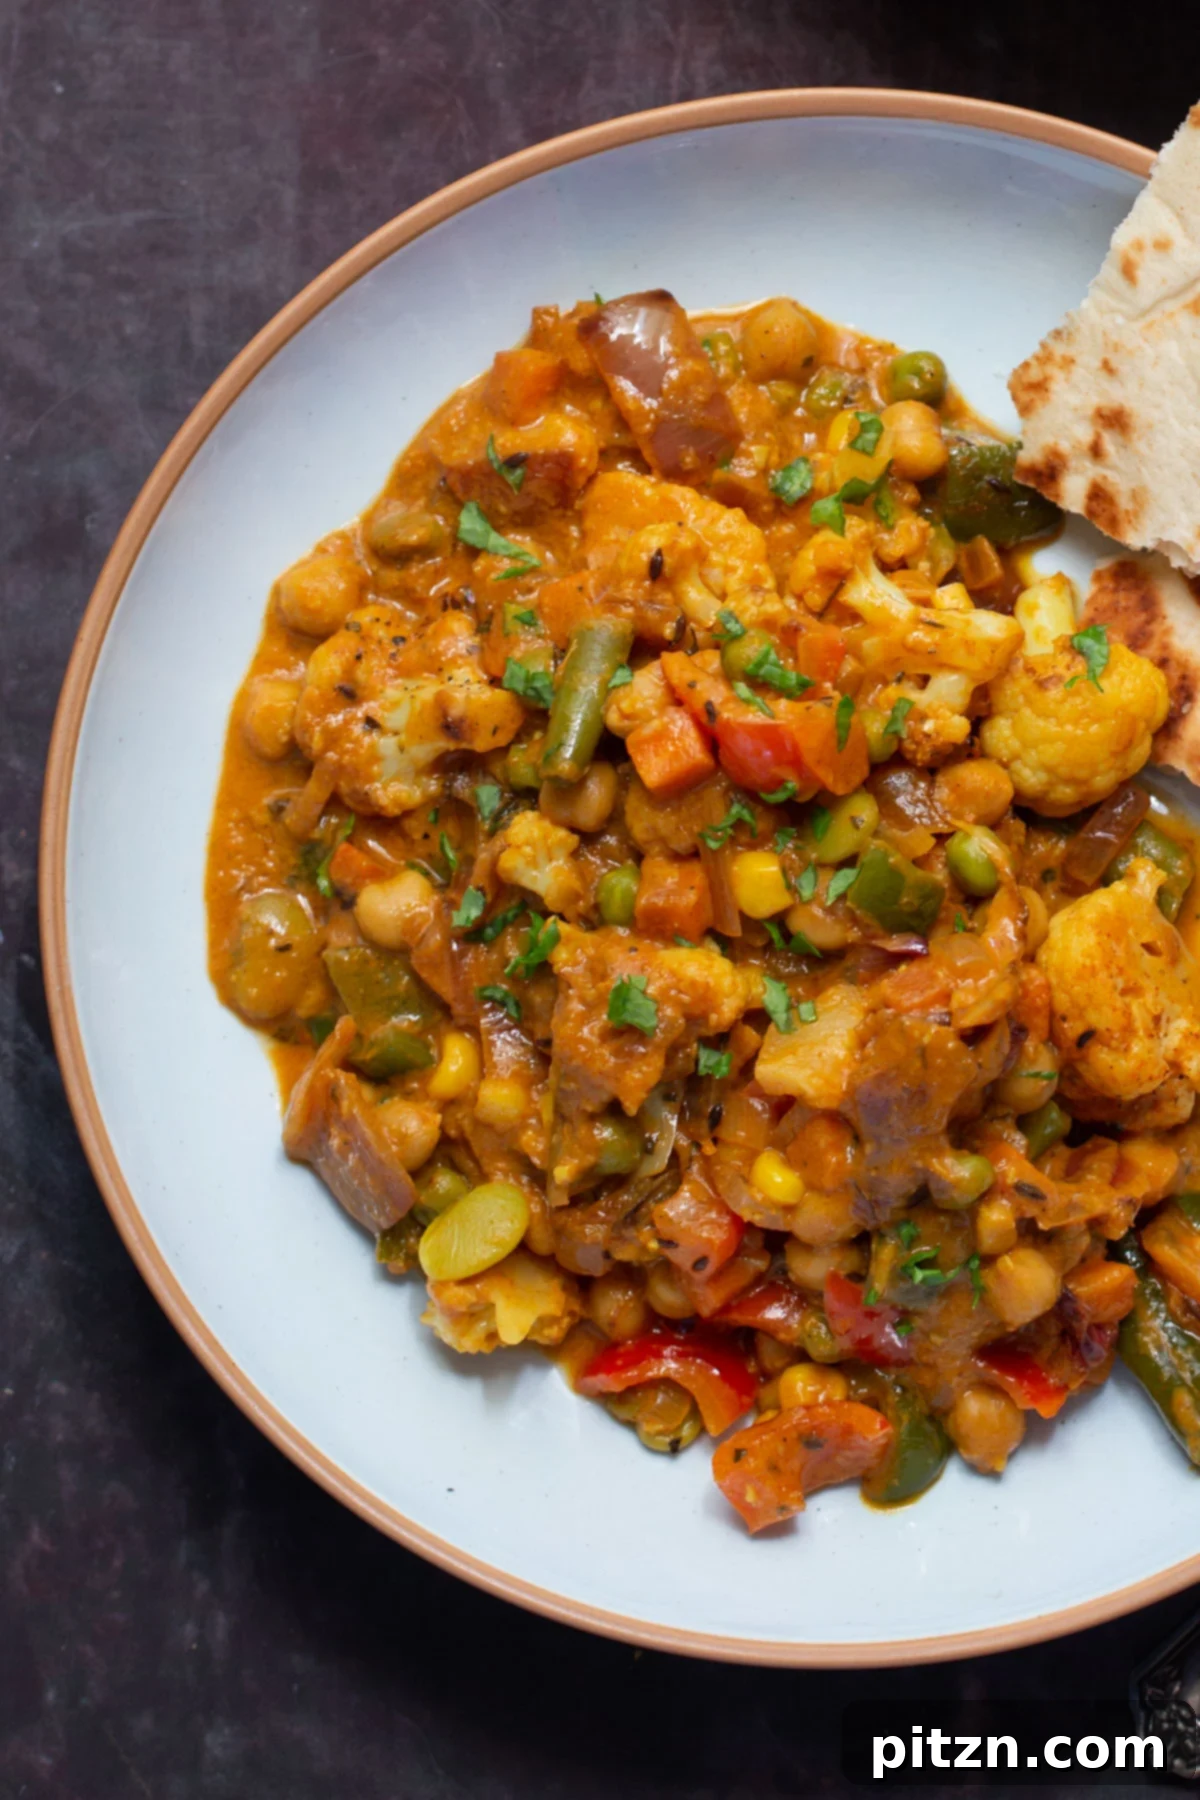
Embark on a culinary journey to the heart of India with this exquisite Vegetable Bhuna recipe. A rich, aromatic, and deeply flavorful Indian curry, our restaurant-style Vegetable Bhuna promises an unparalleled dining experience right in your home. This guide will reveal the secrets to creating tender-crisp, fenugreek-roasted vegetables nestled in a creamy, spiced tomato sauce, all finished with a vibrant cumin-infused oil, known as tadka. Prepare to transform your everyday vegetables into an extraordinary feast that tantalizes the taste buds and leaves a lasting impression. Whether you’re a seasoned cook or new to Indian cuisine, our detailed tips and step-by-step instructions will help you master this delicious vegetarian curry.

Table of Contents
- Unveiling Vegetable Bhuna: A Flavorful Indian Delight
- Why You’ll Savor This Vegetable Bhuna
- Explore More Vegan Curries
- Vegetable Bhuna (North Indian Vegetable Curry) Recipe
- Key Ingredients and Smart Substitutions
- Expert Tips for a Perfect Bhuna
- Step-by-Step Guide: How to Make Vegetable Bhuna Curry
- Frequently Asked Questions About Vegetable Bhuna
Unveiling Vegetable Bhuna: A Flavorful Indian Delight
Bhuna, a term originating from Indian and Bengali cuisine, directly translates to “to fry” or “to roast.” This cooking technique is not merely a step but a philosophy, central to developing the deep, caramelized flavors that define this signature curry. Unlike many other Indian curries where ingredients are simmered together, a Bhuna masala is meticulously roasted and fried in its own juices and a minimal amount of oil, allowing the spices and aromatics to fully release their essential oils and achieve a rich, concentrated taste profile. This slow roasting and deglazing process builds layers of complexity, creating a sauce that is thick, intensely flavorful, and clings beautifully to the ingredients.
Traditionally, Bhuna is often prepared with chicken or other meats, featuring a creamy, spiced tomato-yogurt sauce. However, this rendition masterfully adapts the technique for a vibrant vegetable bhuna, proving that plant-based versions can be equally, if not more, satisfying and flavorful. We focus on showcasing the natural sweetness and textures of a variety of vegetables like cauliflower, green beans, and carrots, ensuring each bite is packed with goodness. The result is a curry that’s both hearty and incredibly satisfying, proving that vegetable-forward dishes can be the star of any meal.
Crafting this restaurant-style vegetable bhuna involves three distinct steps, each purposefully designed to maximize flavor and texture:
- First, we meticulously pre-cook the vegetables. This crucial initial stage involves searing and roasting longer-cooking vegetables, like cauliflower, to develop a slight char and tender-crisp texture. A splash of water is then added to steam them gently, ensuring they cook evenly to an al dente perfection. This separate cooking prevents the vegetables from becoming mushy and allows them to retain their individual character and bite, which is essential for a delightful curry.
- Second, we create the rich bhuna masala sauce. This involves frying aromatic spices, caramelizing onions, and incorporating ginger-garlic paste with tomato and a creamy element like non-dairy yogurt. The magic here is in the slow, patient cooking of the sauce, allowing the flavors to meld and deepen without the interference of cooking vegetables. Once the sauce is perfected, the pre-cooked vegetables are gently folded in, ensuring they absorb the exquisite flavors without losing their distinct texture. We specifically avoid cooking the vegetables directly in the sauce to prevent it from tasting like a “vegetable soup” and to keep the sauce’s inherent robust flavor prominent.
- Third, a vibrant finishing spiced oil, or ‘tadka,’ is prepared. This tempering involves blooming whole cumin seeds and bay leaf in hot oil, followed by lightly sautéing fresh onions and bell peppers. This tadka is then stirred into the finished curry just before serving. The spiced oil adds an incredible burst of fresh, aromatic flavor, while the lightly cooked vegetables contribute a delightful crunch and an additional layer of texture, carrying the spice notes throughout the dish. This final step is the hallmark of a truly authentic and restaurant-quality bhuna, elevating the curry from delicious to unforgettable.
This bhuna vegetable curry is not only a delicious way to utilize fresh or frozen vegetables but also a testament to the art of Indian cooking, where thoughtful layering of flavors and textures results in a truly memorable dish. While it involves a few more steps than a quick weeknight curry, the rich, complex flavors and satisfying textures make the extra effort incredibly worthwhile.
Why You’ll Savor This Vegetable Bhuna
- Unforgettable Flavor Profile: Experience a creamy, rich tomato-based curry infused with a captivating cumin-spiced oil that delivers an explosion of authentic Indian flavors. The “bhuna” cooking method concentrates the spices and aromatics, resulting in a profoundly satisfying taste.
- Remarkably Versatile: This recipe is a fantastic way to customize your curry! Feel free to use a diverse array of your favorite vegetables, adapting it to whatever is fresh in season or readily available in your fridge or freezer. From root vegetables to leafy greens, almost any combination works beautifully.
- Dietary-Friendly: Naturally gluten-free, this vegetable bhuna can also be easily adapted to be soy-free and nut-free by simply selecting a compatible non-dairy yogurt or cream. This makes it an inclusive and delicious option for many dietary needs.
- Restaurant-Quality at Home: While it demands a little more attention to detail, the multi-step process yields a curry that rivals your favorite Indian restaurant. Impress your family and friends with a dish that tastes complex and professionally prepared.
- Textural Harmony: The unique three-step cooking process ensures perfectly cooked, al dente vegetables with a slight bite, complementing the smooth, rich sauce and the crunchy tadka topping. This combination of textures makes every spoonful exciting.
Explore More Vegan Curries
- Chickpea Coconut Curry
- Malaysian Tofu Curry
- Malabar Curry
- Baked Tofu Curry
- Butter Chickpeas Curry
Vegetable Bhuna (North Indian Vegetable Curry)
Rated 5 out of 5 stars by 11 users

Ingredients
For the vegetables:
- 1 teaspoon oil
- 1/2 teaspoon dried fenugreek leaves
- 2 cups cauliflower florets
- 1 – 2 cups other vegetables of choice, I use a mix of frozen carrots, peas, green beans, etc. (thaw them before using). You can also use some bell peppers, root vegetables like sweet potato, parsnip, turnip, etc.
- 1/2 teaspoon salt
For the bhuna masala sauce:
- 2 teaspoons oil
- 1 cup chopped red onion
- 1 tablespoon ginger-garlic paste
- 1/2 – 1 teaspoon garam masala, or to taste
- 1/4 teaspoon turmeric
- 1 teaspoon ground coriander
- 1/2 teaspoon smoked paprika
- 1/4 teaspoon salt
- 2 tablespoons tomato paste
- 1/3 cup non-dairy yogurt, or use non dairy cream such as coconut cream or cashew cream
- 1 cup cooked or canned(drained) chickpeas
- 1/2 cup or more water or non dairy milk
For the spiced oil tadka topping:
- 1 teaspoon oil
- 1/2 teaspoon cumin seeds
- 1 bay leaf
- 1/2 cup onion, chopped into 3/4 – 1-inch cubes or slices
- 1 bell pepper, chopped into 3/4 – 1-inch slices, I use a mix of colored bell peppers
- 1/4 teaspoon dried fenugreek leaves
- cilantro, pepper flakes, lemon juice for garnish
Instructions
Cook the vegetables.
-
Heat a large skillet over medium-high heat and add 1 teaspoon of oil. Once the oil is shimmering, add the fenugreek leaves and stir to combine. Immediately add the cauliflower florets along with a generous pinch of salt. Cover the skillet and cook for 3-4 minutes, stirring once or twice, until the cauliflower begins to brown beautifully on some edges. (If you are incorporating harder root vegetables like potatoes or parsnips, add them at this initial stage alongside the cauliflower to ensure even cooking.)
-
Next, add the remaining chosen vegetables (such as frozen carrots, peas, or green beans) and another pinch of salt. Mix thoroughly. If the skillet appears too dry, add 2-3 tablespoons of water to create a steaming effect. Cover once more and continue to cook until all the vegetables, especially the cauliflower, are cooked through yet retain an al dente, firm-to-the-bite texture. They should be tender but not mushy.
-
Carefully transfer all the cooked vegetables from the skillet into a bowl and set them aside. This ensures they don’t overcook while the sauce is being prepared.
Make the bhuna masala sauce.
-
In the same skillet, add 2 teaspoons of oil. Add the chopped red onion and a good pinch of salt. Sauté over medium heat, stirring frequently, for 5-8 minutes until the onion turns a lovely golden brown and caramelizes. If the onions start to stick or scorch, add a few splashes of water to deglaze the pan and continue cooking. Once the onions are golden, add the ginger-garlic paste and the ground spices (garam masala, turmeric, ground coriander, smoked paprika, and 1/4 teaspoon salt). Stir constantly for about 30 seconds to allow the spices to bloom and become fragrant. Then, stir in the tomato paste, non-dairy yogurt (or cream), and 1/2 cup of water or non-dairy milk. Mix well, bringing the sauce to a gentle simmer. Cook for a few minutes until the sauce thickens slightly and the oil begins to separate from the sides, indicating it has cooked down beautifully.
-
Return the reserved, al dente vegetables to the skillet. Add the cooked or canned (drained) chickpeas. Gently toss everything together to thoroughly coat the vegetables and chickpeas in the rich bhuna masala sauce. Remove the skillet from the heat immediately after tossing to prevent the vegetables from overcooking in the hot sauce.
Make the spiced oil topping.
-
In a separate medium skillet, heat 1 teaspoon of oil over medium-high heat. Once hot, add the cumin seeds. Cook for 2-3 minutes, stirring, until the cumin seeds deepen in color and become fragrant but do not burn. Then, add the bay leaf and stir for a few seconds. Introduce the cubed or sliced onion, bell pepper, and 1/4 teaspoon of dried fenugreek leaves, along with a good pinch of salt. Continue to cook, stirring occasionally, for 3-4 minutes until the bell pepper is slightly softened but still retains a pleasant crispness. The goal is a gentle softening, not complete tenderness, to ensure a delightful “bite” in the topping.
-
Transfer this freshly prepared spiced oil tadka topping directly into the skillet containing the vegetables and sauce. Toss everything together vigorously to ensure the topping is evenly distributed and the flavors meld. Cover the skillet and return it to the stove over very low heat for just 1-2 minutes. Then, switch off the heat.
-
Allow the skillet to remain covered and rest for an additional 5 minutes. This crucial resting period allows the intense flavors of the tadka to infuse deeply into the curry, enhancing its overall aroma and taste. Garnish generously with fresh cilantro and a squeeze of lemon juice just before serving. Enjoy your restaurant-style Vegetable Bhuna with warm flatbreads, naan, or fluffy basmati rice for a complete and satisfying Indian meal.
Video
Notes
Storage: For optimal freshness, store any leftover Vegetable Bhuna in an airtight container in the refrigerator for up to 3 days. When reheating, gently warm it in a skillet over medium-low heat or in the microwave until thoroughly heated through. Be mindful not to overcook the vegetables during reheating to maintain their desirable texture.
This dish is not ideally suited for freezing. The texture of the vegetables, particularly the cauliflower and bell peppers, can become overly soft and watery upon thawing and reheating from frozen, diminishing the overall quality and enjoyment of the curry.
Nutrition
Nutrition information is automatically calculated, so should only be used as an approximation.
Did you make this recipe? Rate and comment below!
Key Ingredients and Smart Substitutions
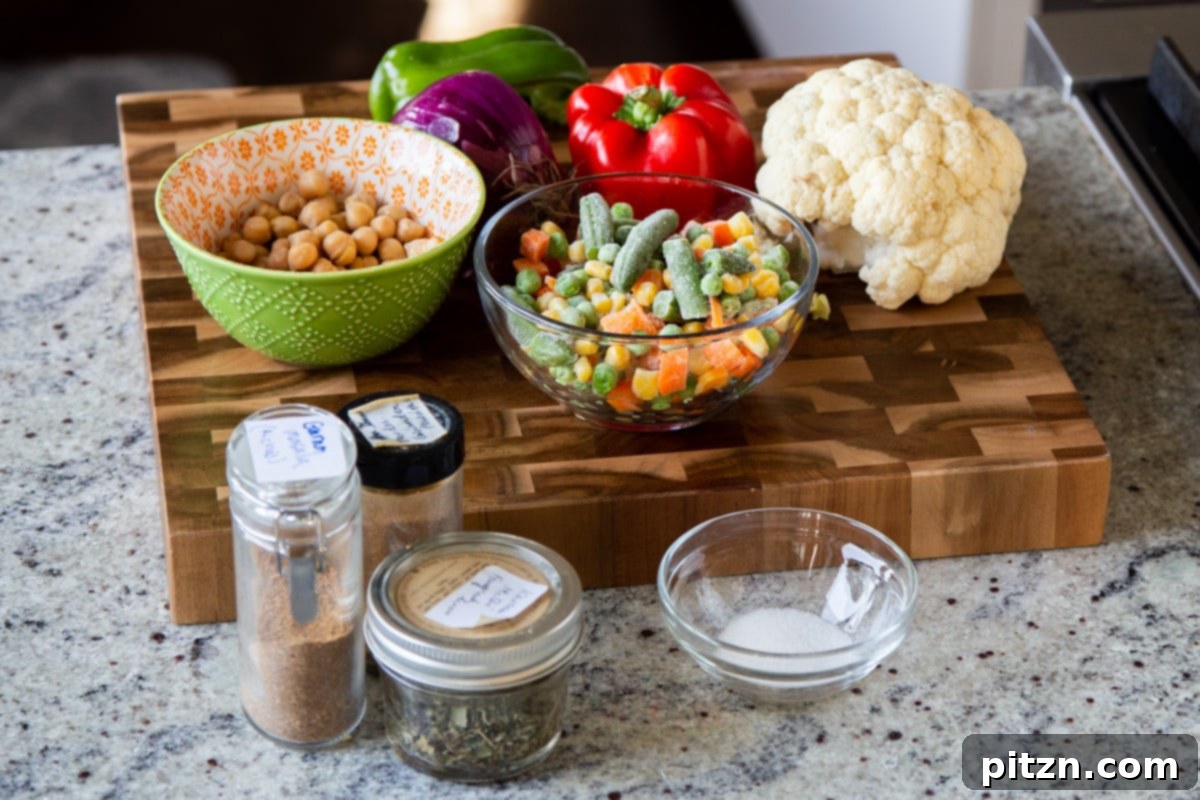
To create this authentic and flavorful Vegetable Bhuna, each ingredient plays a crucial role. Understanding their function and potential substitutions can help you customize the dish to your preference or dietary needs.
- Oil: Used for sautéing and tempering. For authentic Indian flavors, mustard oil or ghee (if not vegan) can be used, but any neutral cooking oil like vegetable or canola oil works perfectly. For an oil-free version, vegetable broth can be used for sautéing.
- Dried Fenugreek Leaves (Kasoori Methi): These highly aromatic leaves are a hallmark of North Indian cuisine, imparting a slightly bitter, earthy, and sweet flavor that is irreplaceable. They contribute a unique depth and fragrance to both the pre-cooked vegetables and the finishing tadka. If unavailable, try a tiny pinch of ground fenugreek, but be cautious as it can be overpowering.
- Mixed Vegetables: The star of our bhuna! Cauliflower florets form a robust base, while a mix of other vegetables adds variety, color, and nutrients. Think frozen carrots, peas, and green beans, which are convenient and cook quickly. You can also experiment with fresh bell peppers (any color), root vegetables like sweet potato or parsnip (add these with cauliflower for sufficient cooking time), mushrooms, or even spinach (added at the very end).
- Aromatics (Onion, Ginger-Garlic Paste): The foundation of flavor. Red onion, caramelized to a golden hue, provides sweetness and body to the sauce. Ginger-garlic paste delivers a pungent, warming kick that is essential in Indian curries. Freshly grated ginger and garlic can be used as a substitute for the paste.
- Dried Spices (Garam Masala, Turmeric, Ground Coriander, Smoked Paprika, Salt): This blend creates the signature depth of the bhuna masala.
- Garam Masala: A fragrant blend of ground spices, typically added at the end of cooking or in the sauce to provide warmth and aroma. Adjust to your taste preference.
- Turmeric: Adds a beautiful golden color and earthy notes, known for its anti-inflammatory properties.
- Ground Coriander: Provides a citrusy, slightly sweet flavor that balances the other spices.
- Smoked Paprika: While not traditionally Indian, it adds a lovely smoky depth and rich color, complementing the roasted flavors of bhuna. Regular paprika can be used as an alternative.
- Salt: Crucial for enhancing all other flavors. Adjust throughout the cooking process.
- Tomato Paste: Concentrated tomato paste contributes a deep umami flavor and richness to the sauce, as well as helping to thicken it. You can substitute with a small amount of finely pureed fresh tomatoes or canned diced tomatoes, but you may need to cook the sauce longer to achieve the desired consistency.
- Non-Dairy Yogurt or Cream: Essential for the creamy texture and a subtle tang that balances the spices. Coconut cream or a smooth cashew cream are excellent choices for a rich finish. Ensure your chosen non-dairy yogurt is plain and unsweetened. For a nut-free option, soy or oat-based yogurts or creams work well.
- Chickpeas: Added for a boost of protein and satisfying texture. Canned chickpeas (drained and rinsed) are convenient, or you can use freshly cooked ones. Other legumes like cannellini beans or even cubed, pan-fried tofu can be substituted.
- Whole Spices for Tadka (Cumin Seeds, Bay Leaf): These are toasted in oil to infuse the topping with fresh, bright aromatics that awaken the senses. Cumin seeds offer a warm, earthy flavor, while bay leaf adds a subtle, herbaceous note.
- Topping Vegetables (Onion, Bell Pepper): These are lightly sautéed to provide a textural contrast and fresh flavor to the final dish. Using a mix of colored bell peppers adds visual appeal.
- Garnish (Cilantro, Pepper Flakes, Lemon Juice): Fresh cilantro adds a vibrant herby finish, pepper flakes offer an optional hint of heat, and a squeeze of fresh lemon juice brightens all the flavors, bringing the dish to life.
Expert Tips for a Perfect Bhuna
Creating a truly authentic and delicious Vegetable Bhuna involves a few key techniques and considerations. Follow these expert tips to ensure your curry is nothing short of restaurant-quality:
- Embrace the Oil: While this recipe uses a moderate amount of oil for that signature restaurant-style richness, it’s there for a reason. The oil helps to properly caramelize the aromatics and bloom the spices, extracting their full flavor potential. If you prefer to reduce the oil, you absolutely can! Substitute oil with vegetable broth or water for sautéing at all stages. For the tadka topping, dry-toast the cumin seeds first in a dry skillet until fragrant, then add a splash of broth to sauté the onions and bell peppers. This will still yield a flavorful curry, albeit with a slightly different mouthfeel.
- Master the Caramelization of Onions: The secret to a deep, rich bhuna sauce lies in patiently caramelizing the onions. Don’t rush this step. Cook them slowly over medium heat, stirring occasionally, until they turn a beautiful golden brown. Adding a splash of water if they start to stick or scorch helps deglaze the pan and builds layers of flavor. This deep caramelization is fundamental to the “bhuna” technique and contributes immensely to the sauce’s complexity.
- Don’t Overcook Your Vegetables: This is paramount for an enjoyable bhuna. You want your vegetables, especially the cauliflower and bell peppers, to be fork-tender yet retain a slight bite—an “al dente” consistency. Overcooked vegetables become mushy and lose their distinct textures, detracting from the overall experience. Follow the separate cooking instructions carefully to achieve this perfect balance.
- Bloom Your Spices Properly: When adding dry spices to the hot oil or onions, stir them for only a few seconds. This process, known as “blooming,” releases their aromatic compounds, enhancing their flavor. Be careful not to burn them, as burnt spices will taste bitter. The quick sauté is just enough to make them fragrant.
- The Power of Tadka: The finishing spiced oil (tadka) is not just a garnish; it’s a critical flavor enhancer. The freshly toasted whole spices and lightly cooked fresh aromatics add a burst of vibrant flavor and texture that elevates the entire dish. Don’t skip it!
- Let the Flavors Meld: After combining all components and adding the tadka, covering the skillet and allowing the curry to rest off the heat for 5 minutes is crucial. This brief resting period allows all the intricate flavors to meld and deepen, resulting in a more harmonious and complex taste.
- Adjust Spice Levels: The amount of garam masala and smoked paprika can be adjusted to your preference. If you enjoy more heat, a pinch of cayenne pepper or a fresh green chili can be added during the onion sautéing stage. For a milder curry, start with half the recommended amount of garam masala and adjust to taste.
- Serving Suggestions: Vegetable Bhuna is incredibly versatile. Serve it hot with your favorite Indian flatbreads like naan, roti, or paratha. It also pairs wonderfully with fluffy basmati rice, brown rice, or even quinoa for a healthier twist. A side of cooling raita or a simple cucumber salad would complement the rich flavors beautifully.
Step-by-Step Guide: How to Make Vegetable Bhuna Curry
Follow these detailed steps to create a show-stopping Vegetable Bhuna that will impress everyone at your table.
Part 1: Cooking the Vegetables to Perfection
Begin by preparing your vegetables, ensuring they are cut into bite-sized pieces for even cooking and presentation.
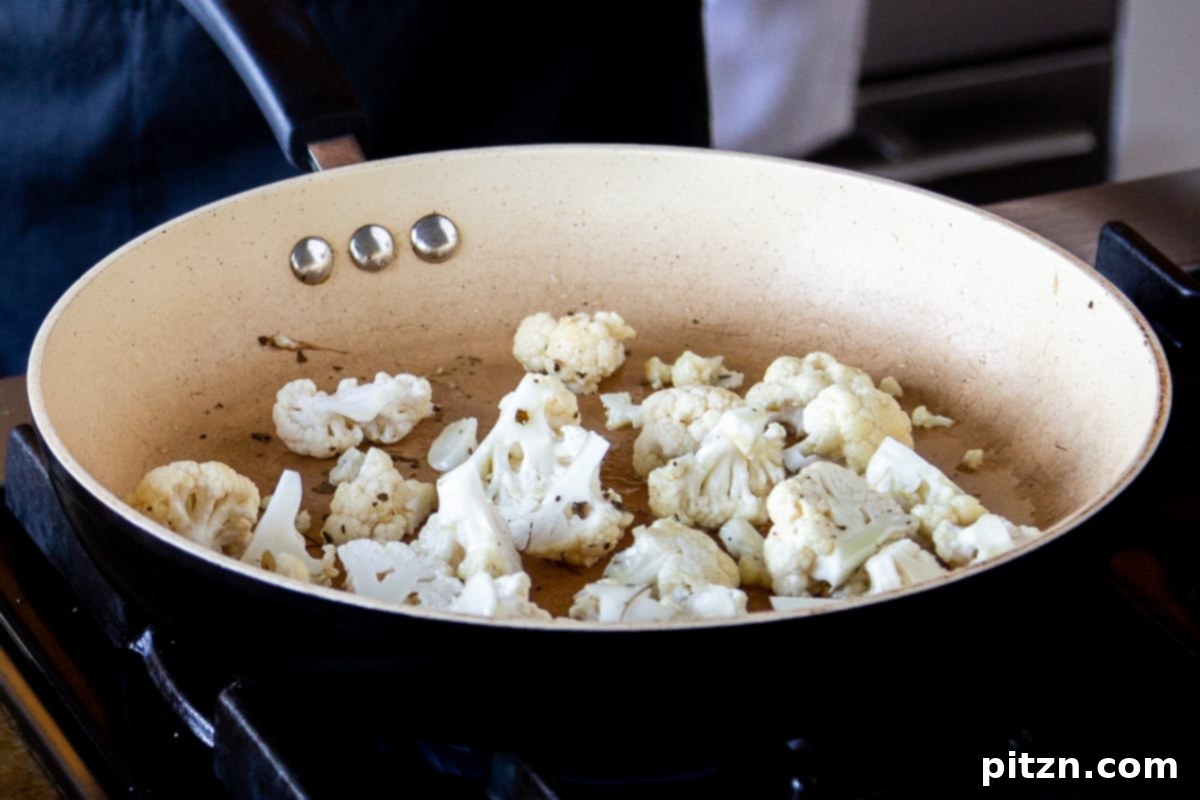
Heat a large, sturdy skillet over medium-high heat. Add one teaspoon of oil. Once the oil is hot and shimmering, add the dried fenugreek leaves. Stir for just a few seconds until they become fragrant. Immediately add the cauliflower florets and a good pinch of salt. Cover the skillet and allow the cauliflower to cook for three to four minutes. During this time, stir once or twice to ensure even browning. You’re looking for beautifully browned edges, indicating a lovely char that adds depth of flavor.
Next, add the rest of your chosen vegetables (such as frozen carrots, peas, and green beans) along with another pinch of salt. Mix all the vegetables thoroughly. If the skillet seems too dry at this point, add two to three tablespoons of water; this will help steam the vegetables and prevent sticking. Cover the skillet again and continue to cook until the cauliflower and all other vegetables are al dente. This means they should be tender when pierced with a fork but still have a slight, pleasant resistance or “bite.” Remember, if you’re using any root vegetables like sweet potato or parsnip, they should have been added at the very beginning with the cauliflower to ensure they are also perfectly al dente.
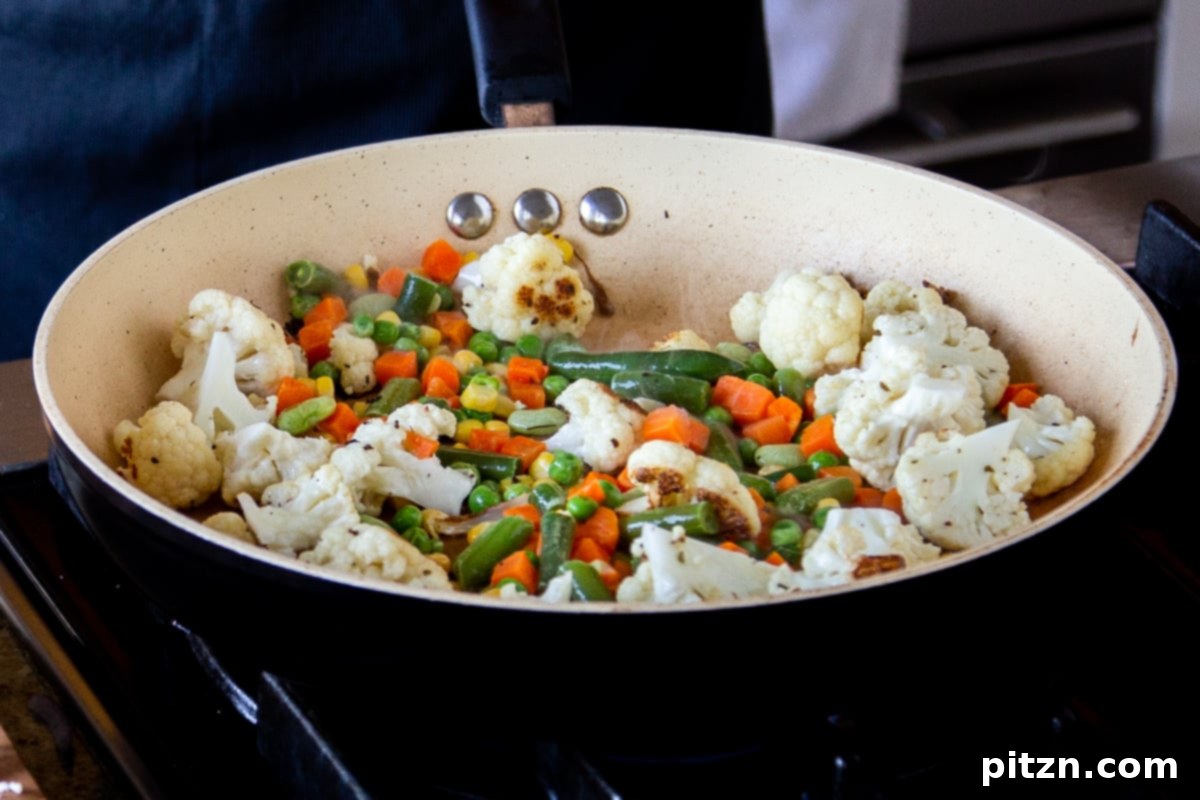
Once the vegetables are perfectly cooked, carefully remove them from the skillet and transfer them into a bowl. Set this bowl aside, as they will be folded into the sauce later, ensuring they don’t overcook.
Part 2: Crafting the Rich Bhuna Masala Sauce
Now, it’s time to build the heart of the curry – the deeply flavorful bhuna masala sauce.
Using the same skillet (no need to clean it, as the residual flavors enhance the sauce), add two teaspoons of fresh oil. Then, add the finely chopped red onion and a good pinch of salt. Cook the onions over medium heat, stirring frequently. This is a crucial step: allow the onions to cook for five to eight minutes, or until they turn a beautiful, deep golden brown and caramelize. If you notice the onions starting to stick or scorch too quickly, simply add a few splashes of water to deglaze the pan and continue cooking. This patient caramelization develops immense flavor.
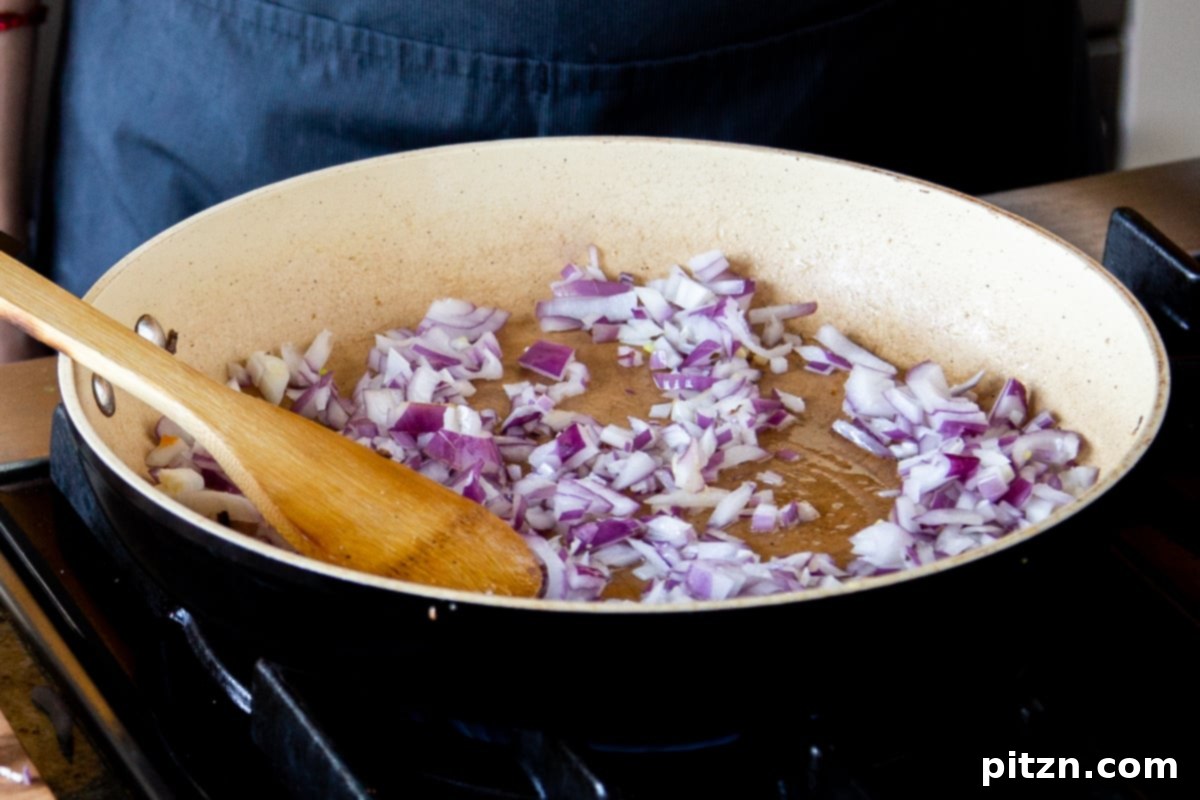
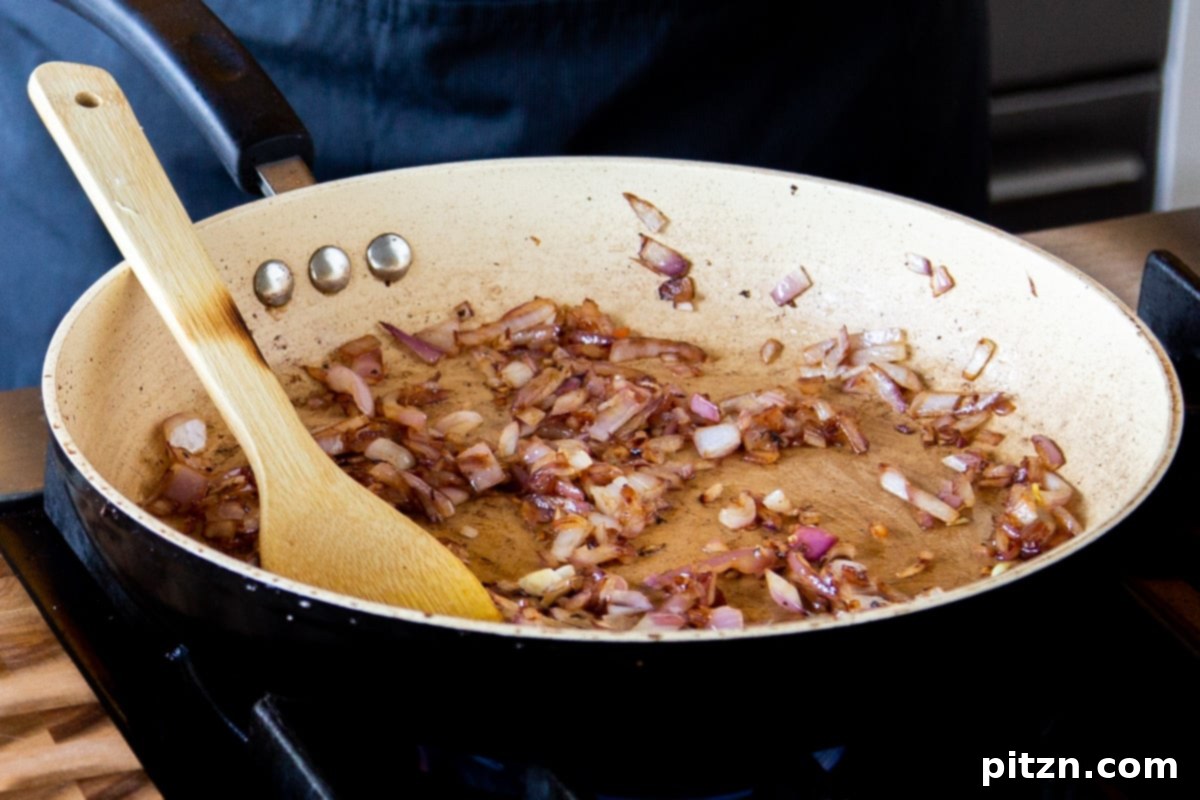
Once the onions are perfectly caramelized, add the ginger-garlic paste and the ground spices: garam masala, turmeric, ground coriander, smoked paprika, and 1/4 teaspoon of salt. Stir these vigorously for just a few seconds; this allows the spices to bloom and become incredibly fragrant. Be careful not to burn them. Next, stir in the tomato paste, followed by the non-dairy yogurt (or your chosen non-dairy cream) and half a cup of water or non-dairy milk. Mix everything thoroughly until well combined, then bring the sauce to a gentle boil. Let it simmer for a couple of minutes, stirring occasionally, until it thickens slightly and the oil begins to subtly separate from the mixture, signaling that the sauce is beautifully cooked.
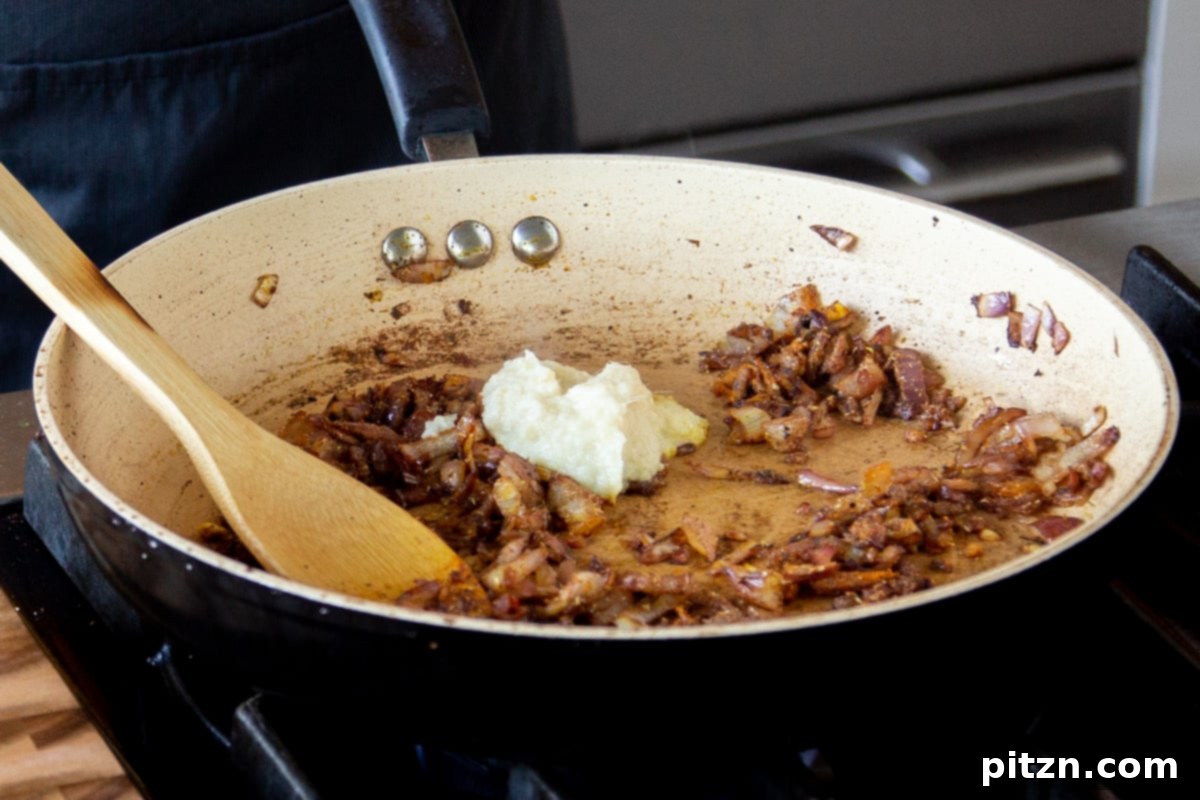
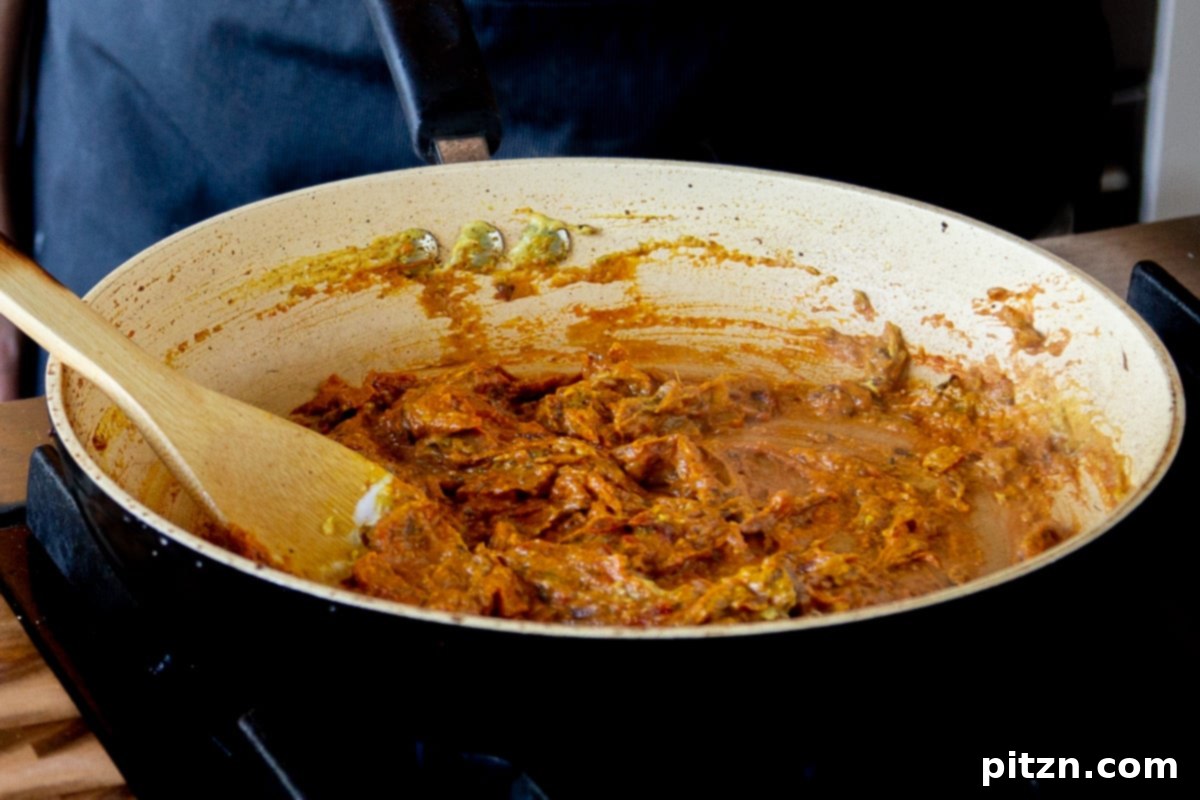
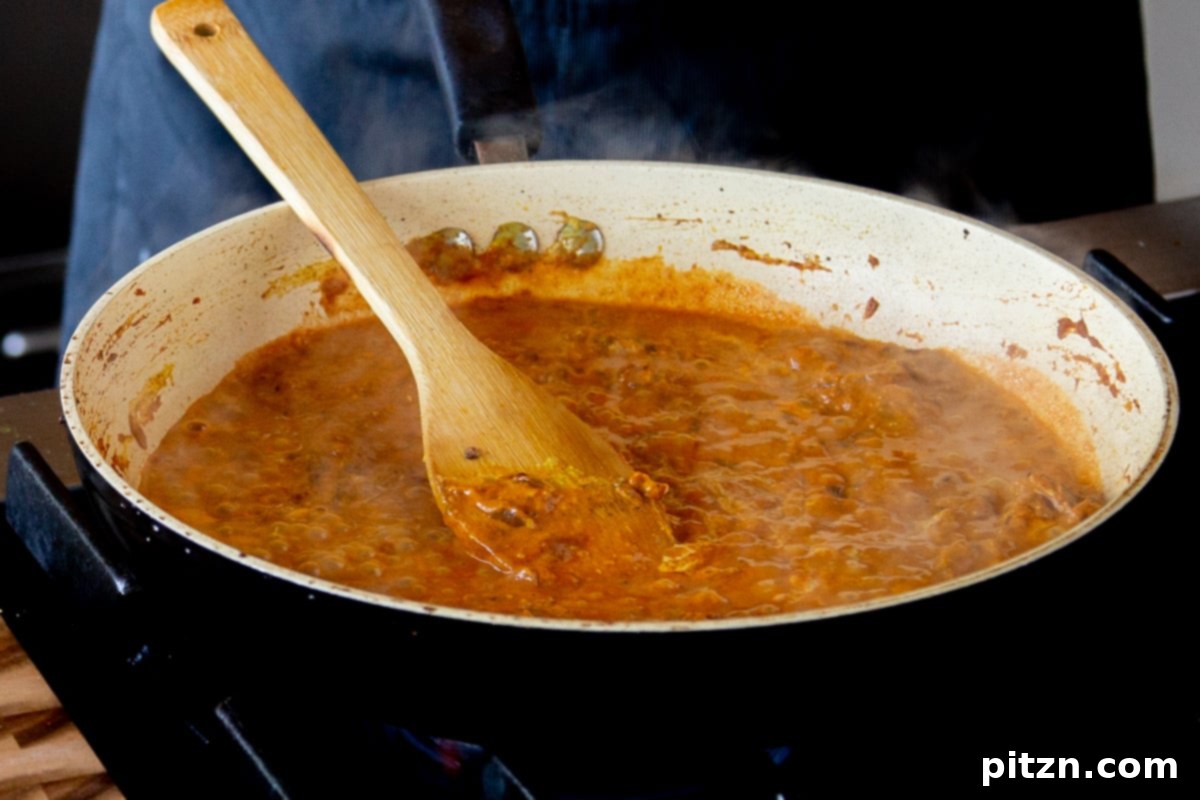
Finally, return the reserved, perfectly cooked cauliflower and other vegetables to the skillet with the now-simmering bhuna masala sauce. Add the cooked or canned (drained) chickpeas. Gently toss everything together, ensuring all the vegetables and chickpeas are beautifully coated in the rich, fragrant sauce. Once coated, immediately take the skillet off the heat to prevent the vegetables from becoming overcooked.
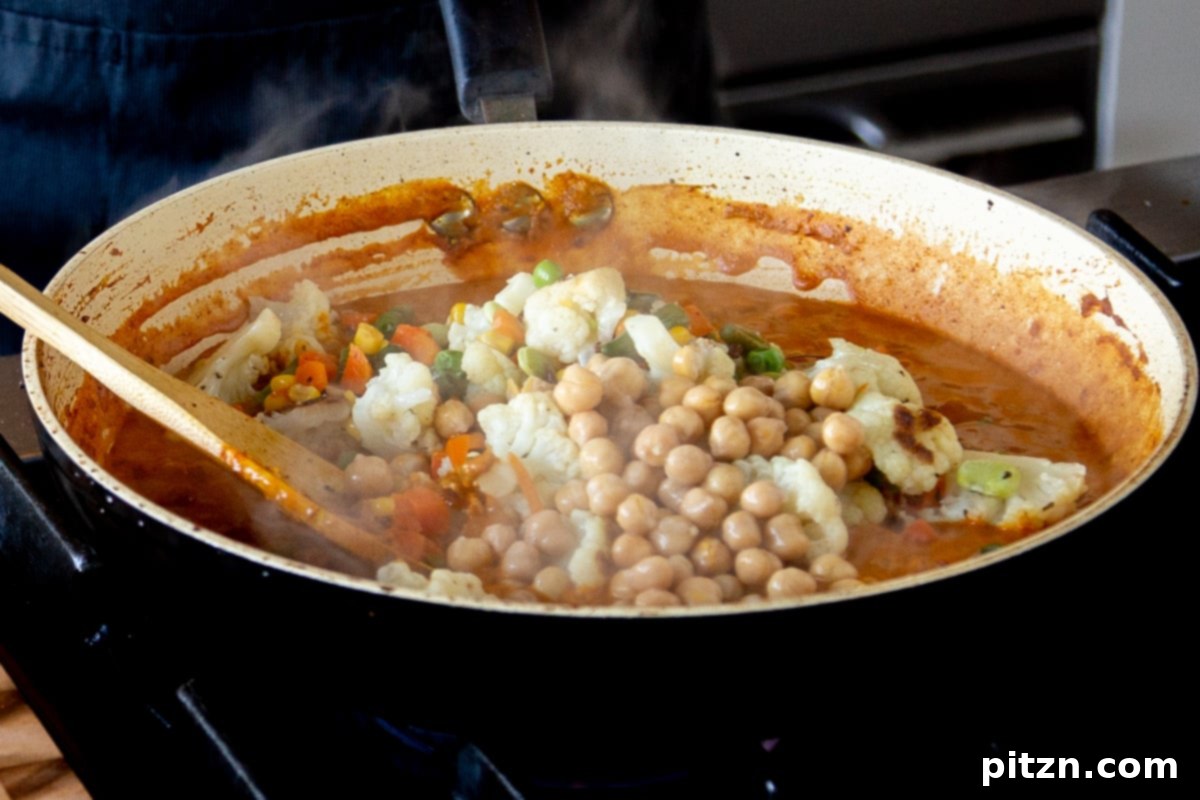
Part 3: The Flavorful Spiced Oil Tadka Topping
The final step introduces a burst of fresh flavor and a delightful textural contrast with a quick tadka.
Heat one teaspoon of oil in a clean medium skillet over medium-high heat. Once the oil is hot and shimmering, add the cumin seeds. Cook, stirring occasionally, for about two to three minutes. Watch closely as the cumin seeds change color and become incredibly fragrant; be careful not to let them burn, as this can make them bitter. Then, add the bay leaf and stir for a few seconds to release its aroma.
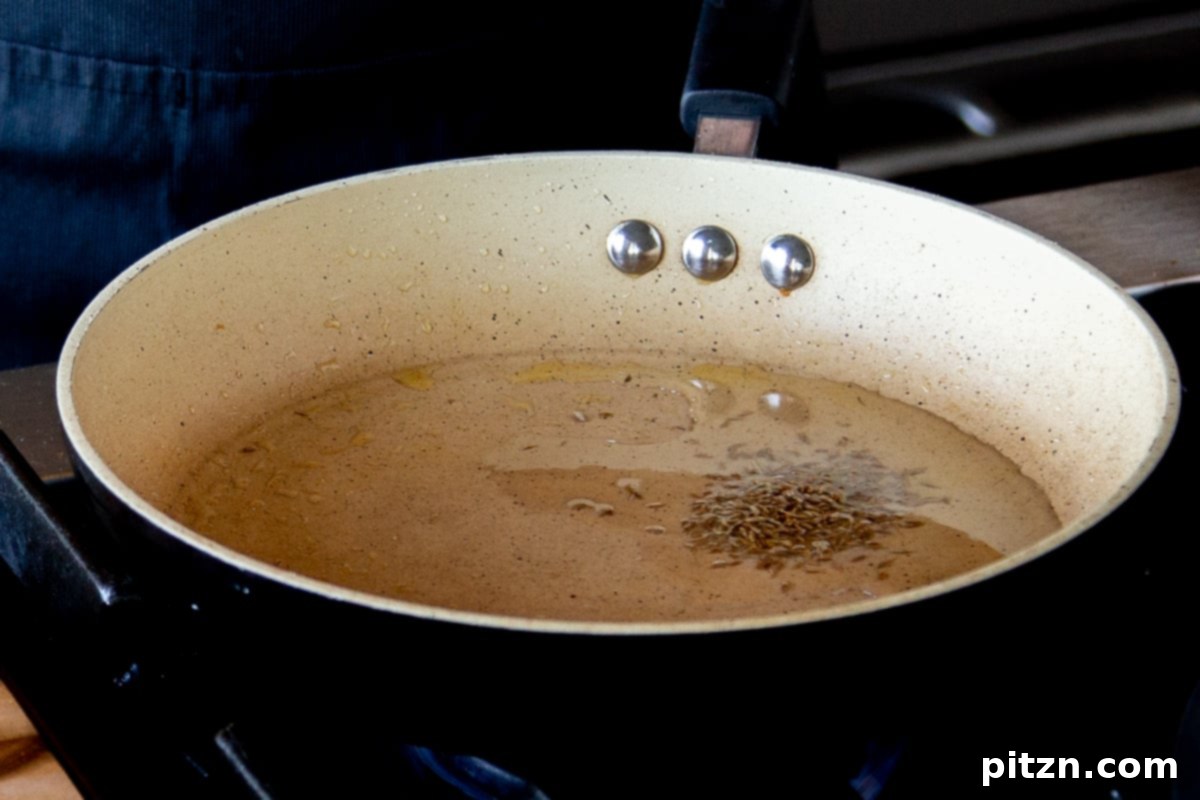
Add the chopped onion, sliced bell pepper, 1/4 teaspoon of dried fenugreek leaves, and a good pinch of salt to the skillet. Continue to cook, stirring frequently, for about three to four minutes. The goal here is for the bell pepper to soften slightly, but crucially, it should still retain a little bit of a “bite” – you don’t want to overcook these vegetables, as their fresh crunch is key to the topping’s appeal.
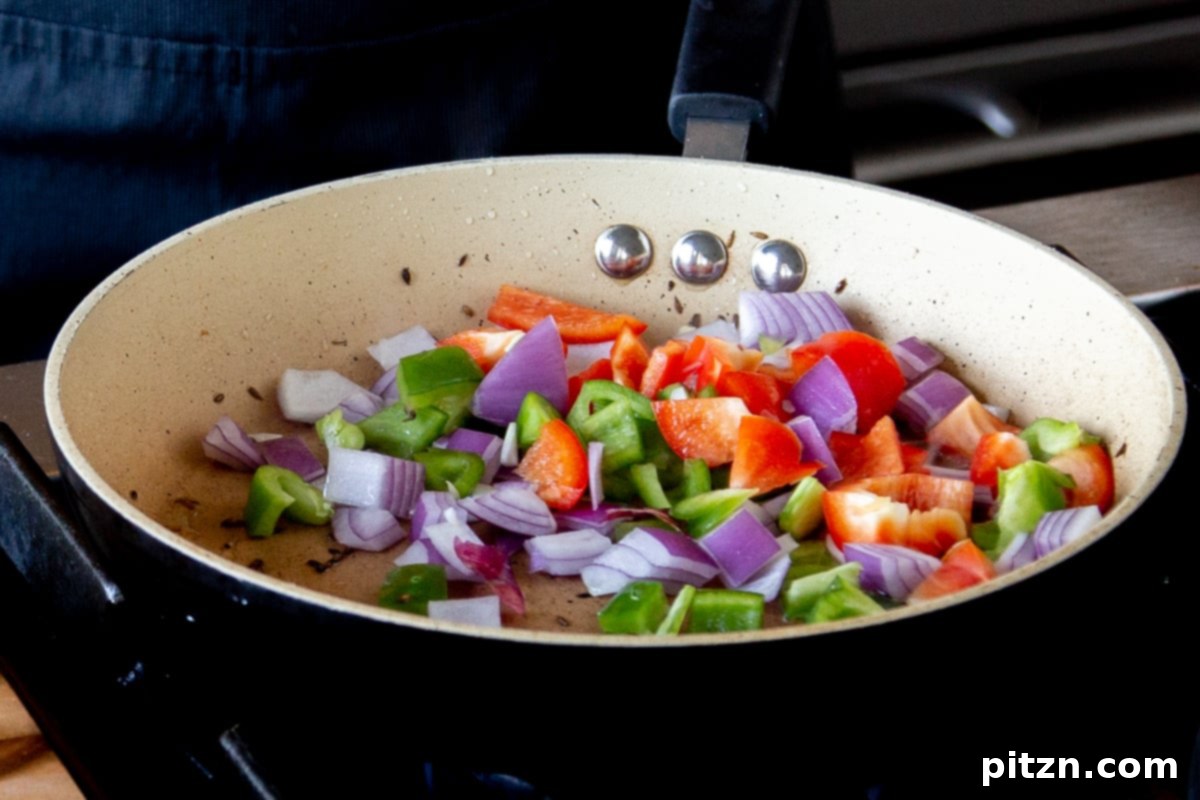
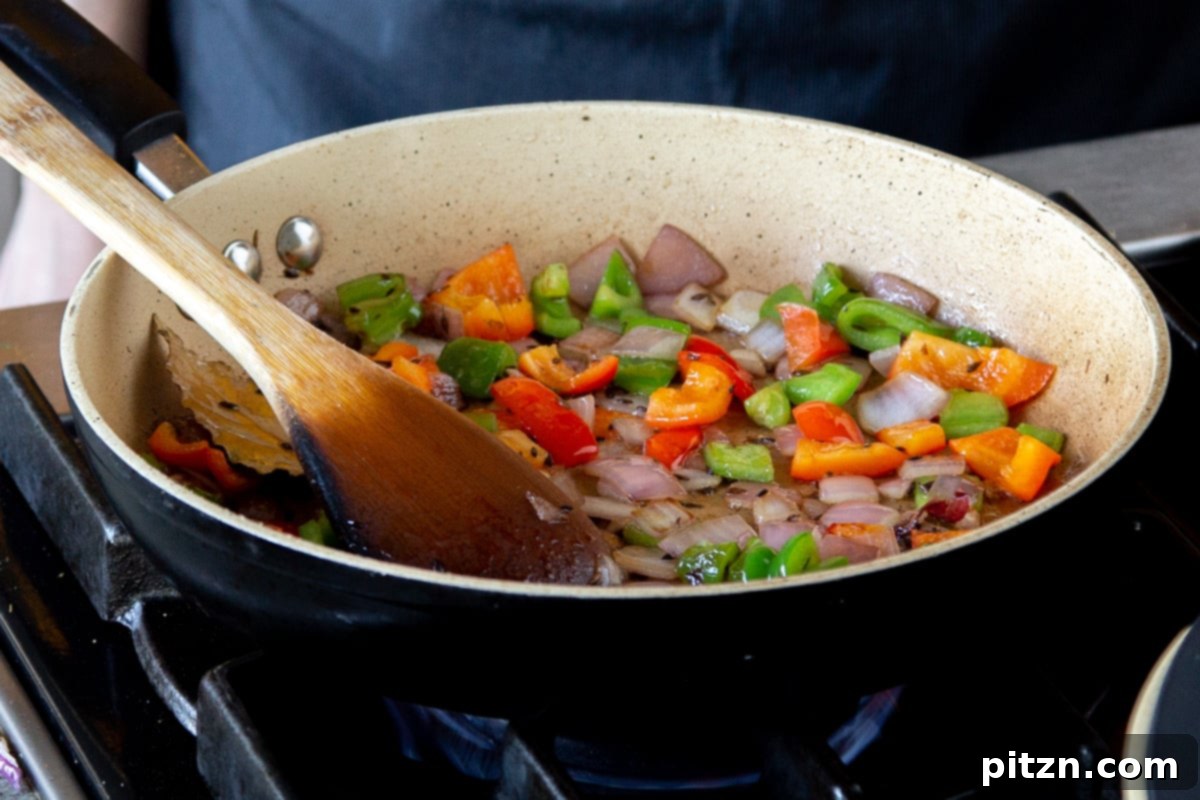
Transfer this vibrant tadka topping directly into the skillet with the vegetables and sauce. Toss everything together really well, ensuring the aromatic oil and lightly cooked vegetables are evenly distributed throughout the curry. Cover the skillet and place it back on the stove over very low heat for just one to two minutes, then immediately switch off the heat.
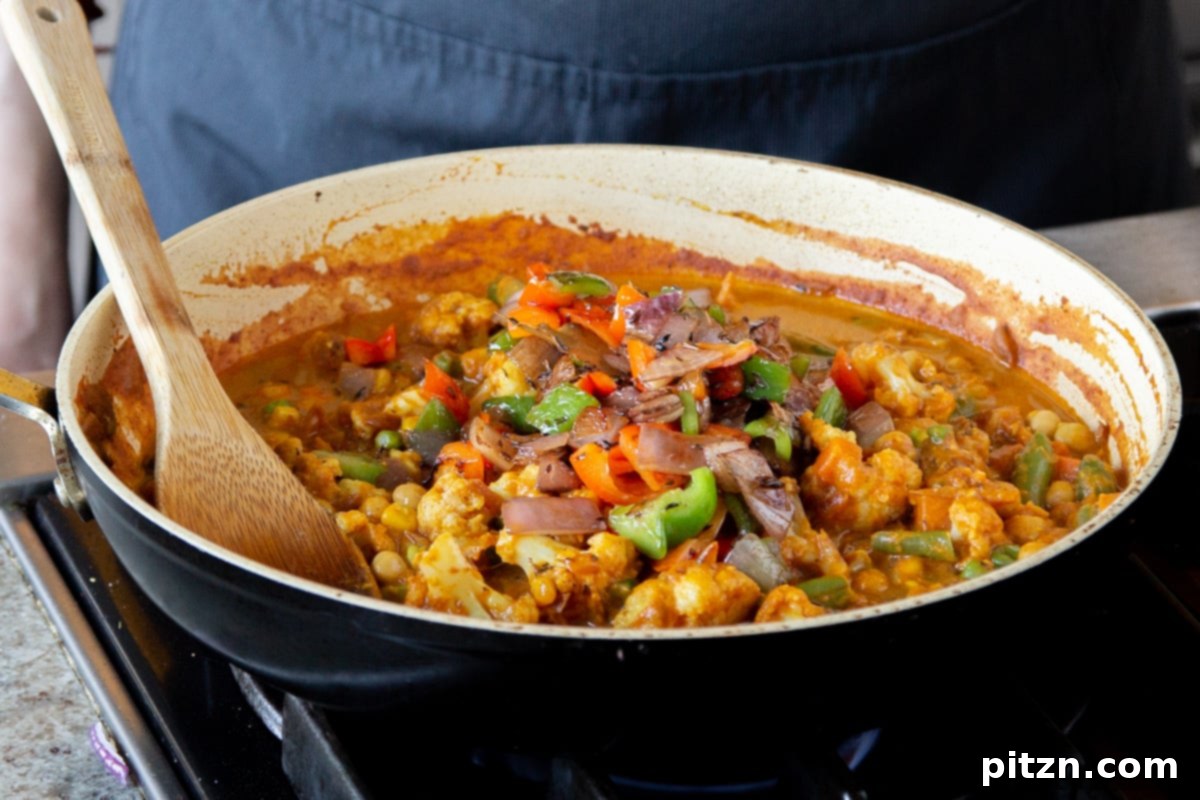
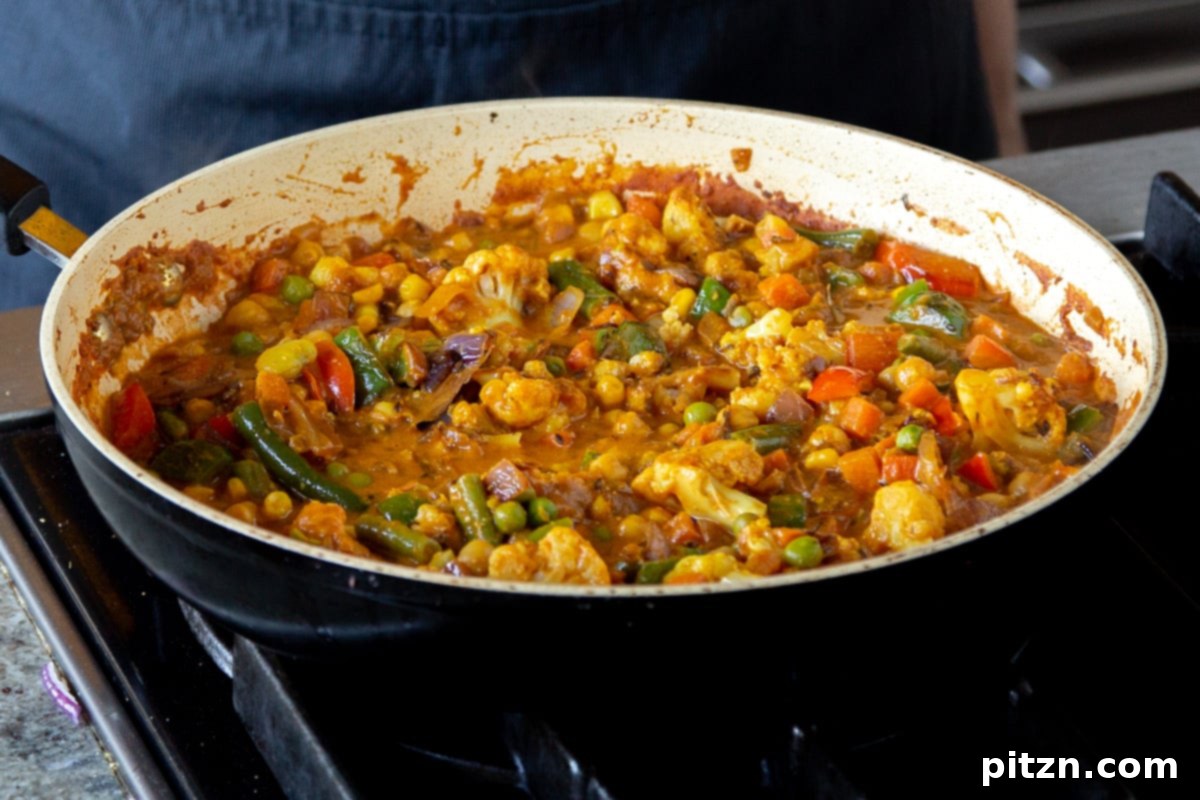
Allow the skillet to remain covered and rest off the heat for five minutes. This essential resting period allows the flavors to truly meld and deepen, creating a more harmonious and intense taste profile. Finally, garnish generously with fresh cilantro and a squeeze of fresh lemon juice before serving. Your restaurant-style Vegetable Bhuna is now ready to be enjoyed with warm flatbread, naan, or steaming basmati rice.
Frequently Asked Questions About Vegetable Bhuna
Absolutely! While restaurant-style curries often use a bit more oil for richness and deep flavor development, you can easily adapt this recipe to be oil-free or low-oil. For sautéing the vegetables and the bhuna masala, simply replace the oil with vegetable broth or water. When preparing the tadka topping, dry-toast the cumin seeds in a hot skillet until fragrant, then add a small amount of broth or water to sauté the onions and bell peppers. This method will still yield a delicious and aromatic curry, retaining the essence of bhuna while being lighter.
Yes, this Vegetable Bhuna is naturally gluten-free, making it suitable for individuals with gluten sensitivities or celiac disease. It is also highly adaptable to be soy-free and nut-free. To ensure it’s free from soy and nuts, simply select a non-dairy yogurt or cream that is specifically labeled soy-free and nut-free, such as coconut cream or an oat-based yogurt. Always check ingredient labels to confirm.
Bhuna refers to a distinctive cooking technique in Indian cuisine, particularly prevalent in North Indian, Pakistani, and Bangladeshi culinary traditions. The word ‘bhuna’ means “to fry” or “to roast.” The key difference from other curries is the method of preparing the masala (spice base). Instead of simply simmering ingredients in liquid, a bhuna masala is created by frying spices and aromatics (like onions, ginger, and garlic) over a sustained period with minimal liquid. This process allows the ingredients to caramelize and cook down in their own juices and a small amount of oil, intensifying their flavors and creating a thick, rich, and concentrated sauce that clings to the main ingredients. This technique results in a much deeper, roasted flavor profile compared to saucier, liquid-based curries.
Vegetable Bhuna is incredibly versatile and pairs wonderfully with a variety of accompaniments. For a classic Indian meal, serve it hot with freshly baked naan, fluffy roti, or paratha. It also complements steamed basmati rice or brown rice beautifully, allowing the rich sauce to be fully enjoyed. For a lighter meal, consider serving it with quinoa or a simple side salad. A cooling dollop of plain non-dairy yogurt or raita can also provide a refreshing contrast to the warm spices.
You can certainly do some prep work in advance to make cooking day easier. Chop all your vegetables and store them separately. You can also prepare the ginger-garlic paste ahead of time. The bhuna masala sauce (Part 2) can be made a day in advance and stored in the refrigerator, allowing its flavors to deepen. However, it’s best to cook the vegetables (Part 1) and prepare the tadka topping (Part 3) fresh, just before assembling and serving the curry, to ensure the optimal texture of the vegetables and the vibrant aroma of the tempering.