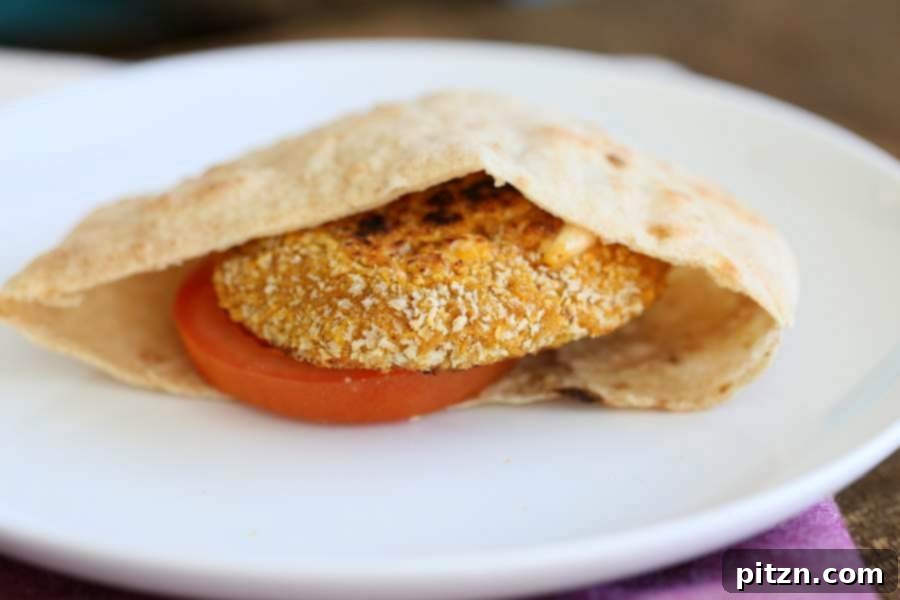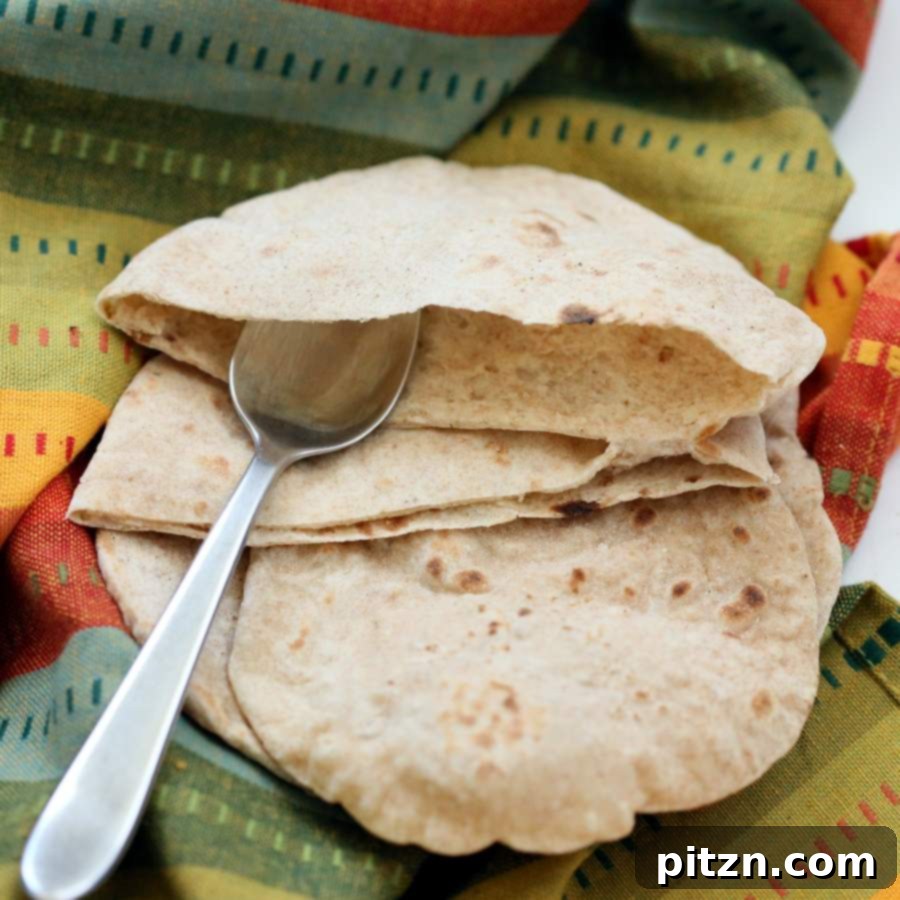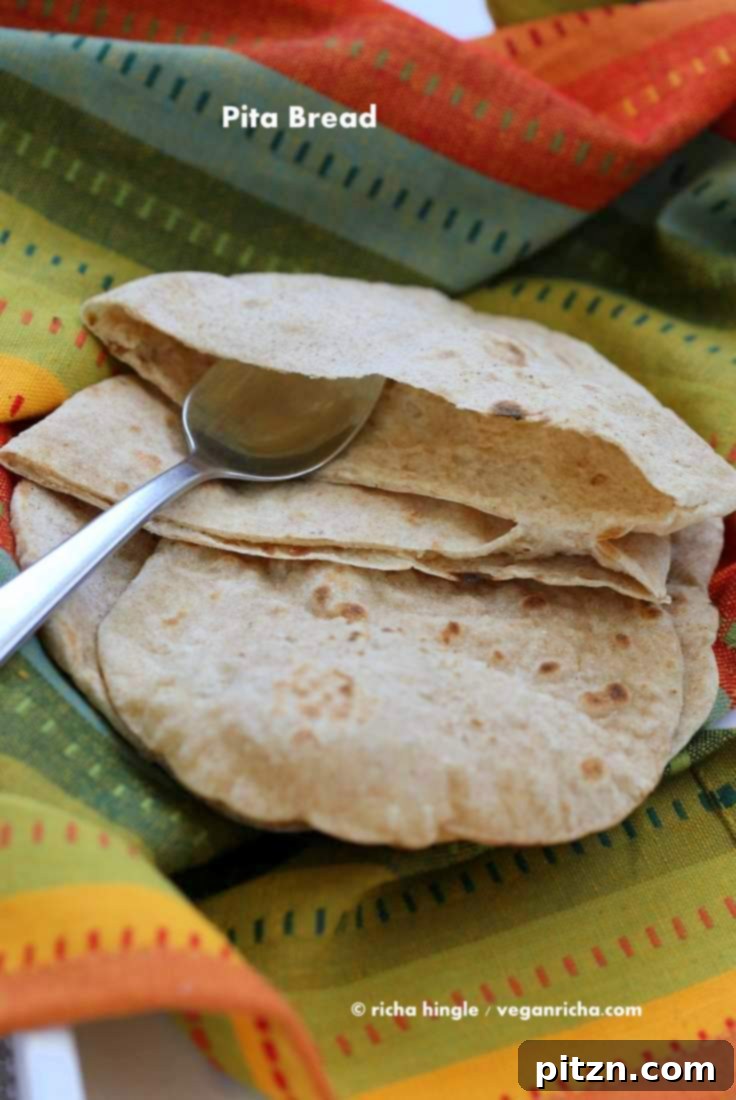
Pita bread, a staple of Middle Eastern and Mediterranean cuisines, is renowned for its distinctive pocket and incredible versatility. From serving as the perfect vessel for savory fillings to an essential accompaniment for dips and stews, this humble flatbread has earned its place in kitchens worldwide. While store-bought options are readily available, there’s an unparalleled joy and flavor that comes with crafting warm, pillowy pita bread right in your own home. Get ready to discover the secrets to making the best homemade pita bread you’ve ever tasted.
This comprehensive guide will walk you through creating an easy and utterly delicious vegan pita bread recipe, ensuring perfectly puffed, soft flatbreads every time. We’ll explore the advantages of using yeast for a superior texture and provide detailed instructions for both stovetop and oven baking methods. This recipe is not only simple but also caters to dietary needs, being completely free from dairy, eggs, corn, nuts, and soy. Prepare to elevate your culinary game and impress your family and friends with these homemade pockets of goodness!
Homemade Vegan Pita Bread: Your Essential Guide to Soft, Puffy Flatbreads
Embark on a culinary journey to create the ultimate vegan pita bread. This recipe focuses on achieving that desirable soft, puffy texture that makes pita so enjoyable, whether you’re using it for wraps, dipping, or as a side to your favorite meals. Making pita bread from scratch might seem daunting, but with the right techniques and a little patience, you’ll be producing bakery-quality flatbreads in no time. Our recipe utilizes active yeast to ensure a consistent rise and an incredibly pliable dough, making the entire process smooth and rewarding.
The Magic of Yeast: Why It Makes All the Difference
When it comes to crafting exceptional pita bread, the choice to use yeast truly sets this recipe apart. Yeasted pita dough is remarkably easier to work with, yielding a smoother, more elastic consistency that is a dream to roll out. The active yeast creates air pockets within the dough during fermentation, which are crucial for the pita to puff up beautifully when cooked. This leavening action results in a bread that is not only light and airy but also incredibly soft and pliable, a texture often elusive in yeast-free alternatives. For those curious about a quick, yeast-free option, you can find a Yeast-free Flatbread recipe here.
Beyond its primary use as pita, this versatile yeast dough can also be transformed into delightful dinner rolls or soft buns. To do so, simply shape the dough into rolls after its first rise. A light spray of water and a sprinkle of sesame seeds before a final 15-minute rise, followed by baking at 350 degrees F (175 degrees C) for 17 to 19 minutes, will give you perfectly golden and tender bread rolls. It’s a testament to the adaptability of a well-made yeast dough.
Unleashing the Versatility of Your Homemade Pita
One of the greatest attributes of homemade pita bread is its incredible adaptability in the kitchen. Once you’ve mastered this recipe, a world of culinary possibilities opens up. The iconic pocket of pita is ideal for stuffing with a myriad of fillings. Think hearty plant-based patties, succulent roasted vegetables, or flavorful blackened tempeh for a satisfying sandwich or wrap. Slice the warm flatbread into bite-sized triangles, and it transforms into the perfect accompaniment for creamy hummus, smoky baba ghanoush, or your favorite vegan dips. Its sturdy yet soft texture also makes it excellent for scooping up lentil soups or rich stews.
Beyond traditional uses, get creative! Use a whole pita as a base for a quick individual pizza, layer it in a deconstructed salad, or even crisp it up to make homemade pita chips. Whether you’re planning a lavish Mediterranean feast or simply need a versatile bread for everyday meals, this vegan pita bread will quickly become a go-to in your recipe repertoire.
Mastering the Art of Pita Making: Key Techniques for Success
The Dough: Foundation of Flavor and Texture
The journey to perfect pita begins with the dough. Achieving the right consistency is paramount. After activating your yeast, the flour and oil are incorporated to form a soft, pliable dough. Resist the urge to over-knead; just 1 to 2 minutes until everything is well combined is often sufficient for this type of enriched dough. Over-kneading can develop too much gluten, making the dough tough. Covering the dough with a towel and allowing it to rise until doubled in size, typically an hour or more depending on your ambient room temperature, is a crucial step. This bulk fermentation develops flavor and ensures a light, airy texture.
Shaping for Success: The Roll-Out
Once your dough has risen beautifully, gently punch it down to release the air. A brief knead for a few seconds will smooth it out, preparing it for shaping. Divide the dough into 10 or more equal-sized balls – consistency in size leads to even cooking. Generously dust your work surface and rolling pin with wheat flour. Roll each ball out to a uniform 5 to 6-inch circle. The key here is even thickness; unevenly rolled dough might not puff up correctly. Cover the rolled-out circles with a towel to prevent them from drying out while you prepare your cooking surface.
Cooking Your Pita: Stovetop vs. Oven Methods
There are two primary methods for cooking pita bread, each offering unique advantages. Both aim for that satisfying puff, but they achieve it through slightly different applications of heat. Whether you prefer the quick, interactive nature of stovetop cooking or the batch efficiency of oven baking, this recipe accommodates both.
Stovetop Method: Quick, Engaging, and Visually Rewarding
Cooking pita on the stovetop is a fantastic way to watch the magic unfold before your eyes. Heat a skillet (cast iron works wonderfully) over medium-high heat until it’s very hot but not smoking. Place a rolled-out flatbread onto the hot skillet. Cook for 1 to 2 minutes, or until small bubbles begin to appear on the surface. This is the first sign of steam forming inside, pushing the dough upwards.
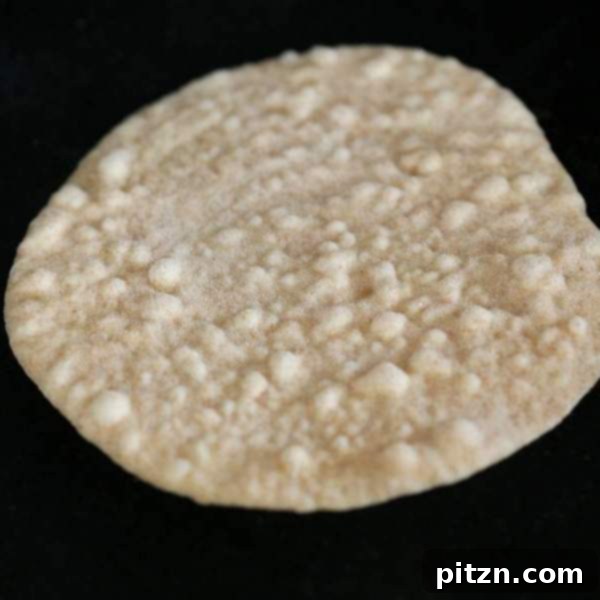
Once bubbles form, flip the pita and cook the other side for a brief 30 seconds to 1 minute. You’ll notice it starting to firm up slightly.
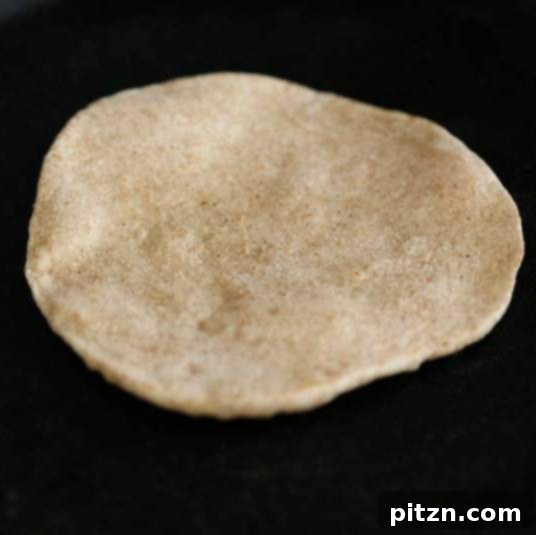
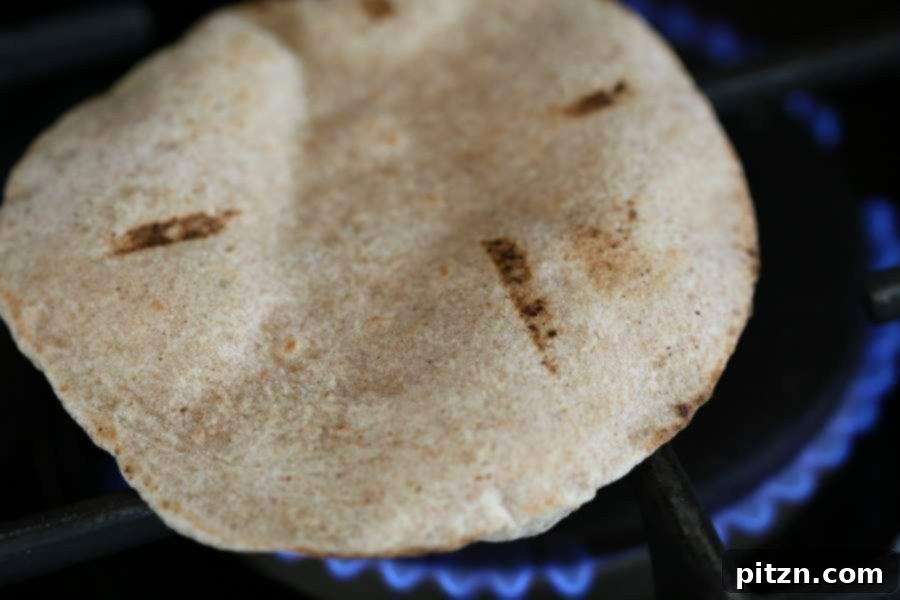
For that iconic pocket, if you have a gas stove, carefully transfer the partially cooked flatbread directly onto the open flame. Keep moving it and flipping it every few seconds. The direct heat will cause the trapped steam inside to rapidly expand, making the pita puff up dramatically like a balloon. Continue until it’s beautifully puffed and lightly golden, then remove it. If you don’t have a gas stove, you can often achieve a good puff by continuing to cook it on the skillet, pressing gently with a spatula, or transferring it to a very hot oven for a minute or two.
Oven Baking Method: Efficiency for Larger Batches
The oven method is perfect for baking multiple pita breads at once, offering convenience and consistent results, especially when feeding a crowd. Preheat your oven to a high temperature of 450 degrees F (230 degrees C). Crucially, place a large pizza stone or a thick baking sheet into the oven while it preheats and let it heat up for at least 20 minutes. This creates a super hot surface that mimics the conditions needed for the pita to puff.
Carefully transfer 3 to 4 rolled-out breads onto the hot stone or baking sheet, depending on its size. Bake for 3 to 6 minutes, or until the breads puff up and achieve a light golden hue on top. If your oven isn’t quite hot enough, or if the pitas are taking too long to puff, you can switch the oven to high broil for a very short period (keep a close eye on them to prevent burning). Once puffed and golden, carefully remove them from the oven. The key to successful puffing in the oven is even rolling and an extremely hot surface. Store the baked pita wrapped in a kitchen towel to keep them soft for the day, or refrigerate for up to 5 days.
The Essential Vegan Pita Bread Recipe
This recipe for soft, puffy yeasted pita bread is a game-changer for anyone looking to enjoy fresh, wholesome flatbreads at home. It’s not only incredibly satisfying to make but also consciously crafted to be free of common allergens, including dairy, eggs, corn, nuts, and soy, making it a fantastic option for a wide range of dietary preferences. This recipe yields approximately 10 or more pita breads, perfect for sharing or stocking up for the week.
For those interested in exploring different flatbread options, particularly without yeast, a handy Yeast-free Flatbread recipe is available here.
Ingredients (Yields 10+ pita breads):
- 1/2 tsp active yeast
- 3/4 cup warm water (approx. 105-115°F / 40-46°C)
- 1/4 tsp sugar (feeds the yeast)
- 1/3 tsp salt (for flavor and dough strength)
- 1/2 cup wheat flour (adds flavor and texture)
- 1 cup unbleached white flour or all-purpose flour (for structure and softness)
- 1 tbsp oil (enhances softness and pliability)
- Additional wheat flour for dusting and rolling
Instructions:
- In a medium-sized bowl, combine the active yeast with warm water and sugar. Stir gently and let this mixture sit for 2 minutes to allow the yeast to activate and become foamy. This indicates your yeast is active and ready.
- In a separate bowl, whisk together the salt with both the wheat flour and unbleached white (or all-purpose) flour. Add this flour mixture to the activated yeast bowl. Pour in the oil.
- Begin to knead the ingredients together until they form a soft, cohesive dough. Avoid over-kneading; typically, 1 to 2 minutes of gentle kneading is sufficient to ensure all ingredients are well combined.
- Cover the bowl with a clean kitchen towel and place it in a warm spot. Allow the dough to rise until it has doubled in size. This can take anywhere from 1 hour to longer, depending on the ambient temperature of your kitchen.
- Once the dough has risen, lightly flour your hands. Gently punch down the dough to release the air and knead for a few seconds to smooth it out.
- Divide the dough into 10 or more equal-sized balls. For best results, aim for uniform pieces to ensure even cooking.
- On a lightly floured surface, use a rolling pin to roll each dough ball out into a circular shape, about 5 to 6 inches in diameter. Try to maintain an even thickness across the entire circle. Cover the rolled-out circles with a towel to prevent them from drying out.
- To Cook on the Skillet: Heat a heavy-bottomed skillet (such as cast iron) over medium-high heat until it is very hot. Place one rolled-out flatbread onto the hot skillet and cook for 1 to 2 minutes, or until small bubbles begin to appear on the surface.
- Flip the pita bread and cook the other side for an additional 30 seconds to 1 minute.
- If you have a gas stove, carefully transfer the partially cooked flatbread directly onto an open flame. Continuously move and flip the pita every few seconds until it puffs up like a balloon and turns lightly golden. Remove and repeat with remaining dough.
- To Bake in the Oven: Preheat your oven to 450 degrees F (230 degrees C). Place a large pizza stone or a thick baking sheet into the oven while it preheats, allowing it to heat up for at least 20 minutes to reach the desired temperature.
- Carefully place 3 to 4 rolled-out pita breads onto the hot stone or baking sheet, depending on its size.
- Bake for 3 to 6 minutes, or until the breads puff up significantly and get a slight golden color on top. If your oven struggles to get hot enough or the pitas aren’t puffing quickly, you can briefly switch to high broil, watching carefully to avoid burning.
- Carefully remove the baked pita from the oven and place the next batch on the stone. Properly rolled and baked breads will puff up wonderfully.
- Storage: Store the freshly cooked pita bread wrapped in a clean kitchen towel for up to one day to keep them soft. For longer storage, refrigerate them in an airtight container or bag for up to 5 days. You can also freeze them for several months; thaw and reheat gently before serving.
Tips for Achieving Perfectly Puffy Pita Bread
- Active Yeast is Key: Always ensure your yeast is active by performing the activation step with warm water and sugar. If it doesn’t foam, your yeast might be old, and your pita won’t rise.
- Warm Environment for Rising: A consistently warm spot helps the dough rise efficiently. If your kitchen is cold, consider placing the covered bowl in a slightly warm (but not hot) oven that has been turned off, or near a warm appliance.
- Even Rolling: The secret to a good pita pocket is even thickness when rolling. If one part is thicker than another, the steam won’t distribute evenly, and it might not puff.
- Hot Cooking Surface: Whether using a skillet or an oven, a very hot surface is critical for instantly creating steam inside the dough, which causes the pita to puff up. Don’t rush the preheating.
- Don’t Overcrowd: When baking in the oven, give your pitas space on the stone or baking sheet. Overcrowding can lower the temperature and hinder puffing.
- Immediate Storage: Once cooked, wrap pita breads in a kitchen towel or place them in an airtight container to retain their softness and prevent them from drying out and becoming brittle.
Creative Ways to Enjoy Your Homemade Vegan Pita Bread
The beauty of homemade vegan pita bread lies in its incredible versatility. Here are some inspiring ideas to make the most of your freshly baked batches:
- Classic Wraps and Sandwiches: Fill the pockets with falafel, shawarma-spiced tempeh, grilled vegetables, hummus, tahini sauce, and fresh salads.
- Dipping Delight: Tear into pieces and serve with classic dips like hummus, baba ghanoush, muhammara, or a simple olive oil and za’atar mixture.
- Pita Pizzas: Use as a quick individual pizza base. Spread with vegan marinara, add your favorite plant-based cheese and toppings, then bake until golden and bubbly.
- Soups and Stews: Enjoy alongside hearty lentil soup, creamy tomato soup, or a flavorful Moroccan tagine. The soft bread is perfect for soaking up rich broths.
- Crispy Pita Chips: Cut into triangles, brush lightly with olive oil, sprinkle with salt and herbs (like oregano or sumac), then bake until crisp for a healthy snack.
- Deconstructed Salad Bowls: Layer torn pita pieces with fresh greens, roasted chickpeas, cucumber, tomatoes, and a lemon-tahini dressing for a vibrant meal.
- Breakfast Options: Serve with scrambled tofu, fresh avocado, and a sprinkle of chili flakes for a savory morning treat.
Nutrition Information (Approximate values per serving):
Based on one serving (one pita bread):
- Calories: 83 kcal
- Carbohydrates: 14 g
- Protein: 2 g
- Fat: 1 g
- Sodium: 78 mg
- Potassium: 20 mg
- Calcium: 2 mg
- Iron: 0.9 mg
Please note: Nutrition information is automatically calculated and should only be used as an approximation. Actual values may vary based on specific ingredients and preparation methods.
Embrace the Joy of Homemade Vegan Pita Bread
Making your own vegan pita bread is a deeply rewarding experience, transforming simple ingredients into a versatile, delicious flatbread that will become a cherished part of your culinary repertoire. The fresh aroma, the soft, puffy texture, and the ability to customize it to your heart’s content truly make homemade superior to store-bought. This recipe offers a straightforward path to achieving perfect results, whether you’re cooking on the stovetop or baking in the oven.
So, gather your ingredients, activate your yeast, and prepare to embark on a delightful baking adventure. Your kitchen will be filled with the inviting scent of fresh bread, and your taste buds will thank you for the incredible flavor and texture of these soft, fluffy, and utterly irresistible vegan pitas. Enjoy the process, savor the results, and delight in sharing your homemade creation with loved ones.