
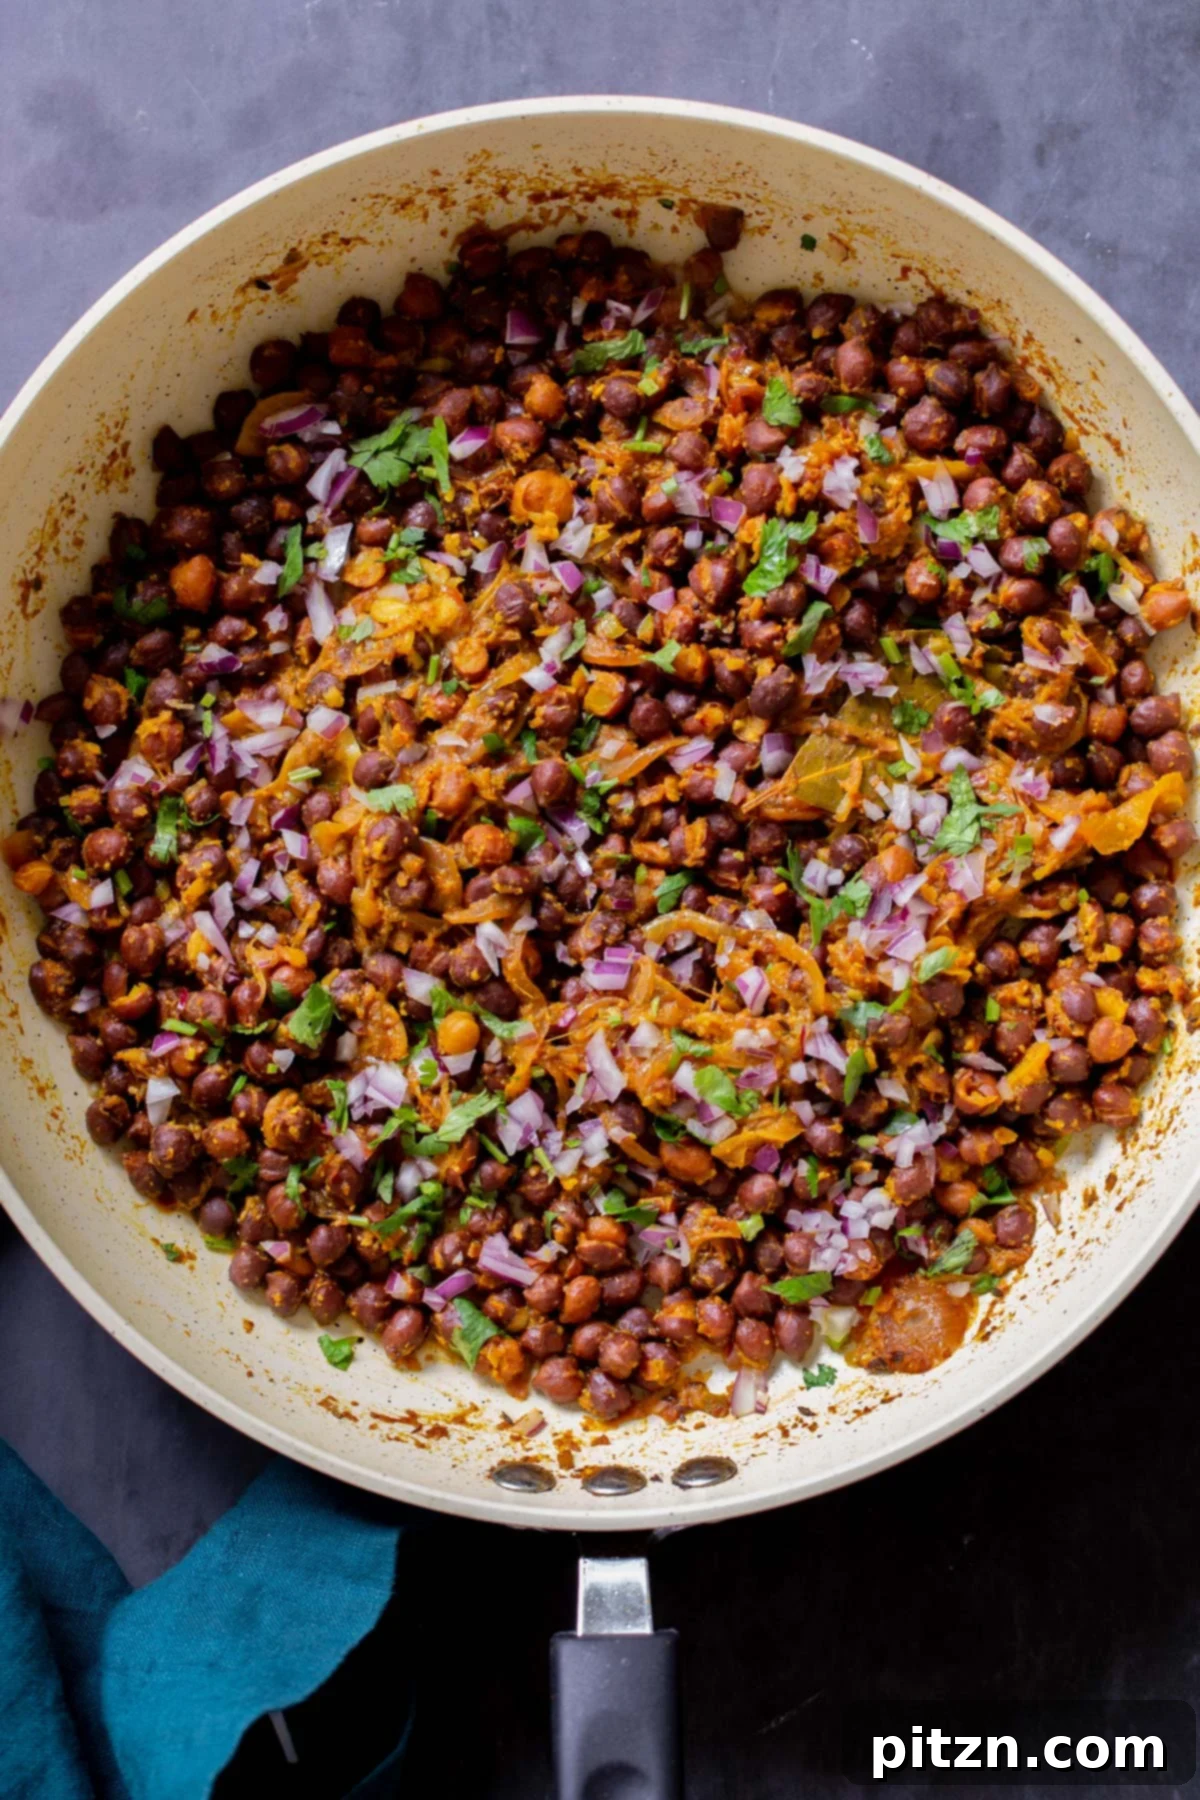
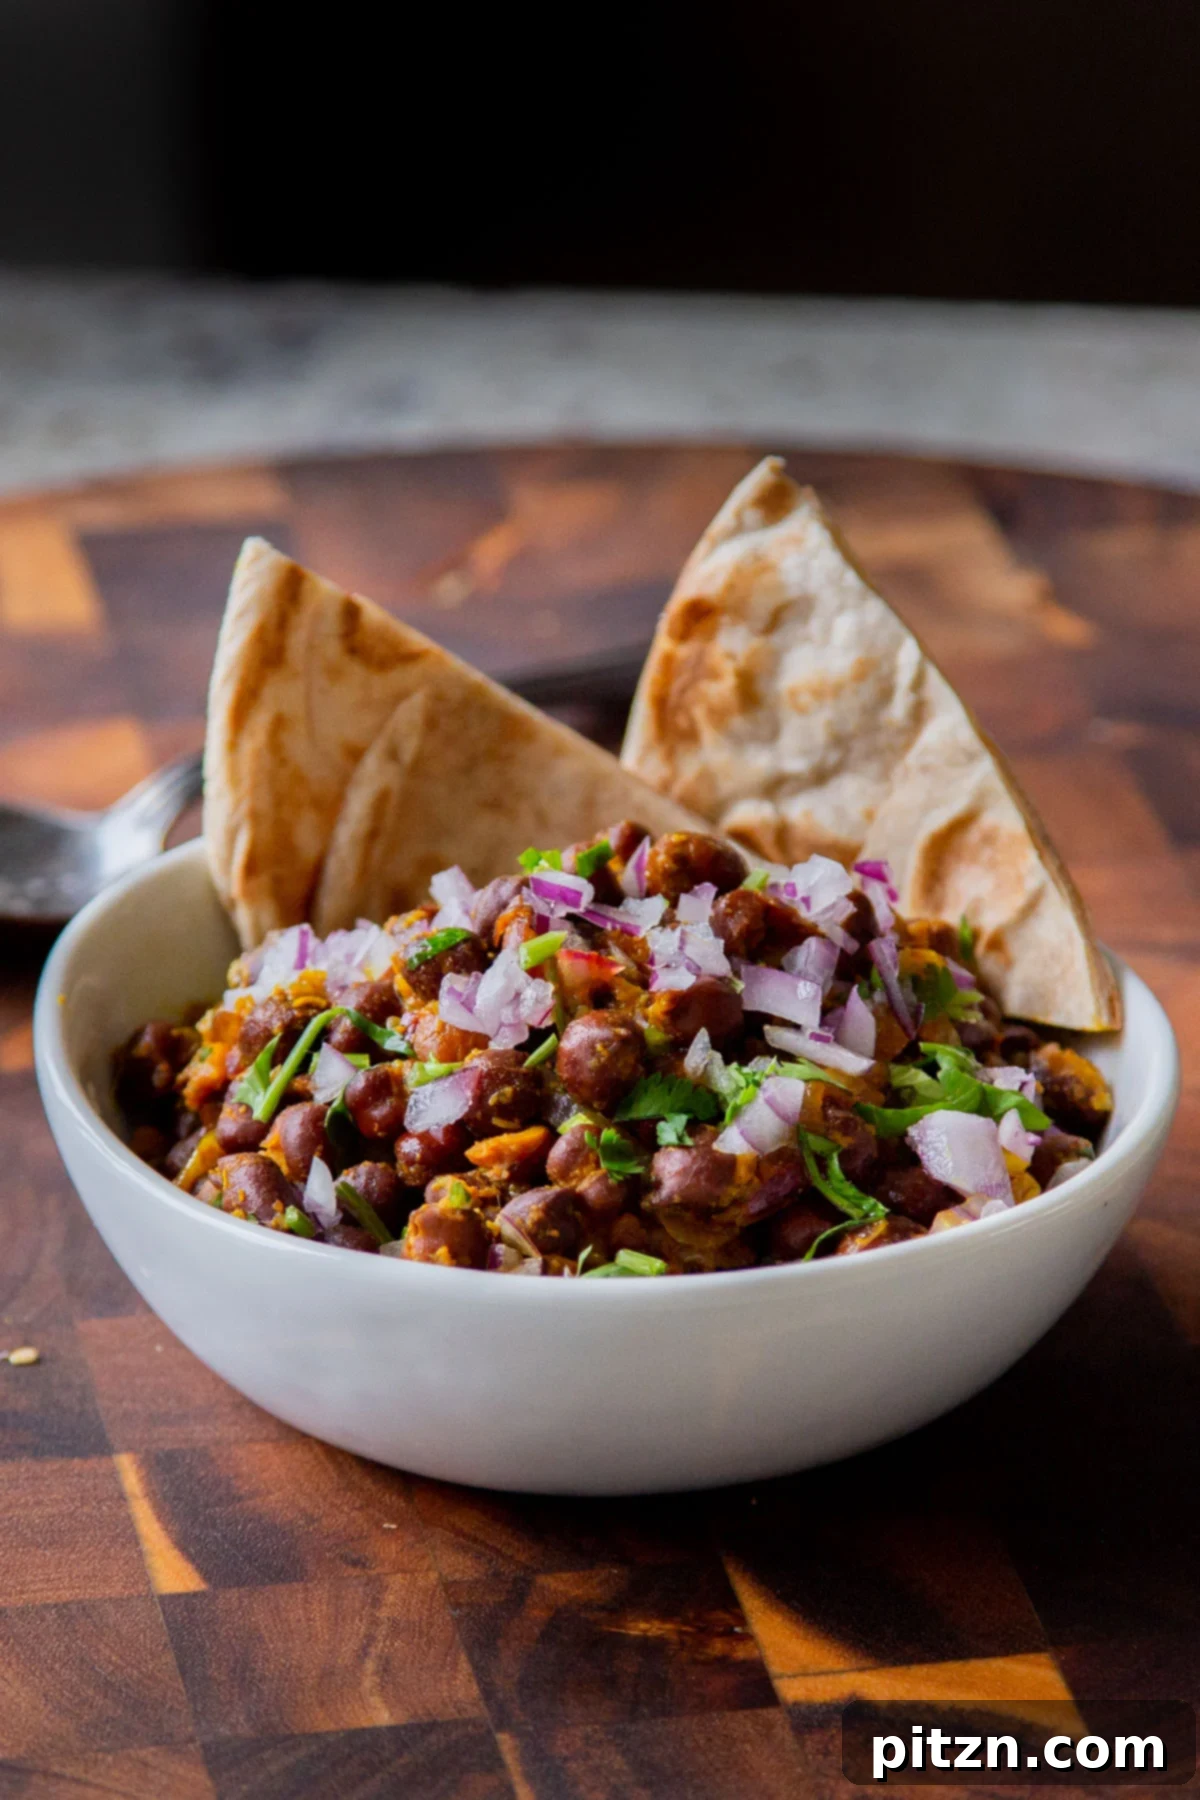
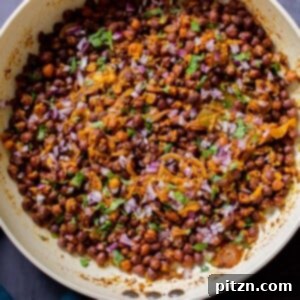
Discover the rich, aromatic flavors of Kala Chana Ghugni, a traditional Indian brown chickpea curry that tantalizes the taste buds. This hearty and wholesome dish features tender brown chickpeas, known as ‘desi chana’ or ‘kala chana’, simmered in a deeply spiced onion-based gravy. Perfect as a standalone snack, a fulfilling meal component alongside fluffy flatbreads, warm roti, or crisp crackers, Ghugni is a beloved staple in various parts of India, renowned for its comforting and nutritious qualities.
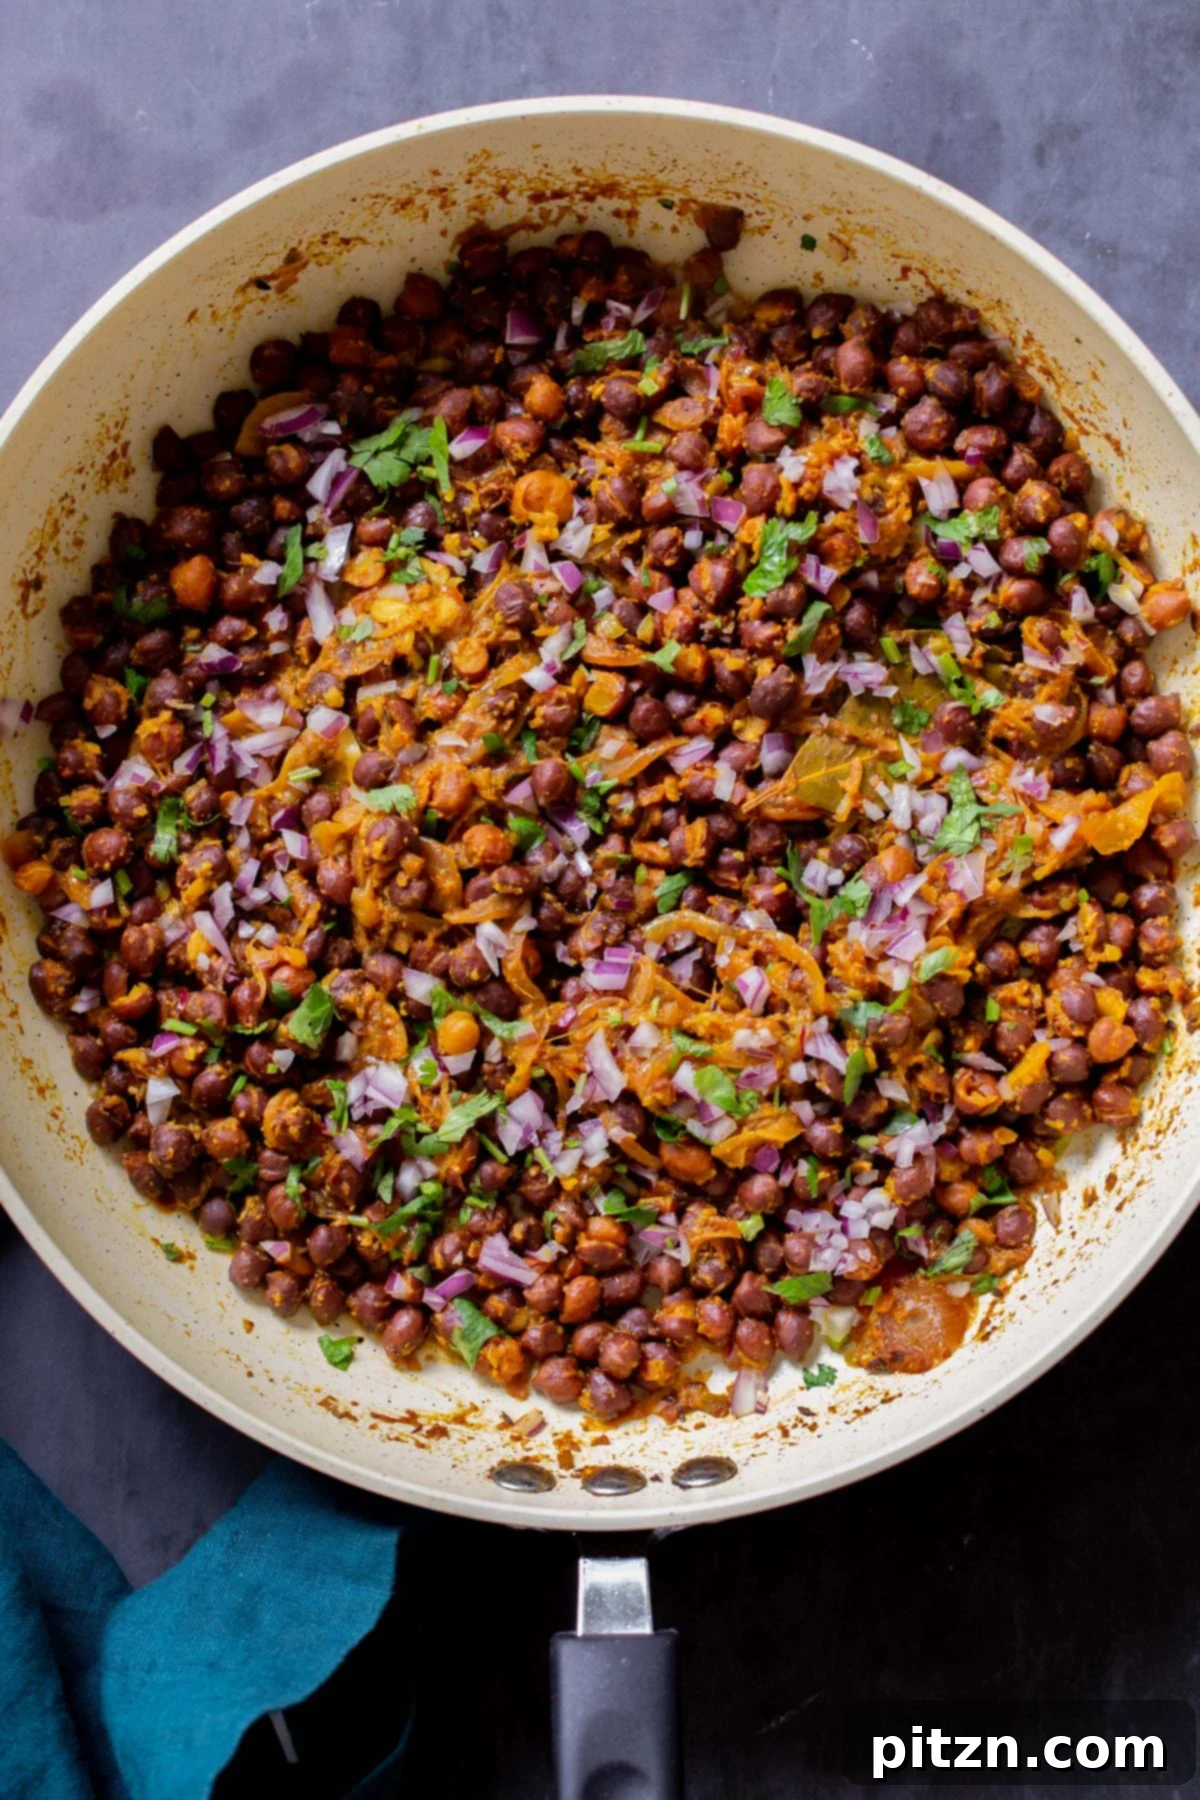
Table of Contents
- Introduction to Ghugni
- Why You’ll Love This Kala Chana Ghugni
- Understanding Kala Chana: The Star Ingredient
- A Glimpse into Indian Chickpea Curries
- Kala Chana Ghugni (Brown Chickpea Curry) Recipe
- Essential Ingredients and Clever Substitutions
- Expert Tips for a Perfect Ghugni
- Step-by-Step Guide to Making Kala Chana Ghugni
- Serving Suggestions for Ghugni
- Storage and Reheating
- Frequently Asked Questions About Ghugni
Introduction to Ghugni: A Culinary Journey
Ghugni stands as a testament to the diverse and vibrant tapestry of Indian cuisine. This delectable bean curry, though simple in its core ingredients, offers a profound depth of flavor that varies beautifully across different regions of the Indian subcontinent. While many variations exist, including those made with dried white peas, our focus today is on a particularly robust and earthy version: Kala Chana Ghugni. This authentic brown chickpea curry is inspired by the rich culinary traditions of Uttar Pradesh and promises a unique textural experience and a symphony of spices that will transport your palate straight to India.
Unlike the creamier texture of white chickpeas, Kala Chana (brown chickpeas or desi chana) offers a more “toothsome” bite, making it an excellent base for a substantial and satisfying curry. Their distinct earthy flavor pairs exceptionally well with the aromatic onion sauce. The preparation involves first pressure cooking these sturdy chickpeas until tender, then simmering them in a rich, aromatic sauce crafted from caramelized onions and a medley of traditional Indian spices. The result is a dryish, intensely flavorful dish, often enjoyed as a hearty snack or a wholesome side. A squeeze of fresh lime juice, a sprinkle of crunchy raw onion, and a generous scattering of fresh cilantro elevate this simple curry into an unforgettable culinary experience.
Why You’ll Love This Kala Chana Ghugni
This particular brown chickpea curry isn’t just a meal; it’s an experience waiting to be savored. Here’s why this vegan Ghugni recipe will quickly become a favorite in your kitchen, offering both incredible flavor and wholesome nutrition:
- Irresistibly Flavorful: Each bite delivers a burst of authentic Indian spices perfectly balanced with the earthiness of brown chickpeas and sweet, caramelized onions. The addictive curry sauce is crafted to perfection, ensuring a memorable taste that will leave you craving more.
- Power-Packed Nutrition: Brown chickpeas are a nutritional powerhouse, loaded with plant-based protein and dietary fiber. This makes Ghugni an incredibly satisfying and healthy option that keeps you full and energized, contributing to digestive health and overall well-being. It’s an ideal dish for those seeking a protein-rich vegan meal.
- Dietary-Friendly & Inclusive: Our Kala Chana Ghugni recipe is naturally gluten-free, soy-free, and nut-free, making it suitable for a wide range of dietary needs and preferences. It’s a fantastic choice for anyone looking for wholesome, allergen-friendly vegan meals.
- Incredibly Versatile: While brown chickpeas are the star, the recipe is wonderfully adaptable. Feel free to experiment with white chickpeas (Kabuli Chana), other types of hearty beans, or even dried white peas (vatana) if you desire a different texture or have them readily available. This flexibility allows you to customize your Ghugni to your liking, without compromising on flavor.
- Simple Yet Sophisticated: Don’t let the complex flavors intimidate you. This recipe breaks down the cooking process into easy-to-follow steps, making authentic Indian cuisine accessible even for novice cooks. The use of an Instant Pot or pressure cooker simplifies the chickpea preparation, cutting down cooking time significantly.
Understanding Kala Chana: The Star Ingredient
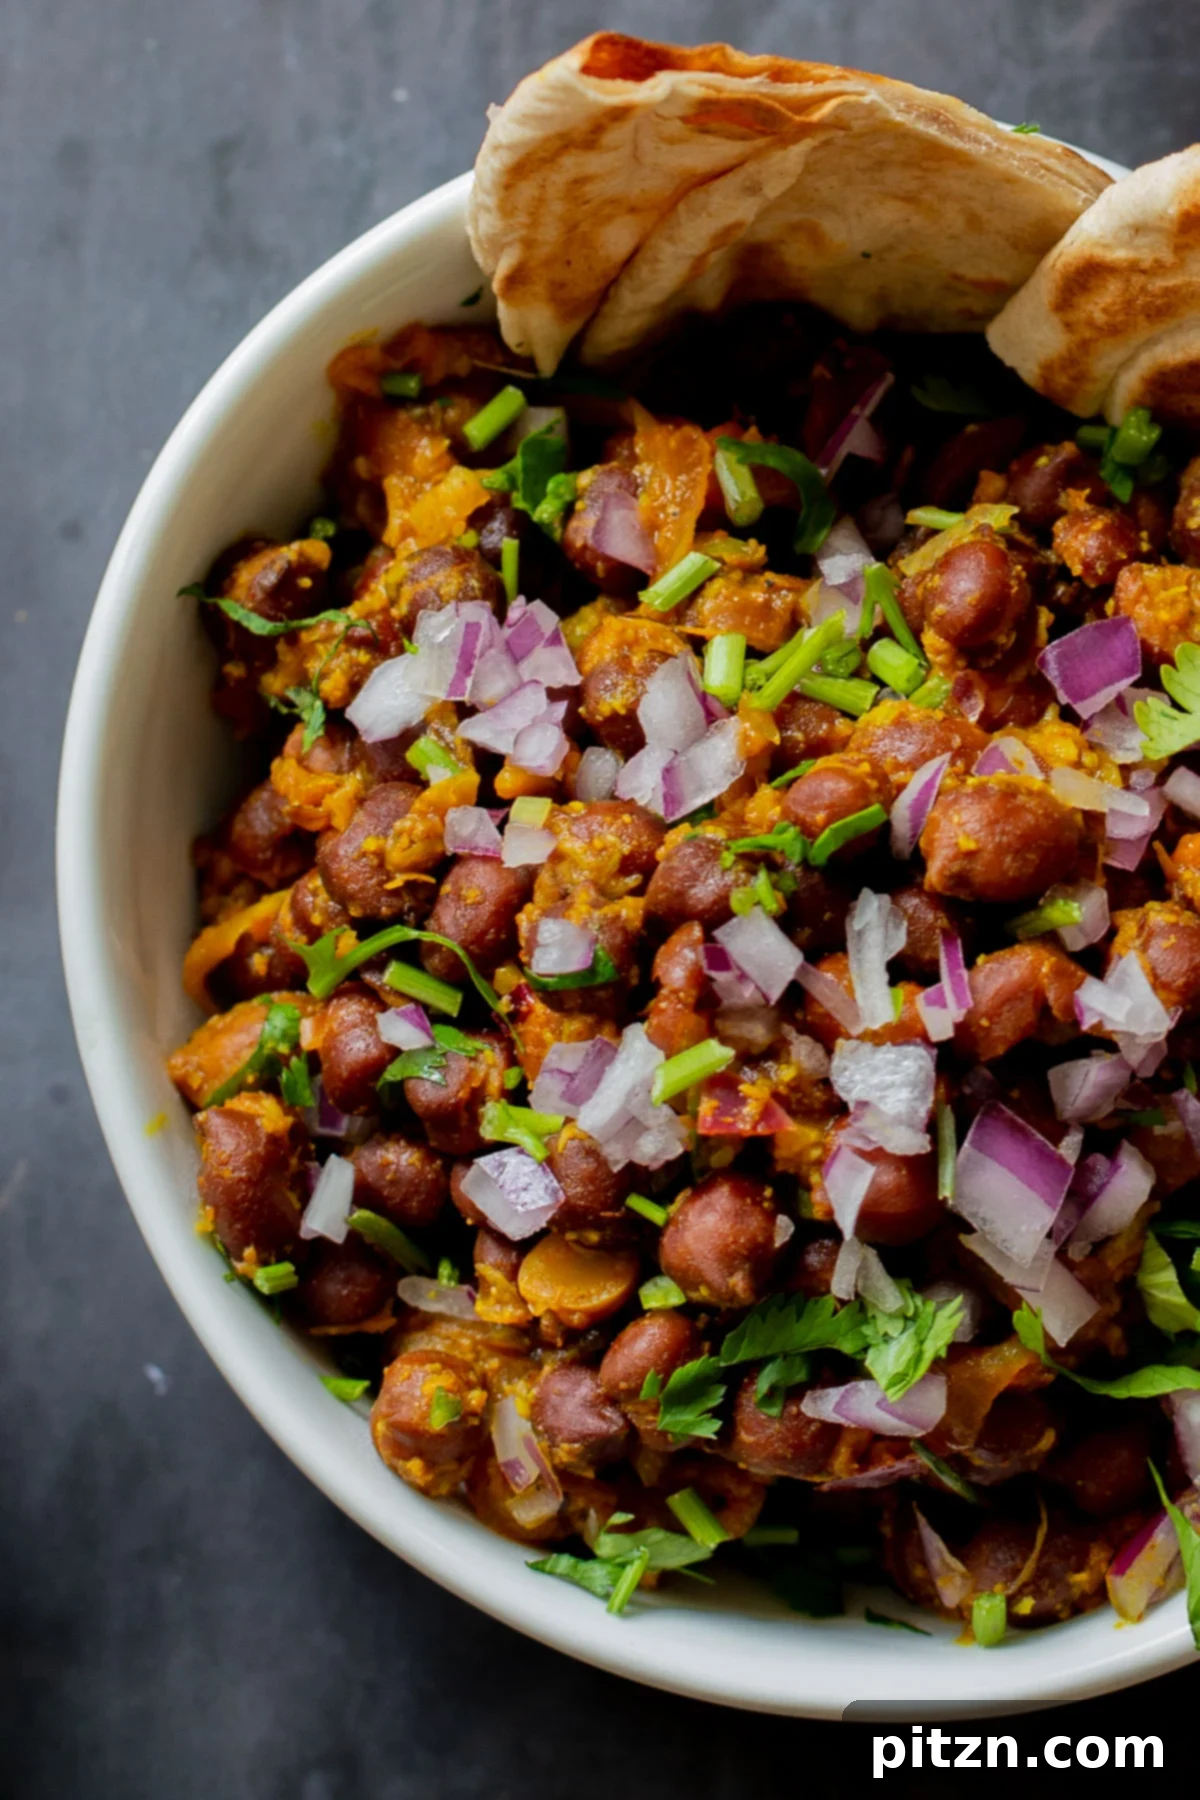
Kala Chana, also affectionately known as ‘desi chana’ or black chickpeas, are a cornerstone of Indian cooking. These legumes are distinct from the more commonly known white chickpeas (garbanzo beans or Kabuli chana). Kala Chana are smaller, darker, and possess a slightly rougher skin. These characteristics contribute to their uniquely nutty flavor and a firmer, more substantial texture that holds up beautifully in curries and stews. Their ability to retain their shape and provide a satisfying chew makes them an ideal choice for dishes like Ghugni, where texture is just as important as flavor.
Beyond their culinary appeal, kala chana are a nutritional powerhouse. They are incredibly rich in plant-based protein, dietary fiber, and essential minerals such as iron, magnesium, folate, and zinc. Incorporating them into your diet can support muscle health, aid digestion, help regulate blood sugar, and provide sustained energy throughout the day. Soaking them before cooking is a crucial step, as it not only significantly reduces their cooking time but also helps in making them more digestible and enhancing the absorption of their valuable nutrients. This Ghugni recipe truly showcases the best of what these wonderful, versatile legumes have to offer, proving that healthy eating can be incredibly delicious.
A Glimpse into Indian Chickpea Curries
India’s culinary landscape is vast and varied, and chickpea curries, or ‘chana’ dishes, are a beloved and indispensable part of it. From the creamy and rich Chana Masala of Punjab, bursting with tang and spice, to the rustic and comforting Ghugni found in Eastern India, these humble legumes are transformed into countless delicious preparations. Ghugni itself has numerous regional interpretations, each reflecting local tastes and ingredients. In states like Bengal and Odisha, for instance, it’s frequently made with dried white peas (vatana), sometimes incorporating diced potatoes or even meat, and is often enjoyed as a popular street food snack, vibrantly topped with chopped onions, fresh green chilies, and a refreshing squeeze of lemon.
The Uttar Pradesh version, which serves as the inspiration for this particular Kala Chana Ghugni recipe, typically highlights the robust flavor and toothsome texture of brown chickpeas. This rendition often features a drier consistency compared to some other chickpea curries, focusing on a strong, aromatic onion-spice base that allows the earthy notes of the kala chana to shine through. While each region adds its unique touch and flair, the underlying essence of Ghugni remains consistent: a comforting, intensely flavorful, and highly nutritious dish built around the humble yet mighty chickpea. If you’ve fallen in love with this Indian brown chickpea curry, you might also enjoy exploring these other delightful chickpea curries, each offering a distinct flavor profile:
- Chickpea Coconut Curry
- Chickpeas in Turmeric Peanut Butter Curry
- Mango Curry Chickpeas
- Chickpeas in Coconut Onion Sauce – Manglorean Chana Gassi
Kala Chana Ghugni (Brown Chickpea Curry) Recipe
Kala Chana Ghugni (Brown Chickpea Curry)
By: Vegan Richa
A flavorful Indian brown chickpea curry, perfect as a snack or a fulfilling meal. This vegan Ghugni recipe brings together tender brown chickpeas with an aromatic onion-spice sauce, garnished with fresh cilantro, crunchy onions, and zesty lime for an unforgettable taste.
- Prep Time:
- 15 mins
- Cook Time:
- 1 hr 10 mins
- Soaking Time:
- 1 hr (or overnight for best results)
- Total Time:
- 2 hrs 25 mins
- Servings:
- 4
- Course:
- Entree, Main
- Cuisine:
- Indian
Equipment
- Instant Pot or other pressure cooker
- Large skillet
Ingredients
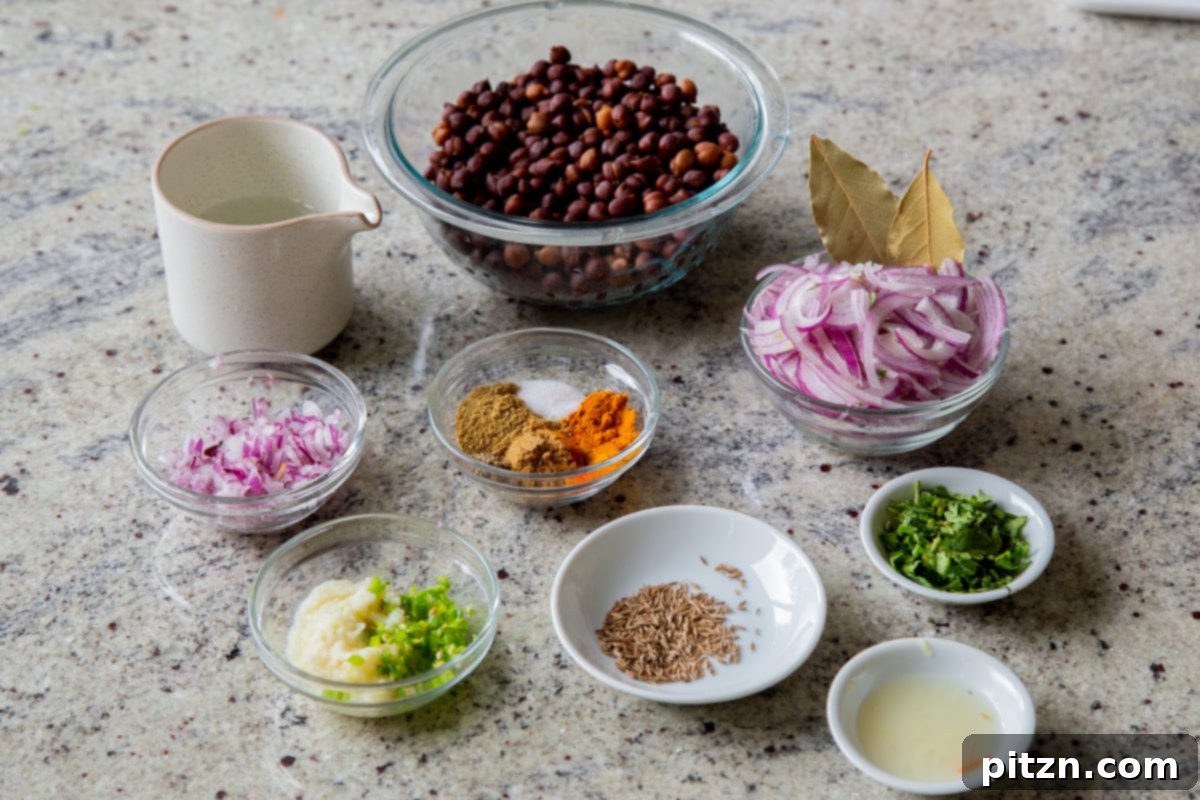
- 1 cup brown chickpeas (kala chana or desi chana), soaked overnight or at least for 1 hour
- For the sauce:
- 1 teaspoon oil
- 1/2 teaspoon cumin seeds
- 2 bay leaves
- 1/2 teaspoon turmeric powder
- 1/2 teaspoon cayenne pepper or Indian red chili powder
- 1 tablespoon ground coriander
- 1 teaspoon ground cumin
- 1/2 teaspoon freshly ground black pepper
- 1 cup thinly sliced red onion
- 1 hot green chili such as Serrano, chopped
- 1 tablespoon ginger-garlic paste (or 2 cloves minced garlic and 1/2 inch minced ginger)
- 1/2 teaspoon salt, or to taste
- For garnish:
- 1/4 cup chopped onion
- 1/4 cup chopped cilantro
- 1/2 teaspoon toasted ground cumin
- 2-3 teaspoons lime juice, or as needed
Instructions
- If not already done, soak the brown chickpeas, then drain them. Transfer the soaked chickpeas to an Instant Pot or a pressure cooker and add 2 cups of water. Secure the lid and pressure cook for 1 hour (using the ‘bean’ mode on an Instant Pot) or for 45 minutes in a conventional stovetop pressure cooker over medium heat.
- Once pressure cooking is complete, allow the pressure to release naturally for 10 minutes before performing a quick release. Carefully open the lid and verify that the chickpeas are tender and fully cooked. Drain the chickpeas, reserving the cooking liquid, and set the drained chickpeas aside.
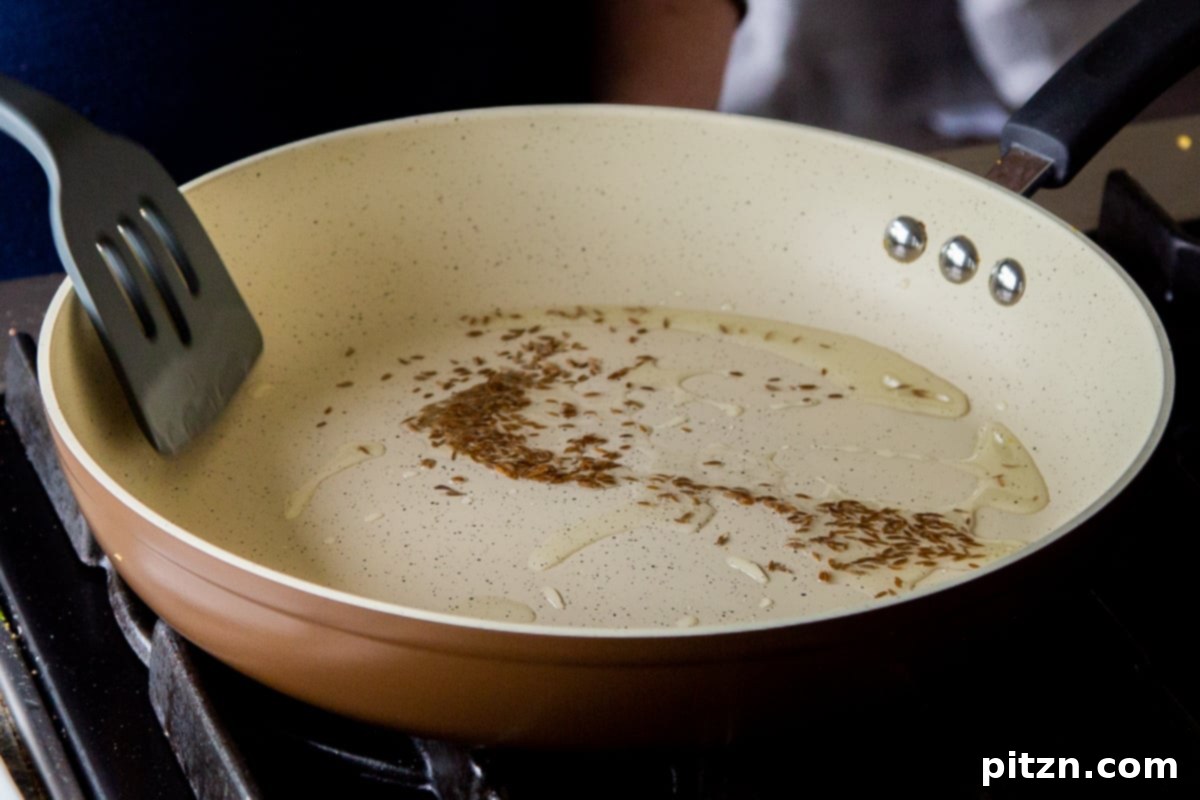
- Prepare the sauce: Heat 1 teaspoon of oil in a large skillet over medium heat. Once the oil is hot, add the cumin seeds and stir. Continue to cook until the cumin seeds change color and visibly darken, indicating they are toasted and fragrant.
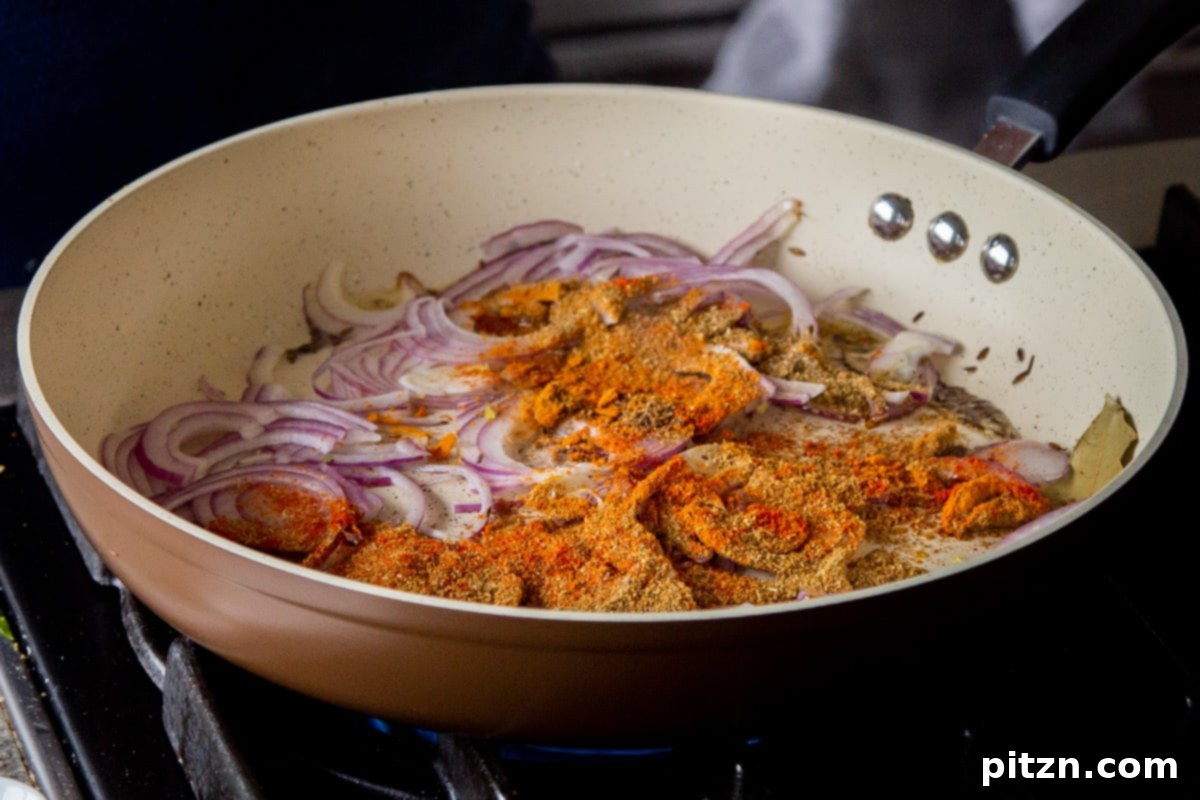
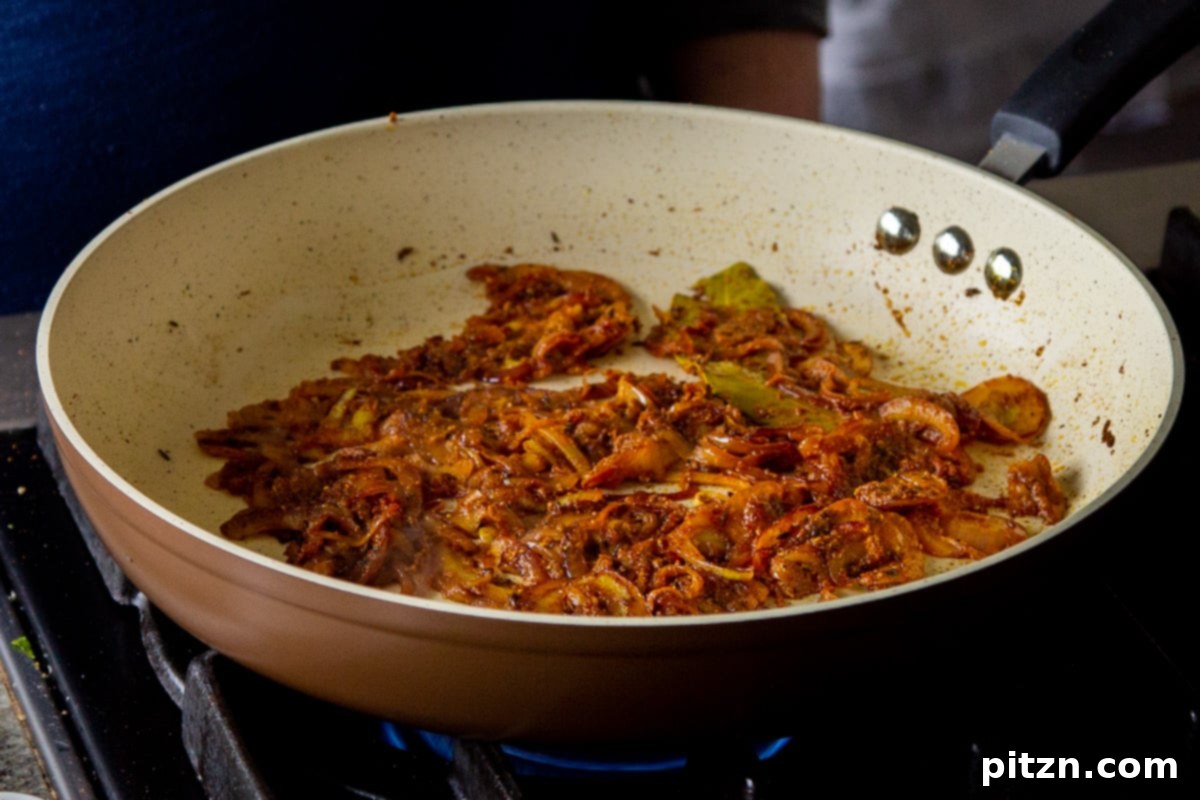
- Next, add the bay leaves, all the ground spices (turmeric, cayenne, ground coriander, ground cumin, black pepper), thinly sliced onion, and a generous pinch of salt to the skillet. Mix thoroughly. Sauté the onion for 6 to 8 minutes until it turns golden brown. If the onion starts to dry out or stick, add small splashes of the reserved chickpea cooking water to keep it moist and prevent burning.
- Once the onion is perfectly cooked and softened, stir in the ginger-garlic paste and chopped green chili. Cook for another minute, allowing the aromatics to meld with the spices.
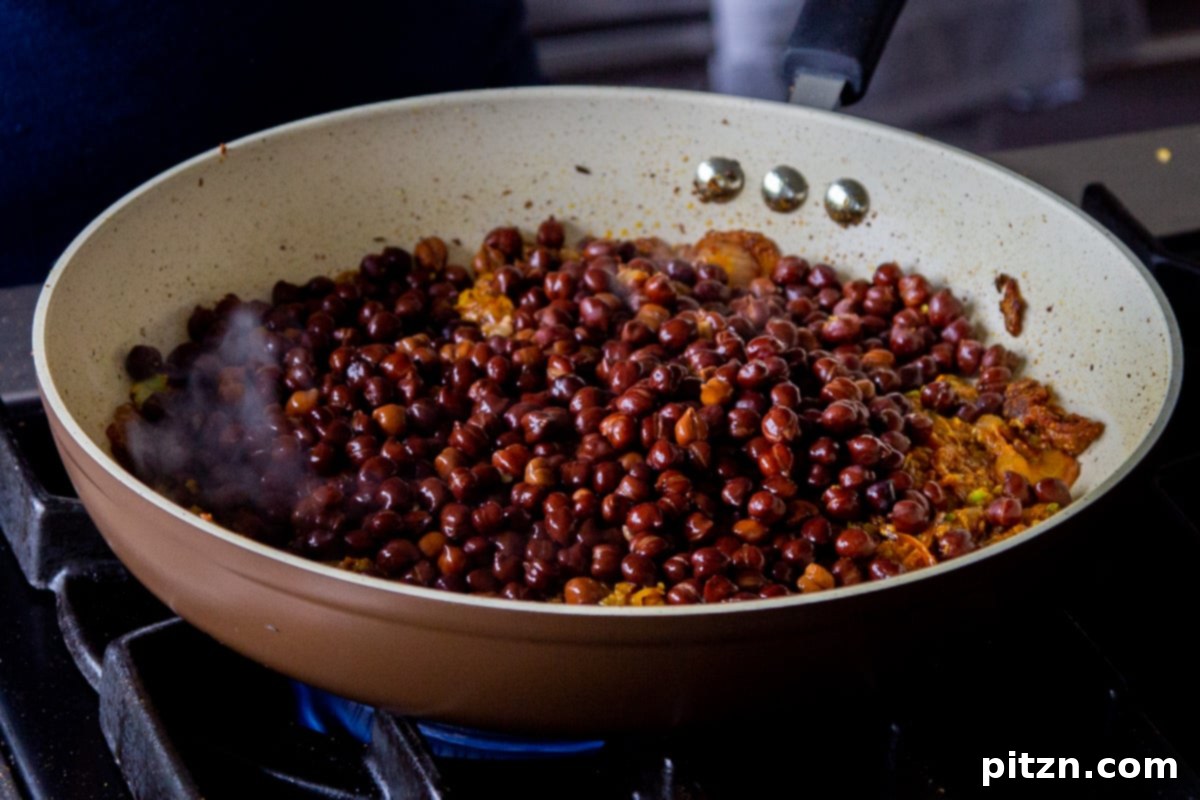
- Finally, add the previously cooked brown chickpeas and 1/4 to 1/2 cup of the reserved chickpea cooking water to the skillet. Mix everything well to ensure the chickpeas are thoroughly coated with the aromatic sauce. Cover the skillet and let it simmer for 6-8 minutes, allowing the flavors to deepen and the chickpeas to absorb the curry.
- Uncover, stir well again, and taste. Adjust the salt and other seasonings as needed to achieve your desired flavor profile. Turn off the heat.
- To serve: Transfer the flavorful Ghugni to a serving bowl. Garnish generously with fresh chopped cilantro and crunchy red onion. Sprinkle the toasted ground cumin over the top and add a generous squeeze of fresh lime juice to brighten the flavors before serving.
Video
Recipe Notes
This versatile Kala Chana Ghugni can be enjoyed in many ways. Serve it warm with your favorite flatbreads like roti, naan, or paratha. It also pairs wonderfully with crisp crackers for a snack, or alongside steamed basmati rice for a more substantial meal.
To adapt this recipe for white chickpeas (Kabuli Chana): Simply pressure cook white chickpeas for approximately 15 minutes instead of the longer time required for brown chickpeas. You can also experiment with other types of beans or even dried white peas (vatana); adjust pressure cooking times to 12-15 minutes based on your preferred tenderness.
As written, this recipe is a perfect option for those with specific dietary needs, being naturally gluten-free, soy-free, and nut-free.
Nutrition
Nutrition information is automatically calculated and should be used as an approximation.
- Calories: 200 kcal
- Carbohydrates: 33g
- Protein: 8g
- Fat: 4g
- Saturated Fat: 0.1g
- Sodium: 351mg
- Potassium: 484mg
- Fiber: 3g
- Sugar: 3g
- Vitamin A: 354 IU
- Vitamin C: 10mg
- Calcium: 117mg
- Iron: 3mg
Did you try this delicious Kala Chana Ghugni recipe? Share your experience and comments below!
Essential Ingredients and Clever Substitutions for Kala Chana Ghugni
Crafting the perfect Kala Chana Ghugni relies on a thoughtful blend of staple ingredients and aromatic spices. Each component plays a crucial role in building the layered flavors and appealing texture of this delightful curry. Here’s a closer look at what you’ll need and how you can adapt the recipe to your pantry or dietary preferences, ensuring a delicious outcome every time:
- Brown Chickpeas (Kala Chana / Desi Chana): These are the true heart of our Ghugni. Their firm texture and distinct nutty, earthy flavor set them apart from the more common white chickpeas. Proper soaking, ideally overnight or for at least an hour, is absolutely crucial for both significantly reducing cooking time and ensuring they cook evenly to a perfectly tender yet toothsome consistency. If brown chickpeas are hard to find, you can substitute with white chickpeas (Kabuli chana), other hearty beans like black beans, or even dried white peas (vatana) – just remember to adjust cooking times accordingly, as white chickpeas typically cook much faster, often around 15 minutes in a pressure cooker.
- Cooking Oil: A small amount of oil is used at the beginning of the cooking process to temper the whole spices and to sauté the aromatics, building the foundation of the sauce. Any neutral cooking oil such as vegetable oil, canola oil, sunflower oil, or even a light olive oil will work well. For a slightly different flavor profile, you could experiment with coconut oil, though it will impart a subtle tropical note.
- Aromatic Spices: The soul of Indian cooking lies in its masterfully blended spices, and Ghugni is no exception.
- Cumin Seeds: These are tempered in hot oil at the very beginning of the sauce preparation, releasing a deep, earthy, and warm aroma. It’s important not to rush this step; allow them to darken to a rich brown hue, but not burn, to bring out their full, complex flavor. This initial tempering, or ‘tadka,’ is fundamental.
- Bay Leaves: Added early in the cooking process, bay leaves infuse the curry with a subtle, warm, and herbaceous note, adding to the overall aromatic complexity.
- Turmeric Powder: This essential spice imparts a beautiful golden hue to the dish and offers a mild, earthy flavor. Beyond its taste, turmeric is well-known for its potent anti-inflammatory properties and numerous health benefits.
- Cayenne Pepper or Indian Red Chili Powder: These spices provide the desired level of heat. Adjust the quantity meticulously to your personal spice preference. For color with less heat, Kashmiri chili powder is an excellent alternative.
- Ground Coriander: A foundational spice in almost all Indian curries, ground coriander offers a wonderful citrusy, floral, and slightly sweet flavor that perfectly balances the savory and spicy notes of the dish.
- Ground Cumin: Adding another layer of depth, ground cumin contributes a warm, earthy essence that complements the initial whole cumin seeds beautifully, reinforcing that signature flavor.
- Freshly Ground Black Pepper: This simple yet powerful spice enhances the overall spice profile with a sharp, pungent kick and subtle warmth.
- Fresh Aromatics: These fresh ingredients build the robust and savory base flavor of the Ghugni.
- Red Onion: Thinly sliced red onion is cooked slowly until it turns beautifully golden and caramelized. This process creates a sweet and savory foundation for the curry sauce, adding incredible depth.
- Hot Green Chili (Serrano or similar): Provides a fresh, pungent heat that brightens the dish. If you prefer a milder curry, you can reduce the amount of chili or deseed it before chopping.
- Ginger-Garlic Paste: A classic and indispensable aromatic blend in Indian cuisine. If you don’t have pre-made paste, finely mincing fresh ginger and garlic cloves at home works perfectly. (Approximately 2 cloves of garlic and a 1/2-inch piece of ginger, finely minced, can substitute for one tablespoon of paste).
- Salt: Essential for seasoning and bringing out all the flavors. Always taste and adjust as you go, adding in small increments, to ensure a perfect balance.
- Fresh Garnishes: These vibrant additions are non-negotiable for an authentic and refreshing Ghugni experience. They add critical layers of flavor and texture that truly elevate the dish.
- Chopped Onion: Added fresh just before serving, chopped raw onion provides a delightful crunch and a sharp, pungent freshness that contrasts beautifully with the cooked curry.
- Fresh Cilantro: A generous scattering of freshly chopped cilantro (coriander leaves) provides a vibrant, herbaceous counterpoint to the rich and warm spices of the curry, adding a burst of freshness.
- Toasted Ground Cumin: A final flourish, a sprinkle of freshly toasted and ground cumin adds another layer of deep, smoky, roasted cumin flavor and a captivating aroma. For the best results, lightly toast whole cumin seeds in a dry pan until fragrant, then grind them just before use.
- Lime Juice: A generous squeeze of fresh lime juice at the very end is transformative. Its bright acidity cuts through the richness of the curry, enhances all the other flavors, and provides a refreshing tang that makes the entire dish incredibly vibrant and balanced.
Expert Tips for a Perfect Kala Chana Ghugni
Achieving a truly outstanding Kala Chana Ghugni is within your reach, even for those new to Indian cooking. By following these expert tips, you can ensure your brown chickpea curry is bursting with flavor, has the perfect texture, and becomes a dish you’ll be proud to serve:
- Don’t Skip the Soaking Process: Soaking brown chickpeas, or kala chana, is absolutely vital. It significantly reduces their cooking time in the pressure cooker and, more importantly, helps them cook evenly, resulting in a tender texture rather than a tough or unevenly cooked one. Aim for at least 1 hour, but overnight soaking (8-12 hours) is ideal for the best results, ensuring maximum tenderness and easier digestion.
- Master the Cumin Tempering (Tadka): When toasting cumin seeds in oil at the beginning of the sauce preparation, be patient and attentive. Allow them to change color and darken considerably, but never burn, to unlock their full, nutty, and deeply aromatic flavor. This initial tempering, known as ‘tadka,’ is fundamental to building the curry’s flavor base. A light golden color is good, but a slightly darker, almost reddish-brown shade indicates that maximum flavor has been released.
- Sauté Onions Until Golden and Caramelized: The key to a rich, sweet, and savory curry sauce lies in properly caramelizing the onions. Cook them slowly over medium heat, stirring frequently, until they turn a beautiful, deep golden brown. This process enhances their natural sweetness and adds incredible depth and body to the curry. Don’t be afraid to add small splashes of the reserved chickpea cooking water if the onions start to dry out or stick to the pan; this helps them cook without burning and aids in building a lovely flavorful fond at the bottom of the skillet.
- Adjust Spice Levels to Personal Taste: The amount of cayenne pepper or green chili specified in the recipe is a guideline. Personal preference for heat varies greatly. If you prefer a milder Ghugni, reduce the amount of chili or deseed the green chili before chopping. For those who love a fiery kick, feel free to add a little extra chili powder or a second green chili. Remember, you can always add more spice later, but it’s much harder to take it away once incorporated.
- Utilize the Chickpea Cooking Water: Do not discard all the water used to cook the chickpeas! Reserving about 1/4 to 1/2 cup of this starchy liquid and adding it to the sauce is a smart move. This reserved water helps to create a more cohesive and flavorful curry texture, preventing the dish from being too dry and infusing it with additional subtle chickpea flavor that deepens the overall taste.
- Fresh Garnishes are Non-Negotiable: The fresh toppings – chopped raw onion, fresh cilantro, freshly toasted ground cumin, and a generous squeeze of fresh lime juice – are not mere decorations. They are absolutely essential for an authentic Ghugni experience. These garnishes provide crucial contrasting textures (crunchy onion), bright herbaceousness (cilantro), an extra layer of roasted aroma (cumin), and a vital zesty acidity (lime) that cuts through the richness of the curry, making each bite incredibly refreshing and balanced.
- Always Taste and Adjust Seasoning: Just before serving, always taste your Ghugni. This is your final opportunity to fine-tune the flavors. Adjust the salt, spice, and sourness (with more lime juice) until it perfectly suits your palate. Indian cooking is all about balancing the five main tastes, so don’t hesitate to make slight adjustments for that perfect harmony.
Step-by-Step Guide to Making Kala Chana Ghugni
Embark on your culinary journey to create a delicious batch of Indian brown chickpea curry with this detailed guide. While the full recipe card offers precise measurements, this section provides expanded explanations and visual cues for each crucial step in preparing your mouth-watering Kala Chana Ghugni.
1. Prepare the Brown Chickpeas
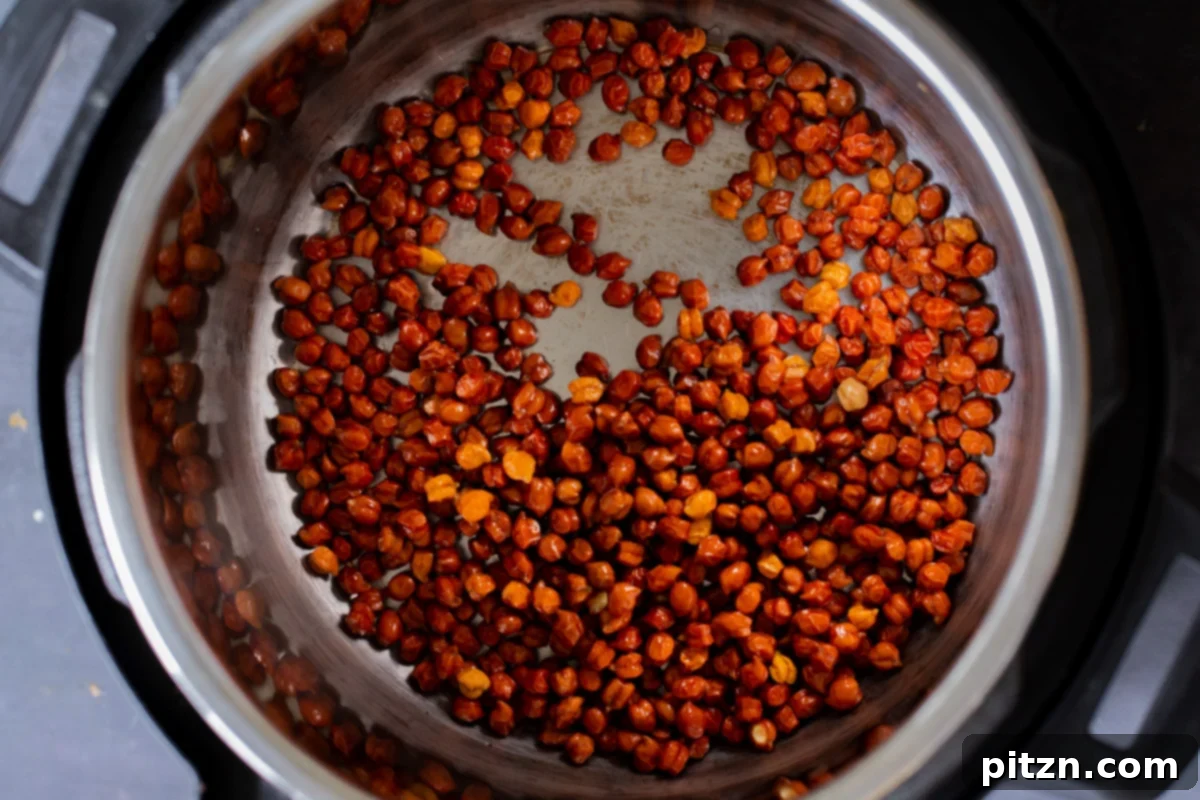
The foundation of a great Ghugni begins with perfectly cooked chickpeas. If you haven’t already, ensure your brown chickpeas (kala chana) have been thoroughly soaked, ideally overnight or for at least one hour. After soaking, drain them completely, discarding the soaking water. Transfer the drained chickpeas to your Instant Pot or a traditional stovetop pressure cooker. Add precisely two cups of fresh water. Secure the lid firmly. For an Instant Pot, select the ‘bean’ or ‘manual’ mode and pressure cook for 1 hour. If using a stovetop pressure cooker, cook over medium heat for approximately 45 minutes after the first whistle. The goal is tender but still firm chickpeas that hold their shape and offer a slight bite.
2. Release Pressure and Drain
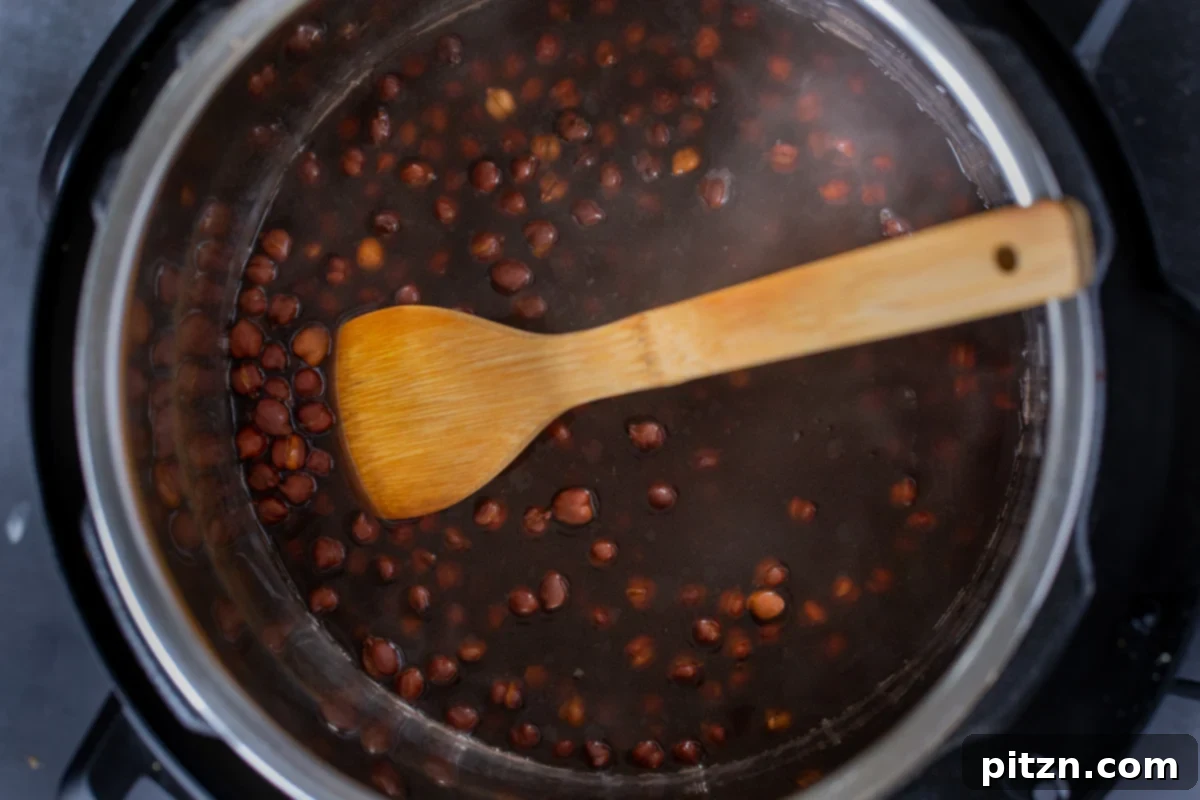
Once the pressure cooking cycle is complete, resist the urge to open the cooker immediately. It’s best to allow the pressure to release naturally for at least 10 minutes. This gradual release helps the chickpeas continue cooking gently, preventing them from bursting and ensuring a more uniform texture. After 10 minutes, you can perform a quick release of any remaining pressure. Carefully open the lid and gently test a few chickpeas to ensure they are cooked through yet retain a pleasant, slightly firm bite. Drain the cooked chickpeas, making sure to reserve about 1/4 to 1/2 cup of the starchy cooking water, which will be used later to enrich and bind the sauce. Set the drained chickpeas aside.
3. Creating the Aromatic Sauce Base
Now, it’s time to build the heart of your Ghugni: the deeply flavorful sauce. Begin by heating one teaspoon of your chosen cooking oil in a large, heavy-bottomed skillet over medium heat. Watch the oil carefully; once it shimmers and appears hot, add the cumin seeds. Stir them constantly with a spoon or spatula and cook until they visibly change color, darkening significantly to a rich brown hue, and become intensely fragrant. This crucial process, known as tempering or ‘tadka,’ is vital for releasing their full, complex aroma and flavor, which forms the delicious base of the curry.
4. Sautéing Onions and Spices
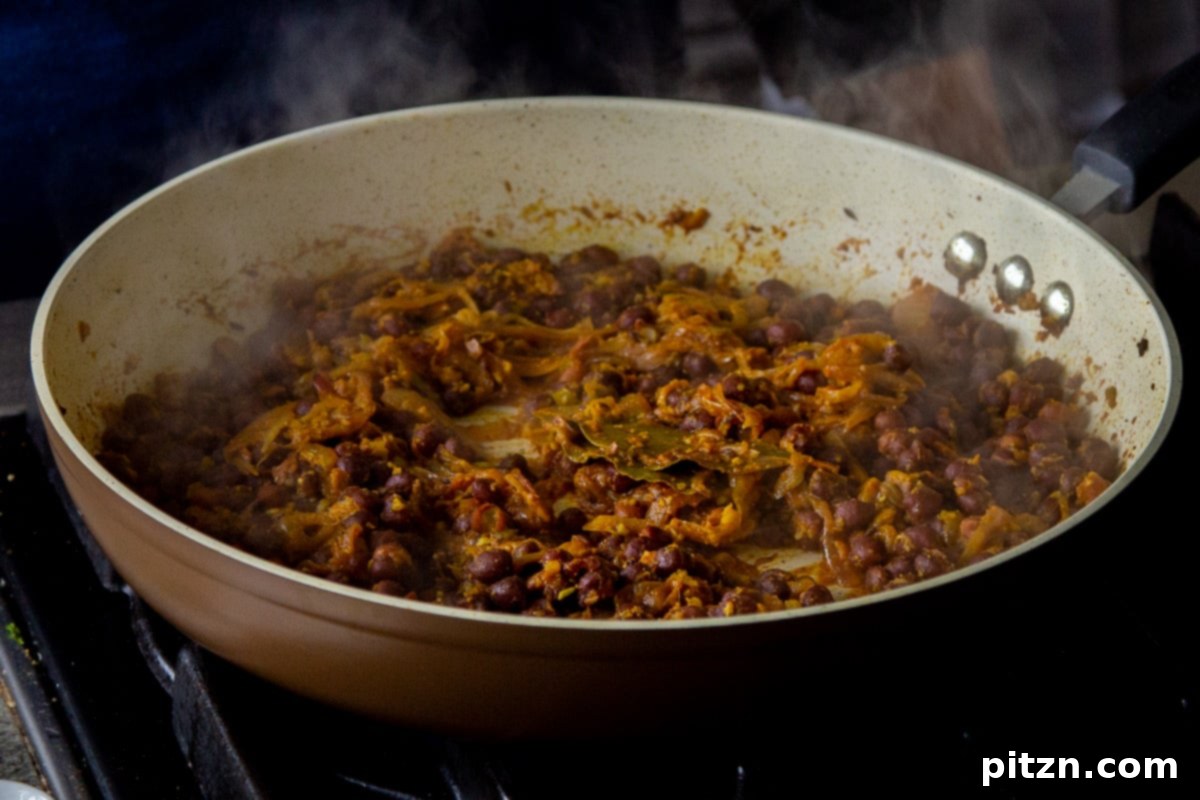
Immediately after the cumin seeds are perfectly toasted and aromatic, add the bay leaves, all the ground spices (turmeric, cayenne, ground coriander, ground cumin, black pepper), your thinly sliced red onion, and a good pinch of salt to the skillet. Mix everything thoroughly to combine the onions and spices. Continue to cook the onion for approximately six to eight minutes, stirring frequently, until it turns a beautiful, rich golden brown and becomes soft and translucent. This caramelization process is absolutely crucial for developing the sauce’s underlying sweetness and adding significant depth of flavor. If the onions start to dry out too much or begin to stick to the bottom of the pan, add small splashes of the reserved chickpea cooking water to deglaze the pan and aid in their cooking without burning.
5. Combining Chickpeas and Sauce
Once the onions are perfectly cooked and fragrant, add the ginger-garlic paste and the chopped green chili to the skillet. Stir well and cook for another minute, allowing these fresh aromatics to release their pungent and vibrant flavors, blending them seamlessly with the spices. Then, add the salt, your previously cooked brown chickpeas, and 1/4 to 1/2 cup of the reserved chickpea cooking water. Mix everything together thoroughly and gently, ensuring that the chickpeas are evenly coated with the rich and aromatic spice mixture. The reserved cooking water helps to create a cohesive sauce, prevents the dish from drying out, and allows all the flavors to meld beautifully. Cover the skillet and let the Ghugni simmer gently for six to eight minutes. This simmering period is crucial as it allows the tender chickpeas to fully absorb the delightful flavors of the curry, deepening the overall taste experience.
6. Finishing and Seasoning
After the simmering period, uncover the skillet and give the Ghugni another good stir to ensure all components are well integrated. Now is the critical moment to taste the curry. Carefully assess the balance of flavors, and adjust the salt, spice, or tanginess (with more lime juice if desired) as needed. This is your chance to perfect the flavor profile to your preference, ensuring it’s exactly to your liking. Once you are completely satisfied with the taste, switch off the heat. Your richly flavored and perfectly cooked Kala Chana Ghugni is now ready for serving, promising a delightful culinary experience.
7. Garnish and Serve
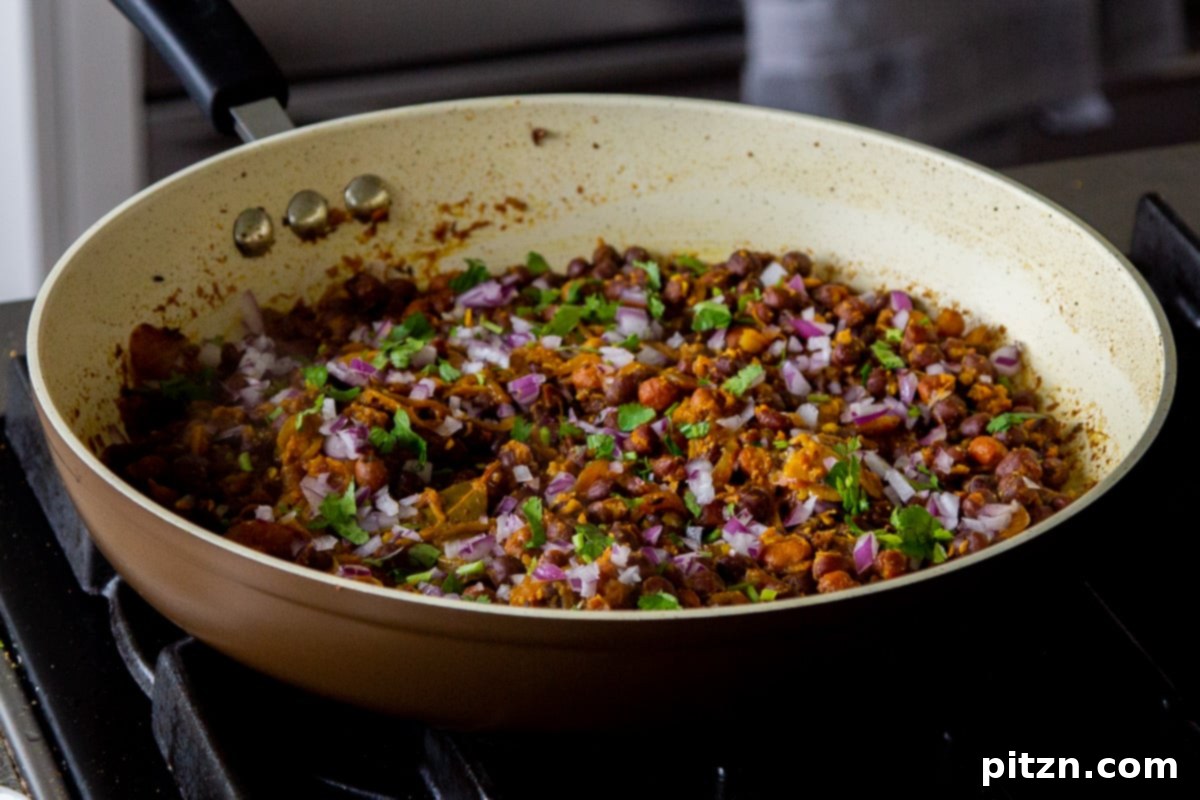
To serve, carefully transfer the warm Ghugni to your chosen serving bowl. Generously garnish with a fresh sprinkle of finely chopped cilantro and a scattering of crunchy, freshly chopped red onion. These fresh additions are not just for visual appeal; they provide a wonderful textural contrast and bright, pungent flavors that cut through the richness of the curry. Finally, sprinkle freshly toasted ground cumin over the top for an extra layer of deep, earthy aroma, and squeeze a liberal amount of fresh lime juice over the entire dish. The invigorating tang of the lime brightens all the flavors, making this Indian brown chickpea curry truly irresistible. Serve immediately and savor every delicious bite!
Serving Suggestions for Ghugni
One of the many charms of Kala Chana Ghugni is its incredible versatility. While it shines as a hearty dish on its own, its robust flavors are perfectly complemented by a variety of accompaniments, making it suitable for various meal times and occasions. Here are some delicious and traditional ways to serve your homemade Indian brown chickpea curry:
- With Indian Flatbreads: This is arguably the most classic and satisfying pairing. Serve your warm Ghugni with freshly made roti, soft naan, flaky paratha, or even simple whole wheat tortillas. The bread is perfect for scooping up the flavorful chickpeas and their rich, aromatic sauce, providing a comforting and complete meal.
- As a Vibrant Street Food Style Snack: In many parts of India, particularly in Eastern states, Ghugni is cherished as a vibrant and popular street food. To recreate this experience, top your Ghugni generously with extra chopped red onion, a shower of fresh cilantro, a sprinkle of freshly roasted cumin powder, and a drizzle of tangy tamarind chutney or spicy green chutney for an explosion of flavors and textures. A squeeze of fresh lime juice is absolutely essential to brighten all the components!
- Alongside Steamed Rice: For a more substantial and deeply comforting meal, serve your Ghugni with a steaming bowl of fragrant basmati rice or wholesome brown rice. The rice beautifully absorbs the curry’s spices and flavors, creating a harmonious and utterly satisfying dish that’s perfect for lunch or dinner.
- With Puri or Luchi: A traditional and often celebratory Bengali pairing sees Ghugni served alongside fluffy, deep-fried puri (an unleavened bread) or luchi (a finer, richer version of puri). This combination creates a truly indulgent and festive meal, beloved during special occasions.
- As a Component in Chaat: Get creative and incorporate Ghugni into a layered chaat for an exciting burst of flavors and textures. Combine it with crispy papdi (fried flour crackers), diced boiled potatoes, cool yogurt (or a dairy-free vegan yogurt alternative), various chutneys, and a final sprinkle of tangy chaat masala for a truly dynamic and unforgettable snack.
- A Hearty Breakfast or Brunch Item: Given its savory and highly satisfying nature, Ghugni makes an excellent and unique alternative for breakfast or brunch. It pairs wonderfully with simple toast, a light flatbread, or even a side of fresh fruit for a well-rounded start to your day.
No matter how you choose to enjoy it, always remember that fresh garnishes like a generous squeeze of lime, crunchy raw onion, and vibrant cilantro are key to unlocking the full, bright, and authentic potential of this delightful Kala Chana Ghugni dish.
Storage and Reheating for Your Kala Chana Ghugni
Preparing a delicious batch of Kala Chana Ghugni often yields wonderful leftovers, which can be just as enjoyable, if not more so, than the freshly made dish as the flavors deepen over time. Proper storage is key to ensuring your brown chickpea curry maintains its incredible flavor and freshness for future meals. Here’s a comprehensive guide on how to store and reheat your Ghugni:
- Cooling Before Storage: It is crucial to allow the Ghugni to cool completely to room temperature before transferring it to storage containers. This prevents condensation from building up, which can lead to sogginess and a shorter shelf life.
- Refrigeration: Once cooled, transfer the Ghugni to an airtight container. It can be safely stored in the refrigerator for up to 3-4 days. The flavors often meld and deepen overnight, making it even more delicious the next day.
- Freezing for Longer Storage: Ghugni freezes exceptionally well, making it a fantastic meal-prep option. Portion it into individual servings using freezer-safe containers or heavy-duty freezer bags. Ensure there is minimal air in the containers/bags to prevent freezer burn. It can be kept in the freezer for up to 2-3 months without a significant loss of quality. Label with the date for easy tracking.
- Reheating from the Refrigerator:
- Stovetop: Transfer the desired portion of Ghugni to a saucepan. Heat over medium-low heat, stirring occasionally, until it is thoroughly warmed through. If the Ghugni appears too dry or thick, add a small splash of water or vegetable broth to reach your desired consistency, stirring it in gently.
- Microwave: For a quick reheat, place Ghugni in a microwave-safe dish. Heat in 1-minute intervals, stirring well in between each interval, until hot and steaming.
- Reheating from the Freezer:
- Thawing First: For the best results in terms of texture and flavor, it’s recommended to thaw frozen Ghugni in the refrigerator overnight before reheating. Once thawed, proceed with the stovetop or microwave reheating methods as described above.
- Direct Reheating (if time is short): If you’re short on time, you can reheat Ghugni directly from frozen. Place it in a saucepan over very low heat, stirring frequently and breaking up the frozen mass. Add a little liquid (water or broth) to prevent sticking. Alternatively, microwave from frozen using longer intervals (2-3 minutes at a time), stirring thoroughly after each to ensure even heating.
- Serving Leftovers: When reheating Ghugni, remember that the fresh garnishes (raw onion, fresh cilantro, lime juice, and toasted ground cumin) are always best added just before serving. This ensures maximum flavor, crunch, and brightness, bringing your delicious leftover vegan Ghugni back to life and making it feel freshly prepared.
With these comprehensive storage and reheating tips, you can efficiently manage your homemade Kala Chana Ghugni, allowing you to enjoy its comforting and rich flavors whenever a craving strikes, without compromising on quality or taste!
Frequently Asked Questions About Ghugni
Yes, absolutely! If you’re looking to significantly reduce your preparation time, you can certainly use canned chickpeas. In this case, simply skip the initial pressure cooking step entirely. Make sure to drain and rinse the canned chickpeas thoroughly under cold water to remove excess sodium and improve their texture. Then, add them directly to the sauce during step 6 of the instructions. Since canned chickpeas are already cooked, they won’t need the extensive cooking that dried chickpeas require. Just allow them to simmer in the sauce for 5-10 minutes to absorb all the delicious flavors.
As written, this Kala Chana Ghugni recipe is wonderfully allergy-friendly and caters to several common dietary restrictions. It is naturally gluten-free, soy-free, and nut-free, making it an excellent choice for individuals navigating these specific allergies. However, it is always a good practice to double-check the labels of all your purchased ingredients (especially spices and pastes) to ensure they are free from any hidden allergens or cross-contamination that might affect your specific dietary needs.
Ghugni is a popular and profoundly flavorful Indian bean or pea curry that holds a cherished place in various regional cuisines across India. It’s a staple dish across several Indian states like Bihar, Odisha, Uttar Pradesh, and Bengal, each with its unique regional nuances in terms of ingredients and preparation. While many variations can include white peas (vatana) or other types of beans, this specific recipe highlights the robust and earthy brown chickpeas (kala chana) simmered in a rich, aromatic spice and onion-based sauce. It’s treasured for its hearty, comforting nature and versatile appeal, often enjoyed as both a satisfying snack and a fulfilling meal component.
Yes, you can absolutely cook brown chickpeas in a regular saucepan if you don’t own a pressure cooker, though it will take considerably longer. After thoroughly soaking the chickpeas (which is even more crucial here for tender results), place them in a large, heavy-bottomed saucepan. Add approximately four times the amount of water (e.g., for 1 cup of chickpeas, use 4 cups of water). Bring the water to a rolling boil, then reduce the heat to low, cover the saucepan tightly, and let them simmer gently for about 1.5 to 2 hours, or until the chickpeas are tender to your liking. Make sure to check them periodically and add more hot water if needed to keep them submerged, ensuring even cooking. While a pressure cooker offers significant time savings, a saucepan will achieve the same tender results with a bit more patience.