
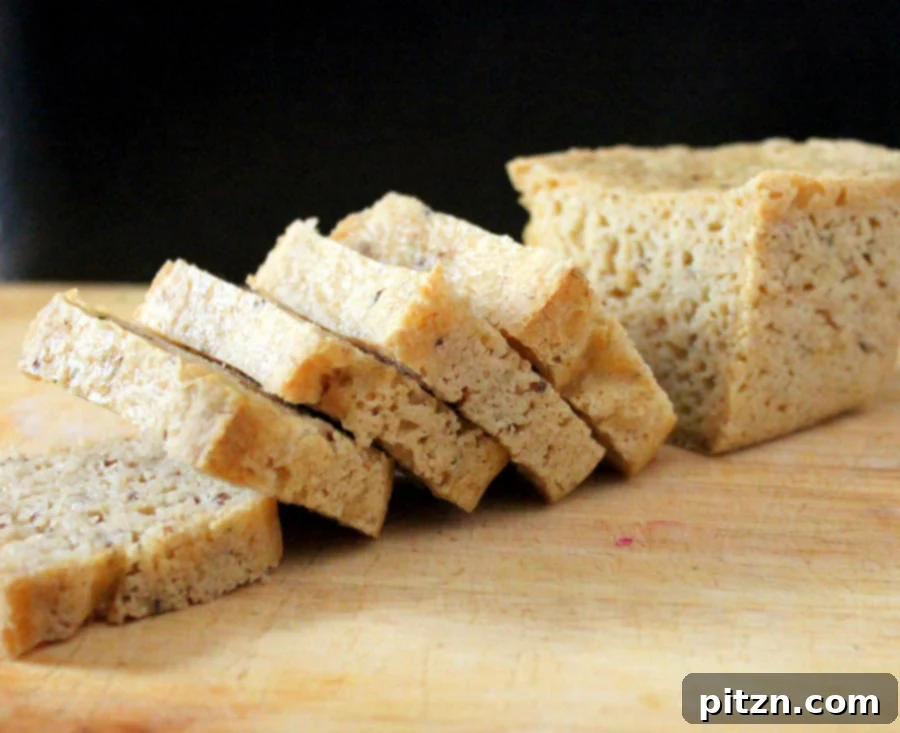
Welcome to the ultimate guide for crafting a truly exceptional gluten-free sourdough bread, a game-changer for anyone seeking a wholesome, delicious, and allergy-friendly loaf. This unique sandwich bread leverages the natural fermentation of traditional Indian dosa batter to create its distinct sourdough tang and incredible texture. What makes this recipe truly stand out is its commitment to inclusivity: it’s entirely gum-free, soy-free, and vegan, making it suitable for a wide range of dietary preferences and needs.
For those eager to dive straight into the baking process, you can Jump to Recipe.
The Fermented Heart: Dosa Batter as Your Sourdough Starter
You might recall the concept of using a fermented lentil and rice batter from my earlier posts, particularly the faux wheat sourdough bread. This gluten-free version builds upon that innovative technique, harnessing the vibrant microbial activity of dosa batter to deliver that signature sourdough flavor and airy crumb. The depth of sourness in your bread is entirely controllable; a longer fermentation period for the batter will yield a more pronounced and complex sour taste, elevating your homemade gluten-free sourdough to new heights. If you’re new to making dosa batter, you can find a comprehensive guide on preparing this fermented lentil and rice base in my Dosa crepe batter post here.
Dosa batter, traditionally made from black gram (urad dal) and rice, is a powerhouse of natural fermentation. This mixture, when allowed to ferment, develops beneficial probiotics and a rich, tangy flavor that beautifully translates into sourdough bread. It’s a fantastic, naturally gluten-free alternative to a traditional wheat-based sourdough starter, offering a unique flavor profile and an easier entry point into the world of sourdough baking for those with gluten sensitivities.
Once fermented, the dosa batter can be stored conveniently in the refrigerator for several days. Remember to bring it back to room temperature before you plan to use it in this bread recipe, as warmth is essential for activating the yeast and ensuring a vigorous rise.
Beyond Gluten: A Bread for Every Diet
While many of us can enjoy conventional gluten-containing breads, there’s a special satisfaction in crafting a loaf that caters to diverse dietary needs without compromising on taste or texture. My husband and I often find ourselves devouring these gluten-free loaves without a second thought, and sometimes he doesn’t even realize it’s gluten-free! This particular recipe excels in creating a chewy, well-steamed bread that closely rivals the delightful characteristics of traditional artisan loaves, making it a truly satisfying experience for everyone.
One of the core philosophies behind my gluten-free bread recipes, including this sourdough, is to make them as accessible as possible. This loaf is intentionally free from common allergens and additives: no gums, nuts, soy, eggs, or dairy. This makes it an ideal choice for individuals managing multiple food sensitivities or those simply looking for cleaner, simpler ingredients in their baking. The dough, thanks to the steaming method, is incredibly forgiving, allowing for some flexibility in ingredients and handling without sacrificing the final result.
You can experiment with your choice of gluten-free flours. For instance, using half oats and half another gluten-free flour blend works beautifully. Similarly, any starch can be used, and a thick non-dairy cream or cream cheese can substitute for non-dairy yogurt. The key is to achieve a dough consistency that is neither too wet nor too dry after the initial rise. This adaptable dough isn’t just for sandwich loaves; it can be transformed into soft dinner rolls, rustic flatbreads, or even a delightful focaccia. When making dinner rolls, due to the soft, slightly mushy nature of the dough, they will benefit from the support of a baking pan’s walls to rise vertically and maintain their shape.
For more inspiration on gluten-free yeast breads, explore my collection of GF yeast breads here.
Above, you can see the batter just after mixing, a smooth and unified base for your delicious bread.
And here, the vibrant transformation after the first rise, indicating the yeast and dosa batter have done their magical work.
Gluten-Free Sourdough Bread
Ingredients
- 1/4 cup warm water
- 2 teaspoons raw sugar
- 1 teaspoon active dry yeast
- 1 Tablespoon non-dairy Greek yogurt, I used So Delicious coconut milk Greek yogurt, or use thick non-dairy cream or non-dairy cream cheese
- 1/4 cup fermented Dosa batter (at room temperature)
- 1/2 teaspoon salt
- a generous pinch of black salt, kala namak, optional for depth of flavor
- 1/2 cup finely ground gluten-free Oats, or half Oat flour and half other GF flour (e.g., brown rice, millet)
- 1/4 cup starch, I used Tapioca starch, but potato or corn starch work too
- 2 teaspoons apple cider vinegar
- a few Tablespoons ground Oats or starch for handling (as needed)
Instructions
- Activate Yeast: Warm the water to about 105-115°F (40-46°C). Add the yeast and raw sugar, mix gently, and let it sit for 8-10 minutes until it becomes frothy. This indicates the yeast is active.
- Combine Dry Ingredients: In a large bowl, thoroughly whisk together all the dry ingredients: gluten-free oats/flour, starch, salt, and black salt (if using). Ensure they are well combined.
- Prepare Wet Ingredients: In a separate bowl, lightly whisk the oil, non-dairy Greek yogurt (or substitute), apple cider vinegar, and the room-temperature fermented dosa batter until they are fully incorporated.
- Form the Dough: Pour the wet ingredient mixture and the activated yeast mixture into the bowl with the dry ingredients. Whisk everything together until just combined. At this stage, the “dough” will have a consistency closer to a stiff, thick batter rather than a traditional bread dough.
- First Rise: Cover the bowl and let the dough rise in a warm place for about 1.5 hours, or until it has noticeably doubled in size. The exact timing can vary depending on the ambient temperature and the vitality of your yeast.
- Dough Consistency Check: After the first rise, the oats will have absorbed more liquid, making the dough less batter-like but still quite sticky. This is normal for gluten-free yeast doughs.
- Prepare for Baking (Loaf): Add 1-2 Tablespoons of extra starch or ground oats to the dough to make it slightly less sticky and easier to handle. Carefully transfer the dough into a mini bread loaf pan (approx. 5.75 x 2.75 inches) that has been lined with parchment paper. Use a wet spatula or wet hands to gently spread and even out the top surface of the dough.
- Versatile Dough Applications:
- For Dinner Rolls: Combine starch and oats flour as needed. With lightly oiled hands, quickly form small balls (a few tablespoons each). Place these balls touching each other in a parchment-lined stoneware dish or a round cake pan if you plan to steam them. Refer to my GF Dinner rolls recipe for more details.
- For Flatbread: Gently pat the dough into oval shapes. Allow them to rise, then steam on the stovetop for about 10 minutes. Finish by grilling each side until golden and slightly puffed. See my GF Naan recipe for guidance.
- Prepare for Second Rise: Lightly spray the top of the loaf with water, then with a little oil, or gently dust with oat flour.
- Second Rise: Place the prepared loaf pan in a warm spot and let it rise again until doubled in size. This second rise typically takes 20-35 minutes.
- Baking Options: You can either steam this bread on the stovetop, similar to an oat sandwich loaf, or bake it in the oven as described below.
- Preheat Oven: Preheat your oven to 400°F (200°C).
- Create Steam Bath: Place a larger pan (I used a white stoneware pan, but any oven-safe pan will work) on the bottom rack of your oven. Carefully pour boiling water into this larger pan, about 1 to 1.5 inches high. This creates a steamy environment crucial for a soft, chewy gluten-free bread crust.
- First Bake (Steamed): Place your bread loaf pan into the larger pan with boiling water. Cover the entire setup (the larger pan with the bread pan inside) tightly with aluminum foil. Pierce a small hole in the center of the foil to allow a little steam to escape. Bake for 30 minutes.
- Second Bake (Crust Development): After 30 minutes, carefully remove the aluminum foil and lift the bread pan out of the larger pan. Place the bread pan directly on a regular oven rack. Continue to bake for another 10-15 minutes, or until your desired crust color and crispness are achieved.
- Cooling: Once baked, remove the bread from the oven and carefully take it out of the loaf pan. Let it cool on a wire rack for at least half an hour before slicing. This cooling period is vital for the bread’s structure to set.
- Serving & Storage: This bread is truly at its best when toasted or served warm. It retains its delightful moisture for 2-3 days. Since steamed breads typically have a higher moisture content than regular baked breads, it’s recommended to store it in the refrigerator to prolong its freshness.
Notes
Nutrition
Carbohydrates: 8g,
Protein: 1g,
Sodium: 151mg,
Potassium: 32mg,
Sugar: 1g,
Calcium: 3mg,
Iron: 0.3mg
Nutrition information is automatically calculated, so should only be used as an approximation.
Did you make this recipe? Rate and comment below!
Baking Tips for Gluten-Free Sourdough Success
Working with gluten-free dough can sometimes feel different from traditional baking, but with a few tips, you’ll master this recipe in no time. The steaming method employed here is particularly beneficial for gluten-free breads. It introduces moisture and helps create a soft, pliable crumb that often eludes gluten-free loaves baked in a dry oven. This process prevents the bread from drying out and becoming too dense, which can be common with alternative flours.
- Room Temperature Batter: Always ensure your fermented dosa batter is at room temperature. Cold batter will slow down or inhibit yeast activity, affecting your rise.
- Warm Environment for Rising: Gluten-free doughs, especially sourdoughs, love warmth. Find a cozy, draft-free spot for your dough to rise. A slightly warm oven (turned off, with just the light on) or a proofing box can work wonders.
- Don’t Over-Mix: While gluten-free dough doesn’t develop gluten, over-mixing can still lead to a tough texture. Mix only until the ingredients are just combined.
- Adjust Flour/Starch as Needed: The consistency of dosa batter can vary. If your dough feels too wet after the first rise, add a tiny bit more ground oats or starch until it’s manageable but still soft.
- Parchment Paper is Your Friend: Gluten-free dough can be sticky. Lining your loaf pan with parchment paper makes for easy removal and cleanup.
- Cool Completely: Resist the urge to slice into your warm bread immediately. Cooling allows the internal structure to set, preventing a gummy texture and ensuring clean slices.
- Storage: Steamed breads are naturally moist. Store any leftovers in an airtight container in the refrigerator for up to 3-4 days to maintain freshness. This bread also freezes beautifully; slice it before freezing for quick toaster access.
Embrace the Joy of Homemade Gluten-Free Sourdough
There’s immense satisfaction in baking your own bread, and even more so when it caters to specific dietary needs while tasting utterly delicious. This gluten-free sourdough bread, with its airy texture and delightful tang derived from fermented dosa batter, is a testament to inventive and inclusive baking. It proves that living gluten-free doesn’t mean sacrificing the pleasure of a perfectly crafted loaf.
This airy sourdough bread is proudly shared at a variety of communities dedicated to allergy-friendly and wholesome eating. You can find more inspiration and connect with fellow bakers at: Glutenfree Wednesdays, Allergyfree Wednesdays, Ricki’s Wellness Weekend, Hearth and Soul Blog Hop, Slightly Indulgent Tuesdays, Amme’s Fit and Fab Friday, and Cybelle Pascal’s Allergy Friendly Fridays. Additionally, it has been featured in Susan’s Weekly Yeastspotting.
Whether you’re making sandwiches, toast, or simply enjoying a slice with your favorite spread, this gluten-free sourdough bread made with dosa batter is sure to become a cherished recipe in your kitchen. Experiment with fermentation times for a milder or bolder sour flavor, and don’t hesitate to adapt the flour blend to your liking. Happy baking!