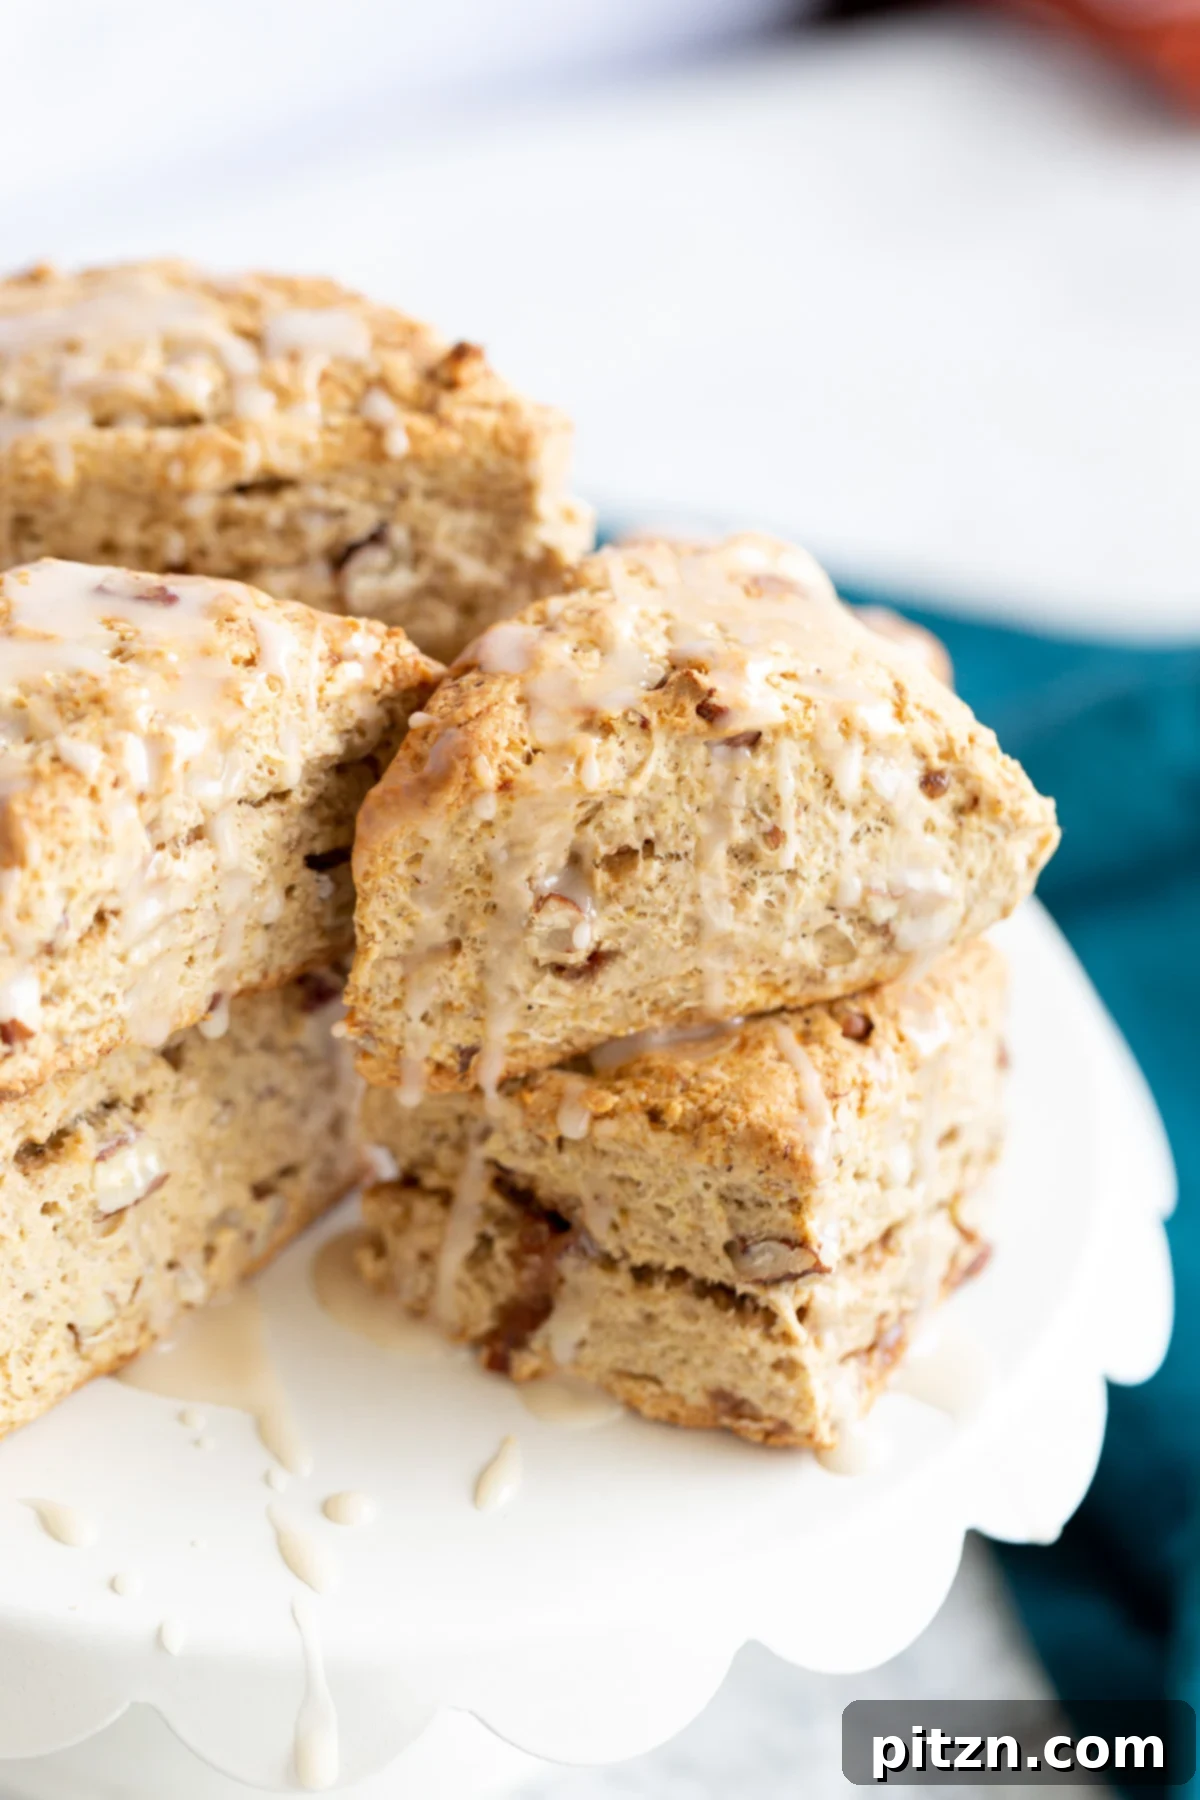
Welcome to the world of irresistibly flaky and tender Vegan Banana Scones! Imagine a golden-crusted treat that tastes like your favorite banana bread, elevated with warming cinnamon, fragrant vanilla, and delightfully toasted nuts. This isn’t just a recipe; it’s an invitation to a wholesome baking experience, designed to be completely oil-free. We also offer fantastic options for those seeking gluten-free or nut-free alternatives, ensuring everyone can enjoy these delectable delights. Jump to Recipe
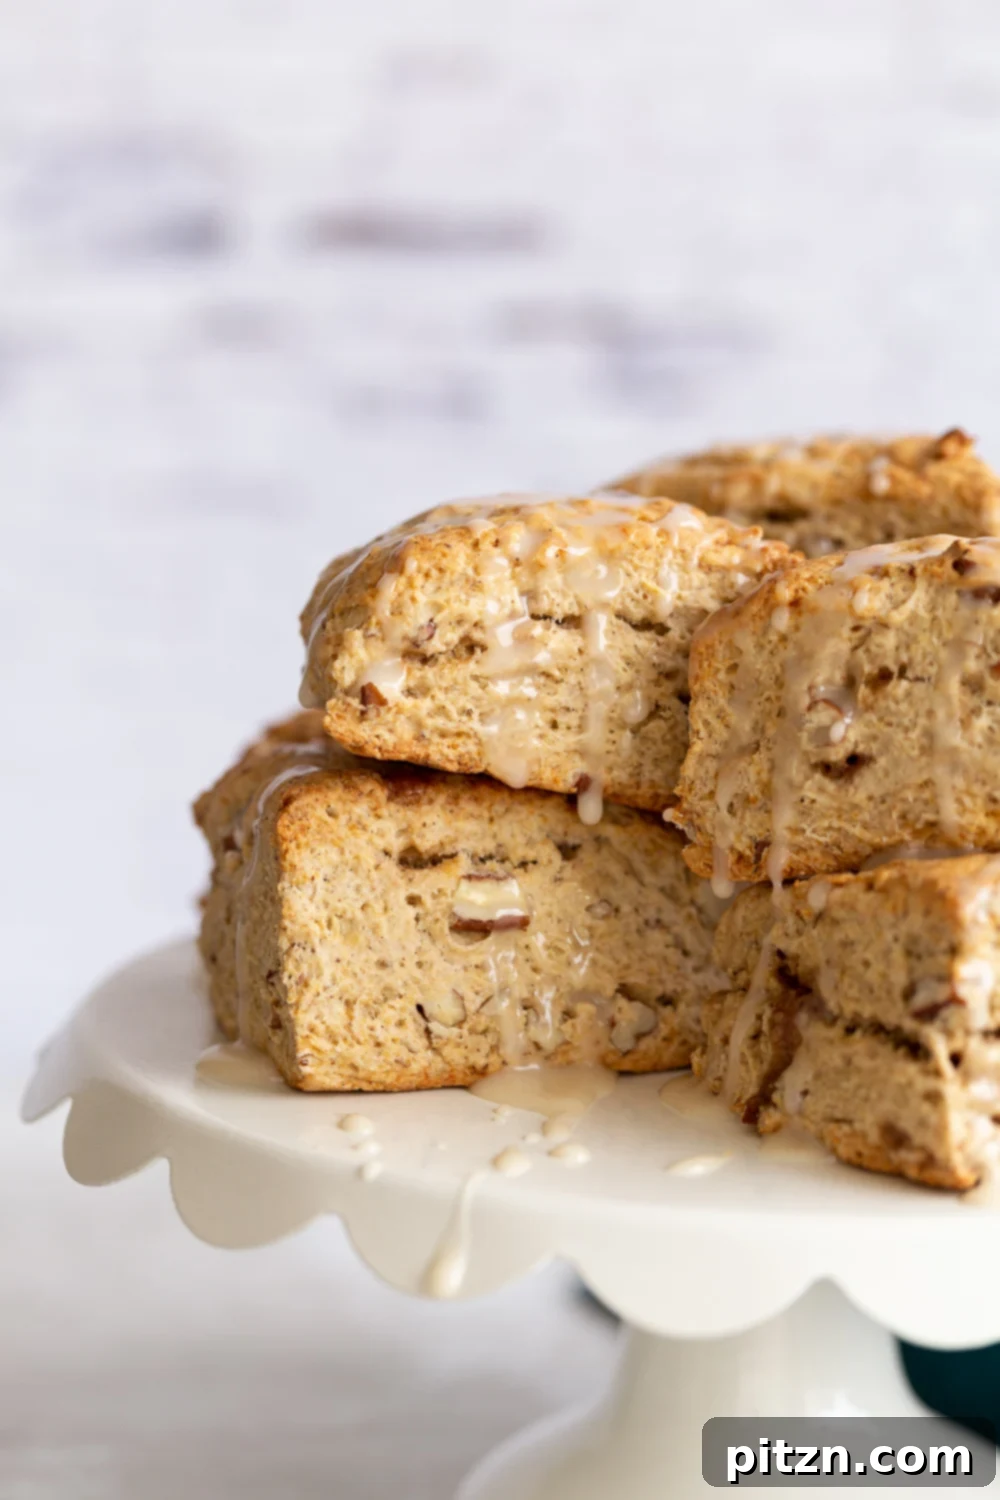
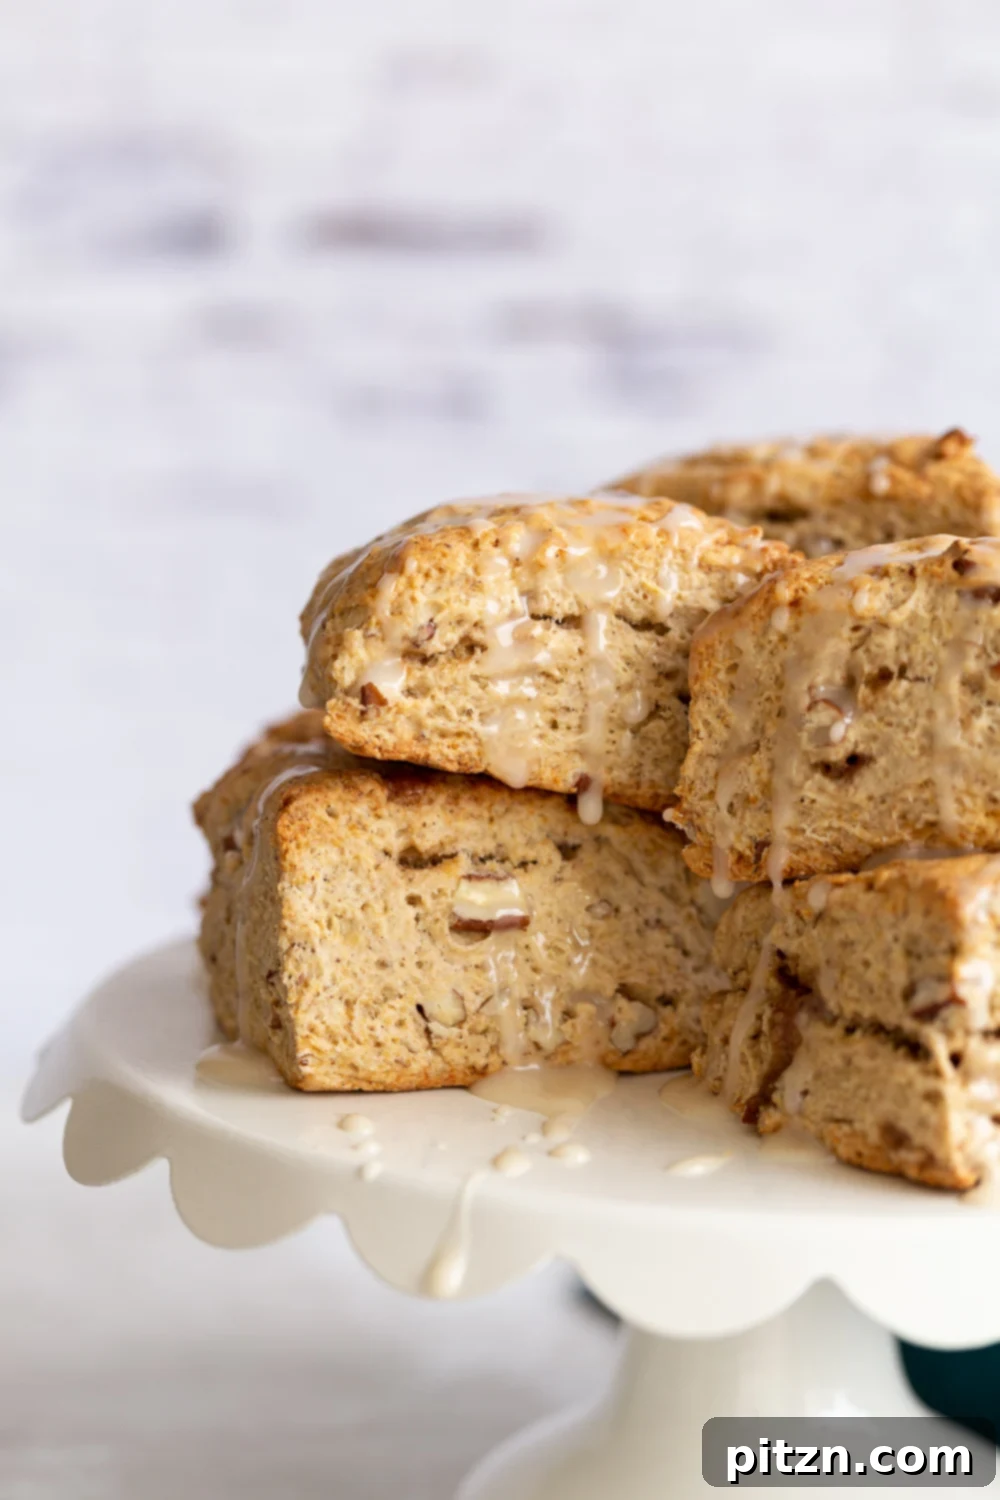
Indulge in Vegan Banana Scones: Perfect for Breakfast, Snack, or Dessert
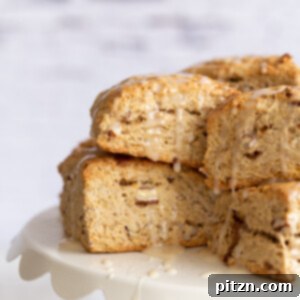
Prepare to be amazed by these utterly delicious vegan scones, crafted to achieve that quintessential balance of density, exquisite flake, and tender crumb, all crowned with a signature golden, crispy crust. These aren’t just any scones; they’re a celebration of flavor and texture, designed to satisfy your cravings at any time of day. Whether you’re starting your morning, enjoying an afternoon snack, or seeking a sweet finish to your meal, these banana scones deliver a truly delightful experience that you will want to revisit again and again.
What transforms these vegan banana scones from merely good to outrageously delicious? It’s a combination of thoughtful techniques and complementary ingredients. Foremost among them are the caramelized bananas. This simple yet transformative step unlocks a depth of sweetness and richness that elevates the entire scone, infusing it with a truly complex and inviting flavor. I frequently incorporate caramelized bananas into my baking, as they add an unparalleled dimension to sweet treats. If this delightful flavor profile excites you, be sure to explore my Vegan Banana French Toast, Caramelized Banana Granola Bars, or these indulgent Banana Bread Chia Puddings with Caramelized Banana Coconut. Each recipe showcases the magic that caramelized fruit brings to the table, turning ordinary dishes into extraordinary delights.
Beyond the irresistible caramelized bananas, we infuse these scones with classic banana bread spices – primarily warm cinnamon and pure vanilla extract – along with the satisfying crunch of chopped nuts. The result is a scone that boasts a complex flavor profile, rich in comforting notes. To recap, these vegan banana scones are a triumph: they are wonderfully flaky, generously packed with the natural sweetness of banana and the earthy texture of nuts. The interior is supremely tender, contrasting beautifully with the crusty and crispy exterior. They offer a perfect sweetness that isn’t cloying, making them a truly irresistible treat that is both light and satisfying. All in all, these oil-free, vegan banana bread scones are a total win, proving that plant-based baking can be both simple and spectacularly flavorful.
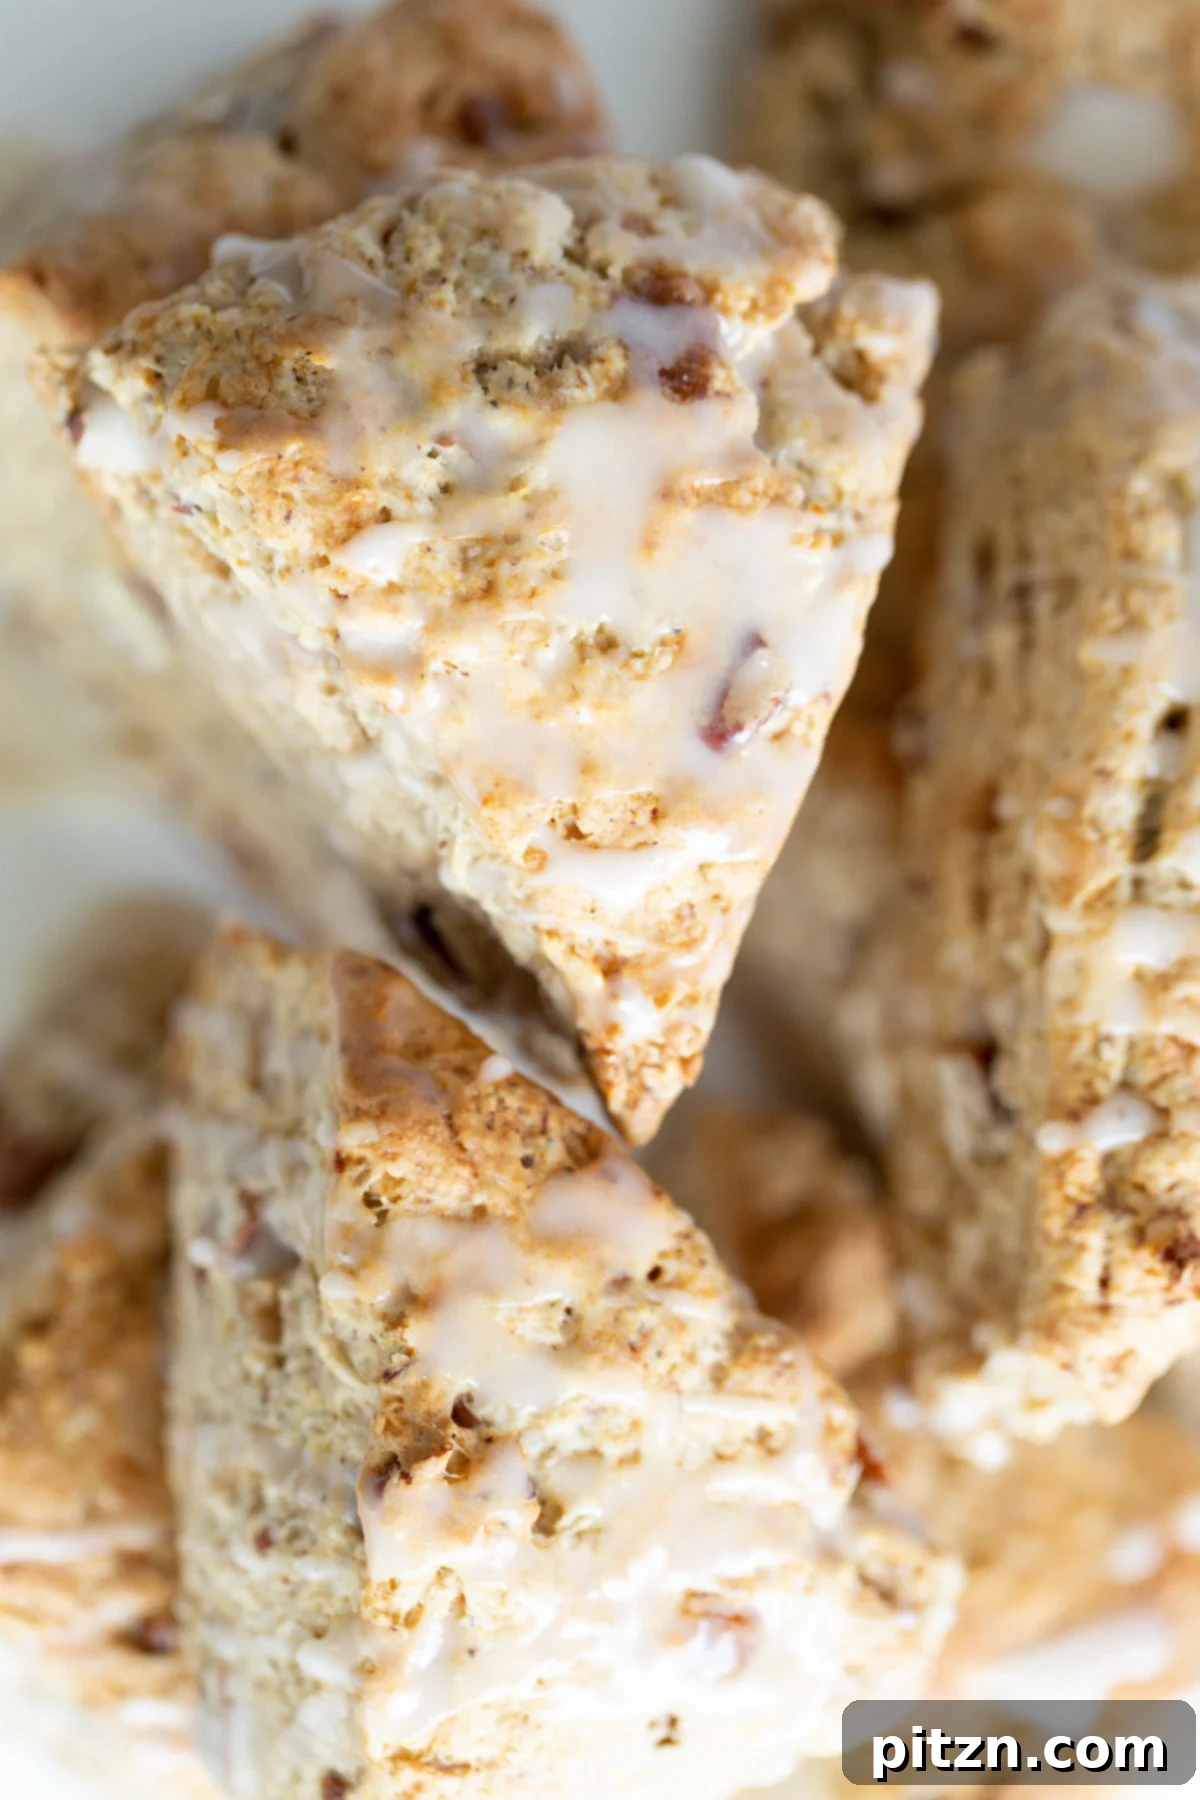
Vegan Banana Scones Recipe Card
Vegan Banana Scones
By: Vegan Richa
Prep Time: 15 mins
Cook Time: 18 mins
Total Time: 33 mins
Servings: 8 scones
Course: Breakfast, Brunch, Snack
Cuisine: American
Print Recipe
Vegan Banana Scones that are beautifully flaky and tender, featuring a delightful golden crust and the comforting taste of banana bread, thanks to warming cinnamon, vanilla, and perfectly toasted nuts! This recipe is designed to be oil-free, with easy options for gluten-free and nut-free dietary needs.
Ingredients
- 2 medium ripe bananas
- 1/4 cup brown sugar (or regular cane sugar + 1 tsp molasses with wet ingredients), divided
- 1 tsp ground cinnamon, divided
- 1/2 tsp vanilla extract
- 2 cups all-purpose flour (for best texture, use 1.5 cups all-purpose and 1/2 cup whole wheat flour)
- 2 tbsp almond flour (can be omitted for nut-free)
- 2 tsp baking powder
- 1/4 tsp baking soda
- 1/3 cup chopped pecans or walnuts (omit for nut-free, or substitute with chocolate chips/dried fruit)
- 1/2 tsp salt
- 1 cup full-fat canned coconut milk (ensure at least 1/3 cup is coconut cream; chill the can for a few hours before using)
Instructions
- Caramelize the bananas: Begin by slicing the bananas. Heat a skillet over medium heat, then add the sliced bananas, 2 tablespoons of the brown sugar, half of the cinnamon, and 1 teaspoon of coconut milk. Mix gently and cook until the banana slices start to turn golden and slightly caramelized. This process typically takes about 5 to 6 minutes. Once caramelized to your liking, remove them from the heat and allow them to cool completely. Caramelizing the bananas not only enhances their natural sweetness and flavor depth but also helps prevent the scones from becoming too cake-like in texture, ensuring a pleasant, firm structure.
- Prepare your baking area: Preheat your oven to 435 degrees F (223 degrees C). This high initial temperature is crucial for a good rise and golden crust. Line a baking sheet or oven-safe dish with parchment paper to prevent sticking and ensure easy cleanup.
- Combine dry ingredients: In a large mixing bowl, thoroughly whisk together the flour (your chosen blend), almond flour (if using), baking powder, and baking soda. Ensure these leavening agents are well distributed to guarantee an even rise. Then, add the remaining brown sugar, chopped pecans or walnuts (if using), salt, and the rest of the cinnamon and vanilla extract. Mix everything together gently until just combined.
- Form the dough: Pour 3/4 cup of the chilled, thick coconut cream/milk into the dry ingredients. Using a fork or a pastry blender, gently cut the liquid into the flour mixture. This technique mimics cutting in butter, creating pockets of fat that yield a flaky texture. The mixture will initially appear very dry. Next, add the cooled caramelized bananas and continue to cut them into the mixture with the fork. Gradually, the ingredients will come together, forming coarse, buttery crumbs that eventually resemble a shaggy dough. If the mixture still feels too dry, add another tablespoon of coconut milk, one at a time, until the dough just starts to cohere. Be careful not to over-hydrate the dough.
- Shape and slice the scones: Once the dough begins to form, use a spatula or your hands to quickly bring it together. Avoid overworking the dough, as this can lead to tough scones. Gently shape the dough into a cohesive disc on a lightly floured surface. The disc should be at least 3/4 inches (about 2 cm) thick to ensure a good rise. Using a pizza cutter or a sharp chef’s knife, carefully slice the disc into 6 to 8 triangular pieces, much like cutting a pizza. This classic scone shape ensures even baking.
- Bake the scones: Carefully transfer the triangular scone pieces onto the prepared baking sheet, ensuring they are spaced slightly apart to allow for even heat circulation. Bake in the preheated oven for 17 to 18 minutes, or until the scones are beautifully golden brown on top and cooked through. The golden color indicates a perfectly baked exterior.
- Cool and serve: Once baked, remove the scones from the oven and transfer them to a wire rack to cool slightly. These vegan banana scones are delightful served warm or at room temperature. Enjoy them plain, or consider adding a simple glaze for an extra touch of sweetness, or perhaps a dollop of vegan whipped cream or jam.
Notes and Pro Tips
- Spice it up: For an enhanced spice profile beyond cinnamon, consider adding 1/8 teaspoon of freshly ground nutmeg or 1/8 teaspoon of ground cloves to the dry ingredients. These warm spices complement the banana and cinnamon beautifully without overwhelming the flavor. They can add a more complex, autumnal note.
- Banana ripeness is key: Always use very ripe, spotty bananas for this recipe. Riper bananas are naturally sweeter, softer, and more aromatic, contributing to a more intense banana flavor and moist texture in your scones. The natural sugars also caramelize more effectively.
- Coconut milk matters: For the best results and flakiest texture, it is crucial to use full-fat canned coconut milk. The high-fat content of the coconut cream (the solid part that separates when chilled) mimics butter, providing richness and tenderness without added oil. Chill the can for several hours, or even overnight, to ensure the cream separates and solidifies. This step is non-negotiable for achieving truly flaky, tender vegan scones.
- Nut-free option: To make these scones completely nut-free, simply omit the almond flour and the chopped pecans or walnuts. The recipe will still be delicious and flavorful. If you desire additional texture and flavor, you can substitute the nuts with an equal amount of vegan chocolate chips, dried cranberries, or finely chopped dried apricots.
- Easy glaze: For an extra touch of sweetness and a beautiful finish, prepare a simple glaze. In a small bowl, whisk together 2-3 tablespoons of full-fat coconut milk (the thinner liquid part from the can works well here) and 1/2 cup of confectioners’ sugar until completely smooth. Adjust the consistency by adding a little more sugar for a thicker glaze or a few drops more coconut milk if it’s too thin. Drizzle this delightful glaze over your scones while they are still slightly warm, allowing it to set beautifully.
- Gluten-free adaptation: To make these scones gluten-free, substitute the wheat flour blend with a specific gluten-free flour mix. A good combination is 1/2 cup oat flour (or white rice flour), 1 1/4 cups almond flour, and 1/3 cup potato starch. Use 1 3/4 cups of this combined gluten-free mix in place of the regular flour. This blend offers a good balance of texture and moisture.
- GF flour considerations: Gluten-free flours tend to absorb more moisture and can result in a drier product. To counteract this and achieve a deliciously tender gluten-free scone, you might want to add 2 tablespoons of vegan butter or solid refined coconut oil to the dry ingredients, cutting it in before adding the coconut milk and bananas. Once baked, it’s recommended to cool gluten-free scones under a clean kitchen towel and store them in an airtight container to help maintain their moisture. Oat flour is often preferred for muffins and scones in gluten-free baking, as rice flour can sometimes lead to a drier texture, making oat flour a more forgiving choice.
- With added oil (optional): If you prefer to add a little extra richness and don’t mind using oil, you can include 2-4 tablespoons of vegan butter or solid refined coconut oil. Cut this into the dry ingredients along with the coconut cream. If using added oil, you may use any low-fat non-dairy milk (such as almond, soy, or oat milk) instead of the full-fat coconut milk, though full-fat coconut milk will still yield a superior texture and flavor profile.
Nutrition (per serving, 8 servings total)
Nutrition information is an approximation and may vary based on ingredients and preparation methods.
- Calories: 263 kcal
- Carbohydrates: 40 g
- Protein: 5 g
- Fat: 10 g
- Saturated Fat: 6 g
- Sodium: 192 mg
- Potassium: 354 mg
- Fiber: 2 g
- Sugar: 11 g
- Vitamin A: 19 IU
- Vitamin C: 3 mg
- Calcium: 81 mg
- Iron: 3 mg
Exploring the Ingredients: Crafting the Perfect Vegan Banana Scone
Creating extraordinary vegan banana scones starts with understanding the role each ingredient plays. This recipe is thoughtfully designed to maximize flavor and texture, while offering flexibility for various dietary preferences. Here’s a closer look at what goes into these delightful treats and why each component is essential for achieving that perfect scone:
- Ripe Bananas: The Heart of the Scone
These aren’t just for flavor; ripe, spotty bananas are essential for natural sweetness and contribute significantly to the moistness and tender crumb of the scones. Their inherent sugars caramelize beautifully, deepening the overall taste. The riper your bananas, the more pronounced and delicious the banana flavor will be, mimicking that beloved banana bread aroma that everyone enjoys. They also add a natural binding quality, reducing the need for other fats or binders. - Brown Sugar: A Touch of Sweetness and Depth
We use brown sugar not just for its sweetness, but also for its subtle molasses notes, which complement the banana and cinnamon perfectly. Its slightly moist texture also contributes to a softer scone. Since ripe bananas provide a good amount of natural sweetness, we don’t need excessive sugar, keeping the scones light. If you only have regular cane sugar, you can achieve a similar depth by adding 1 teaspoon of molasses along with your wet ingredients, replicating that rich, caramel-like note. - Warming Spices: Cinnamon & Vanilla Extract
These aren’t just “banana bread spices”; they are the soul of comforting baked goods. Cinnamon brings warmth, a classic aroma, and a hint of spice that pairs exquisitely with banana. Vanilla extract, meanwhile, enhances all the other flavors, adding a layer of sophisticated sweetness and a comforting fragrance. Together, they create that irresistible, homely scent and taste that defines these wonderfully fragrant scones, making every bite a delight. - Flour Blend: The Foundation of Texture
For the ideal scone texture – flaky yet tender – all-purpose white flour works exceptionally well. However, for a richer flavor, a slightly chewier crumb, and a touch of wholesome goodness, I highly recommend a blend of 1.5 cups all-purpose flour and 0.5 cup whole wheat flour. The whole wheat adds a subtle nuttiness and increased fiber, contributing to a more complex texture and making the scones a bit heartier. This blend strikes a perfect balance between light and substantial. - Almond Flour: For Added Richness (Optional, but Recommended)
Just two tablespoons of almond flour significantly enhance the scone’s texture by adding a bit more fat and moisture. It contributes to a more tender crumb, a slightly richer flavor, and a delicate chewiness. This subtle addition makes a noticeable difference in the overall mouthfeel. If you need to make these scones completely nut-free, simply omit the almond flour without needing a direct substitute; the scones will still be delicious, just slightly less rich. - Rising Agents: Baking Powder and Baking Soda
These dynamic duos are crucial for giving our scones their impressive lift and airy, fluffy texture. Baking powder works rapidly to create initial pockets of air, while baking soda reacts with the acidic components present in the recipe (like brown sugar or molasses, and even the bananas themselves) to create extra rise and tenderness during baking. Ensuring they are fresh is vital for optimal results, so always check the expiration dates! - Chopped Pecans or Walnuts: The Crunchy Counterpoint
Adding chopped pecans or walnuts introduces a delightful crunch and enhances the “banana bread” character of these scones. Their earthy, toasted flavor pairs wonderfully with the sweet bananas and warming spices, adding a pleasant textural contrast to the tender scone. Feel free to use either nut, or a mix, depending on your preference. For a nut-free version, simply leave them out or replace them with vegan chocolate chips or dried fruit for a different kind of texture and sweetness. - Salt: The Flavor Enhancer
A small amount of salt is vital in any baked good. It doesn’t just add saltiness; it balances the sweetness, sharpens the spice flavors, and makes all the other ingredients truly sing, bringing out their best characteristics. Don’t skip it, as it’s the secret to a well-rounded flavor profile that keeps you coming back for more. - Full-Fat Canned Coconut Milk: The Vegan “Secret Weapon”
This is perhaps the most important ingredient for achieving that classic scone flakiness and richness without dairy butter or added oil. When chilled, the thick coconut cream (which naturally rises to the top of the can) can be cut into the flour mixture just like cold butter, creating those desirable pockets of richness that steam during baking and result in flaky layers. It’s absolutely essential to use full-fat canned coconut milk and to chill the can for at least a few hours (or overnight) to allow the cream to separate and solidify. Aim for at least 1/3 cup of thick coconut cream from the can. This ingredient makes all the difference in achieving tender, moist, and wonderfully flaky vegan scones.
Expert Tips & Smart Substitutions for Your Vegan Banana Scones
Achieving the perfect vegan banana scones is easier than you think with these helpful tips and substitution options. Tailor this recipe to your dietary needs and taste preferences with confidence, and elevate your baking skills with these insights!
- Elevate Your Spice Profile: While cinnamon and vanilla are core to the banana bread flavor, consider deepening the spice experience for an even more complex and aromatic scone. Adding 1/8 teaspoon of freshly ground nutmeg or 1/8 teaspoon of ground cloves alongside the cinnamon will introduce a more sophisticated, warming aroma reminiscent of traditional holiday baking. These subtle additions can significantly enhance the overall flavor without overwhelming the star, banana, and create a truly memorable scone.
- Embrace the Speckled Banana: The ripeness of your bananas is not merely a suggestion; it’s a key ingredient that impacts both flavor and texture. Bananas that are heavily spotted or even slightly brown are ideal. They are significantly sweeter, softer, and more aromatic, imparting a richer, more authentic banana flavor to your scones. Under-ripe bananas will result in less flavor, a drier texture, and will not caramelize as effectively, so patiently wait for those perfect speckled beauties!
- The Power of Canned Coconut Milk: For that truly flaky, tender scone texture without dairy butter or added oils, full-fat canned coconut milk is non-negotiable. The solid, chilled coconut cream acts much like cold butter when cut into the dry ingredients, creating pockets that steam and expand, leading to a wonderful flaky texture during baking. Do not substitute with carton coconut milk or other thin plant-based milks, as they lack the necessary fat content to create this effect. Always chill the can for several hours or overnight to ensure maximum cream separation and solidification.
- Customize Your Crunch (Nut-Free & Beyond): If you need to make these delicious scones completely nut-free, simply omit the almond flour and the chopped pecans or walnuts from the recipe. The scones will still be wonderfully flavorful and tender. For those who love a textural contrast but prefer to avoid nuts, consider stirring in an equal amount of vegan chocolate chips, dried cranberries, chopped dates, or even a mix of dried fruits. These additions add bursts of flavor and chewiness that complement the banana beautifully, offering a different yet equally delightful experience.
- The Simple Sweet Glaze: A quick glaze can transform your scones into an even more indulgent and visually appealing treat. To make one, simply whisk 2-3 tablespoons of full-fat coconut milk (the thinner liquid part from the can works well here) with 1/2 cup of confectioners’ sugar in a small bowl until completely smooth. Adjust the consistency by adding a little more confectioners’ sugar for a thicker glaze or a few drops more coconut milk for a thinner, elegant drizzle. Drizzle this delightful glaze over your scones while they are still slightly warm, allowing it to set into a beautiful, sweet finish that adds an extra layer of deliciousness.
How to Master Making These Flaky Vegan Banana Scones
Making delicious vegan banana scones is a straightforward process, but a few key steps ensure a perfect result every time. Follow these instructions carefully to create flaky, tender, and incredibly flavorful scones that will impress everyone:
Step 1: Caramelize Your Bananas for Deep Flavor
The first crucial step is caramelizing the bananas, which significantly deepens their flavor and sweetness, transforming them into a rich, sweet component. Begin by slicing your medium bananas into uniform pieces. In a skillet, combine the sliced bananas with 2 tablespoons of brown sugar, half of the cinnamon (approximately 1/2 teaspoon), and 1 teaspoon of coconut milk. Cook this mixture over medium heat, stirring occasionally, until the banana slices soften and begin to turn golden brown and slightly sticky. This caramelization process usually takes about 5 to 6 minutes, intensifying their natural sugars. Once they reach your desired level of golden goodness, remove them from the heat and allow them to cool completely. This step is vital as it prevents the scones from having a raw banana taste and ensures a richer, more complex banana bread-like flavor, while also helping to maintain a pleasant, firm texture in the final baked good.
Step 2: Prepare Your Baking Environment
While your caramelized bananas are cooling, take this opportunity to prepare your oven and baking sheet. Preheat your oven to a robust 435 degrees F (223 degrees C). This high initial temperature is essential because it helps the scones rise quickly and develop that coveted golden, crisp crust on the outside while remaining tender within. Line a sturdy baking sheet or oven-safe dish with parchment paper. This simple step will prevent your scones from sticking to the pan, ensures easy cleanup, and aids in promoting even baking across all your scone pieces.
Step 3: Combine the Dry Ingredients for the Scone Base
In a large mixing bowl, meticulously measure and combine all your dry ingredients. This includes the flour blend (all-purpose and whole wheat, if using, as specified in the ingredients list), almond flour (if you are including nuts), baking powder, and baking soda. Use a whisk to thoroughly combine them, ensuring that the leavening agents are perfectly and evenly distributed throughout the flour mixture. This even distribution is absolutely critical for a consistent and impressive rise. Next, stir in the remaining brown sugar, chopped pecans or walnuts (if using), salt, and the rest of the cinnamon and vanilla extract. Mix gently until all these dry components are just incorporated, being careful not to overmix at this stage.
Step 4: Incorporate Wet Ingredients and Form the Dough
Now, it’s time to bring your scone dough to life. Take 3/4 cup of your deeply chilled, full-fat coconut cream/milk and add it to the dry mixture. Remember, the colder the coconut cream, the flakier your scones will be. Using a fork or a dedicated pastry blender, begin to “cut” the liquid into the flour. This technique is crucial as it helps distribute the fat (from the coconut cream) evenly without overmixing, which is key for developing that desirable flaky texture. The mixture will initially appear quite dry and crumbly. Next, add your cooled caramelized bananas and continue the “cutting in” process with the fork. As you work, the mixture will gradually transform from dry crumbs into larger, “fat” crumbs, and eventually begin to resemble a shaggy dough. If the dough still feels too dry to come together, add an additional tablespoon of coconut milk, one at a time, until the dough just starts to cohere. Exercise caution not to add too much liquid, as this can result in dense, rather than flaky, scones.
Step 5: Shape and Slice Your Scones
Once the dough has formed and is just cohesive enough, transfer it to a lightly floured surface. Work quickly and gently, using a spatula or your hands, to bring the dough together into a unified mass. Avoid excessive kneading or handling, as the warmth from your hands can melt the precious cold coconut cream, and overworking the gluten can lead to tough scones. Gently shape the dough into a disc that is at least 3/4 inches (about 2 cm) tall. Maintaining this height is important for a good rise and a substantial scone. Using a pizza cutter or a sharp chef’s knife, carefully slice the dough disc into 6 to 8 uniform triangular pieces. This classic scone shape not only ensures even baking but also offers a beautiful, rustic presentation.
Step 6: Bake Until Golden Perfection
Carefully transfer the triangular scone pieces onto your prepared baking sheet, ensuring you leave a small space between each scone. This allows for even airflow and proper baking on all sides. Place the baking sheet into your preheated 435 degrees F (223 degrees C) oven. Bake for approximately 17 to 18 minutes, or until the scones have risen significantly, are beautifully golden brown on top, and feel firm to the touch. The rich golden crust is a visual indicator of perfectly baked scones, promising a delightful texture and flavor.
Step 7: Cool and Savor Your Homemade Vegan Scones
Once baked to golden perfection, remove the cookie sheet from the oven. Let the scones cool on the baking sheet for a few minutes before carefully transferring them to a wire rack to cool completely. Cooling on a wire rack allows air to circulate around the entire scone, preventing the bottoms from becoming soggy and maintaining their crispness. These freshly baked vegan banana scones are absolutely delicious enjoyed warm, perhaps with a comforting cup of coffee or tea. You can enjoy them as they are, letting their natural banana bread flavor shine, or take them to the next level with a delightful glaze, a dollop of vegan butter, or your favorite fruit jam for an extra layer of indulgence.
How to Store Vegan Scones for Lasting Freshness
Proper storage is key to enjoying your delicious vegan banana scones for as long as possible. Whether you’ve just baked them or are planning ahead, here’s how to keep them fresh and flavorful:
- Storing Freshly Baked Scones: The most crucial step for freshly baked scones is to allow them to cool completely on a wire rack before attempting to store them. Trapped steam will lead to soggy scones, compromising their flaky texture. Once fully cooled, you can store them, covered with a clean kitchen towel, directly on your countertop for up to 1 day. For slightly extended freshness at room temperature, place them in an airtight container where they will remain fresh and delicious for up to 2-3 days.
- Refrigeration: If you need to extend their shelf life beyond a few days, vegan banana scones can be refrigerated in a closed airtight container for up to 5 days. When you’re ready to enjoy them, reheat them gently in a toaster oven at a low temperature for a few minutes or in the microwave for a few seconds. This helps to restore some of their warmth and tender texture, making them almost as good as fresh.
- Freezing Unbaked Scones: The Ultimate Prep-Ahead Hack! This method is perfect for having fresh, warm scones on demand with minimal effort. You can prepare the scone dough as directed, shape it into triangles, and then freeze the unbaked scones for up to a month. To do this, arrange the cut scones on a baking sheet lined with parchment paper and freeze until solid (this usually takes about 1-2 hours). Once solid, transfer them to a freezer-safe airtight container or bag, separating layers with parchment paper to prevent sticking. When you’re ready to bake, simply remove them from the freezer and let them thaw on the counter for about 10 minutes while your oven preheats. Then, bake as directed in the recipe – they might need an extra 1-2 minutes of baking time due to starting from frozen.
- Freezing Baked Scones: If you have leftover baked scones, they can also be frozen for up to a month. Once completely cooled, wrap individual scones tightly in plastic wrap, then place them in a freezer-safe bag or container. To enjoy, thaw them on the counter for about an hour. For best results and to regain that delightful crust, reheat them gently in a preheated oven (around 300°F/150°C) for 5-10 minutes until warmed through, which helps crisp up the exterior again. Avoid reheating in the microwave for too long, as this can make them tough.
More Irresistible Vegan Scone & Biscuit Recipes to Try
If you’ve fallen in love with these Vegan Banana Scones, you’re in for a treat! Our collection of plant-based baked goods extends to even more delightful scones and biscuits that are perfect for any occasion, from cozy breakfasts to elegant brunches. Explore these other fantastic recipes, many of which are also oil-free and offer gluten-free options, allowing you to continue your journey into delicious and wholesome vegan baking:
- Apple Cinnamon Scones(No Oil, Low Fat): A cozy classic, these scones are bursting with the comforting flavors of apple and cinnamon, perfect for autumn mornings or any time you crave a warm, spiced treat.
- Vegan Pumpkin Scones with Pumpkin Caramel Glaze(No Oil): Indulge in the spiced sweetness of pumpkin, beautifully complemented by a luscious pumpkin caramel glaze. A seasonal favorite that’s rich in flavor without the added oil.
- Churro Scones(No Oil): Experience the fun and irresistible flavor of churros in a convenient scone form, all without the added oil. These sweet, cinnamon-sugar coated scones are a unique and delightful twist.
- Vegan Biscuits(No Oil): Light, fluffy, and completely oil-free – these versatile biscuits are perfect for savory meals, sweet pairings with jam, or as a base for vegan cream gravy.
- Jalapeno Cheddar Biscuits(GF): For those who love a bit of a kick, these spicy and cheesy (vegan!) biscuits offer a delightful savory option, carefully crafted with a gluten-free twist for broader enjoyment.
- Vegan Pumpkin Cornbread(1 Bowl): A simple, comforting cornbread recipe with a delightful hint of pumpkin, made easily in just one bowl for minimal cleanup. Perfect as a side or a light meal.
- Vegan Pumpkin Biscuits: Earthy sage pairs beautifully with the sweet notes of pumpkin in these savory-leaning biscuits, making them an excellent accompaniment to stews, soups, or holiday meals.