
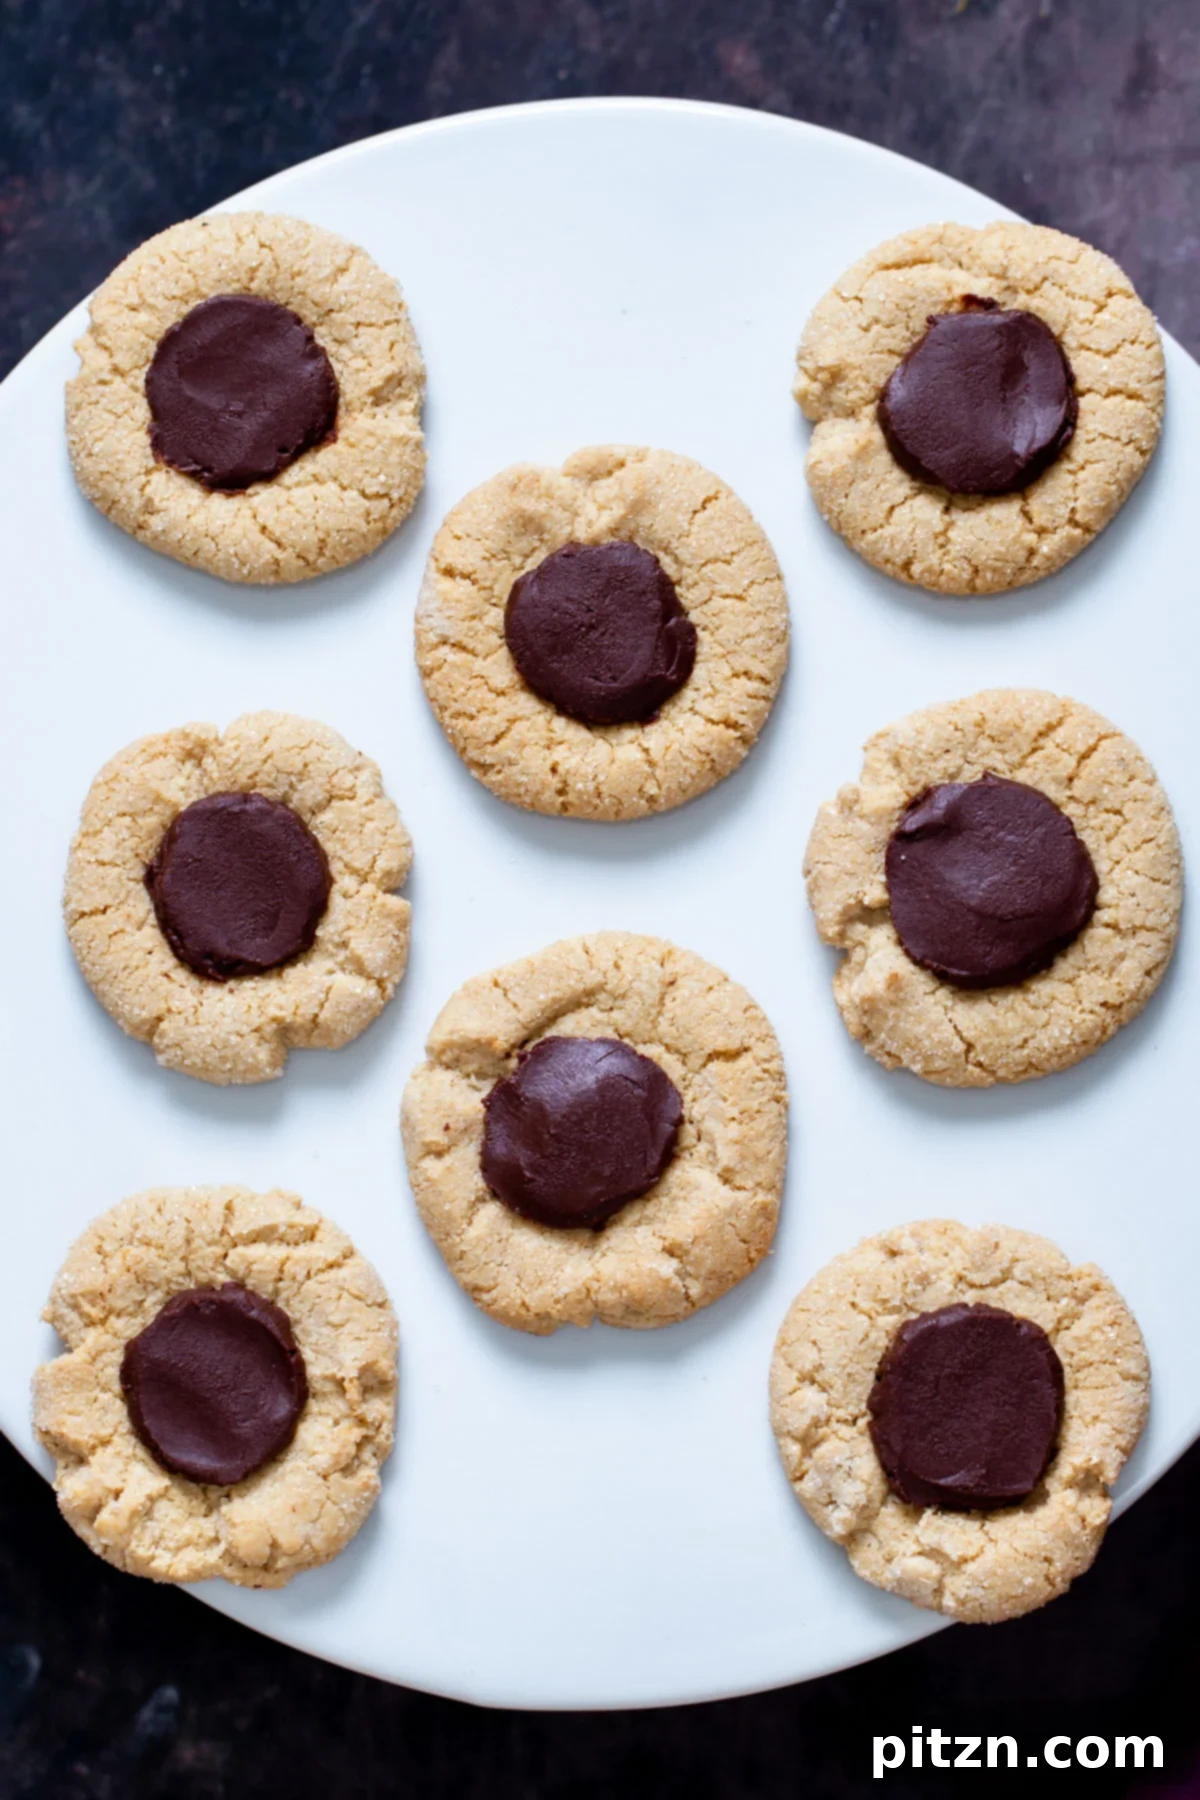
Discover the ultimate indulgence with these Vegan Gluten-Free Chocolate Thumbprint Cookies. Crafted with a delicate blend of almond and oat flours, naturally sweetened with maple syrup, and featuring a rich, velvety chocolate center, these cookies offer an irresistible texture without being overly sweet. Perfect for holiday platters or a delightful everyday treat, with a grain-free option available.
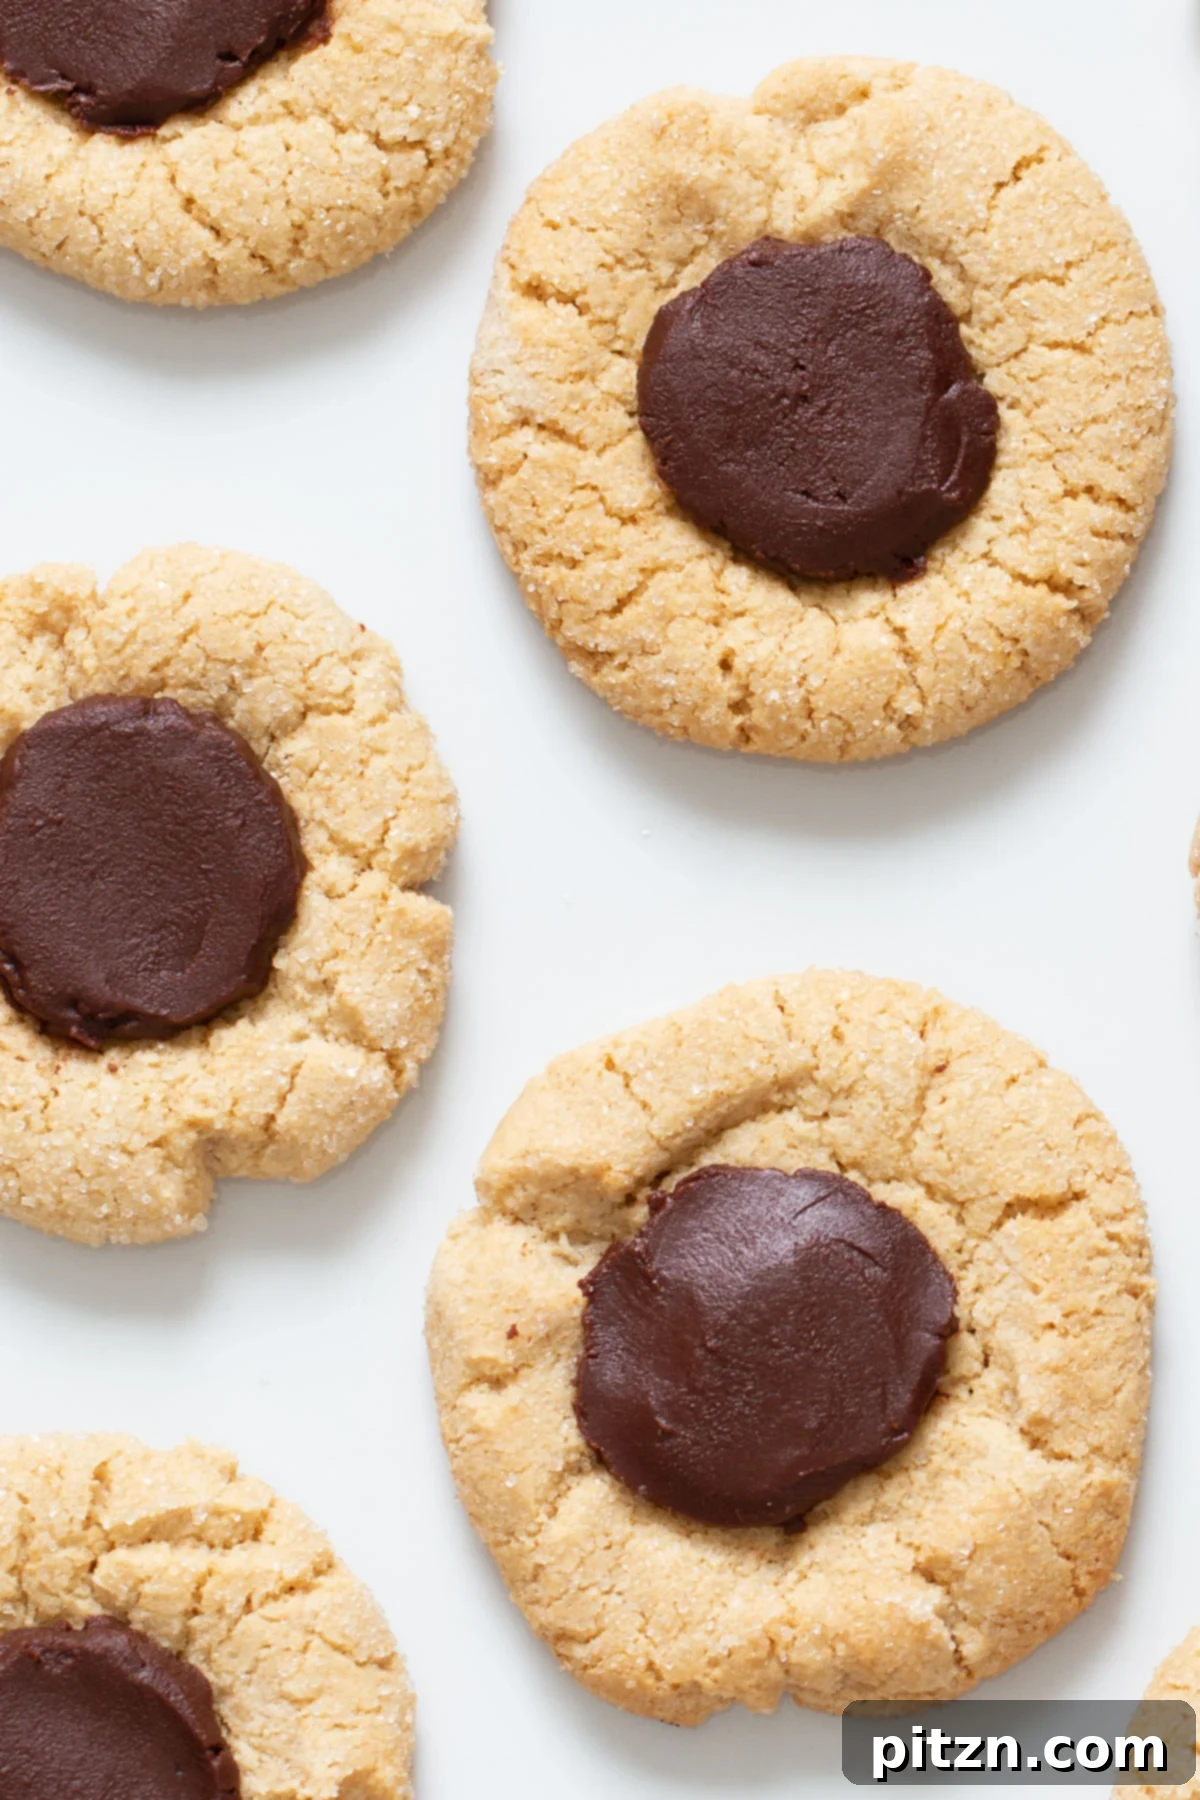
Thumbprint cookies hold a special place in our hearts, especially during the festive holiday season. Their charm lies in their simple yet satisfying appeal, making them a delightful addition to any celebration. However, we believe these particular Vegan Gluten-Free Chocolate Thumbprint Cookies transcend seasonal boundaries, proving themselves to be an exquisite snack year-round. While many traditional thumbprint cookies rely on fruit jams for their signature indentation, our recipe takes a luxurious turn with a smooth, fudgy chocolate center that pairs exceptionally well with a warm cup of coffee or tea. What truly sets these cookies apart is their thoughtful formulation: they are entirely gluten-free, crafted from a harmonious blend of almond flour, oat flour, and a touch of tapioca starch, ensuring a wonderful texture and flavor that everyone can enjoy.
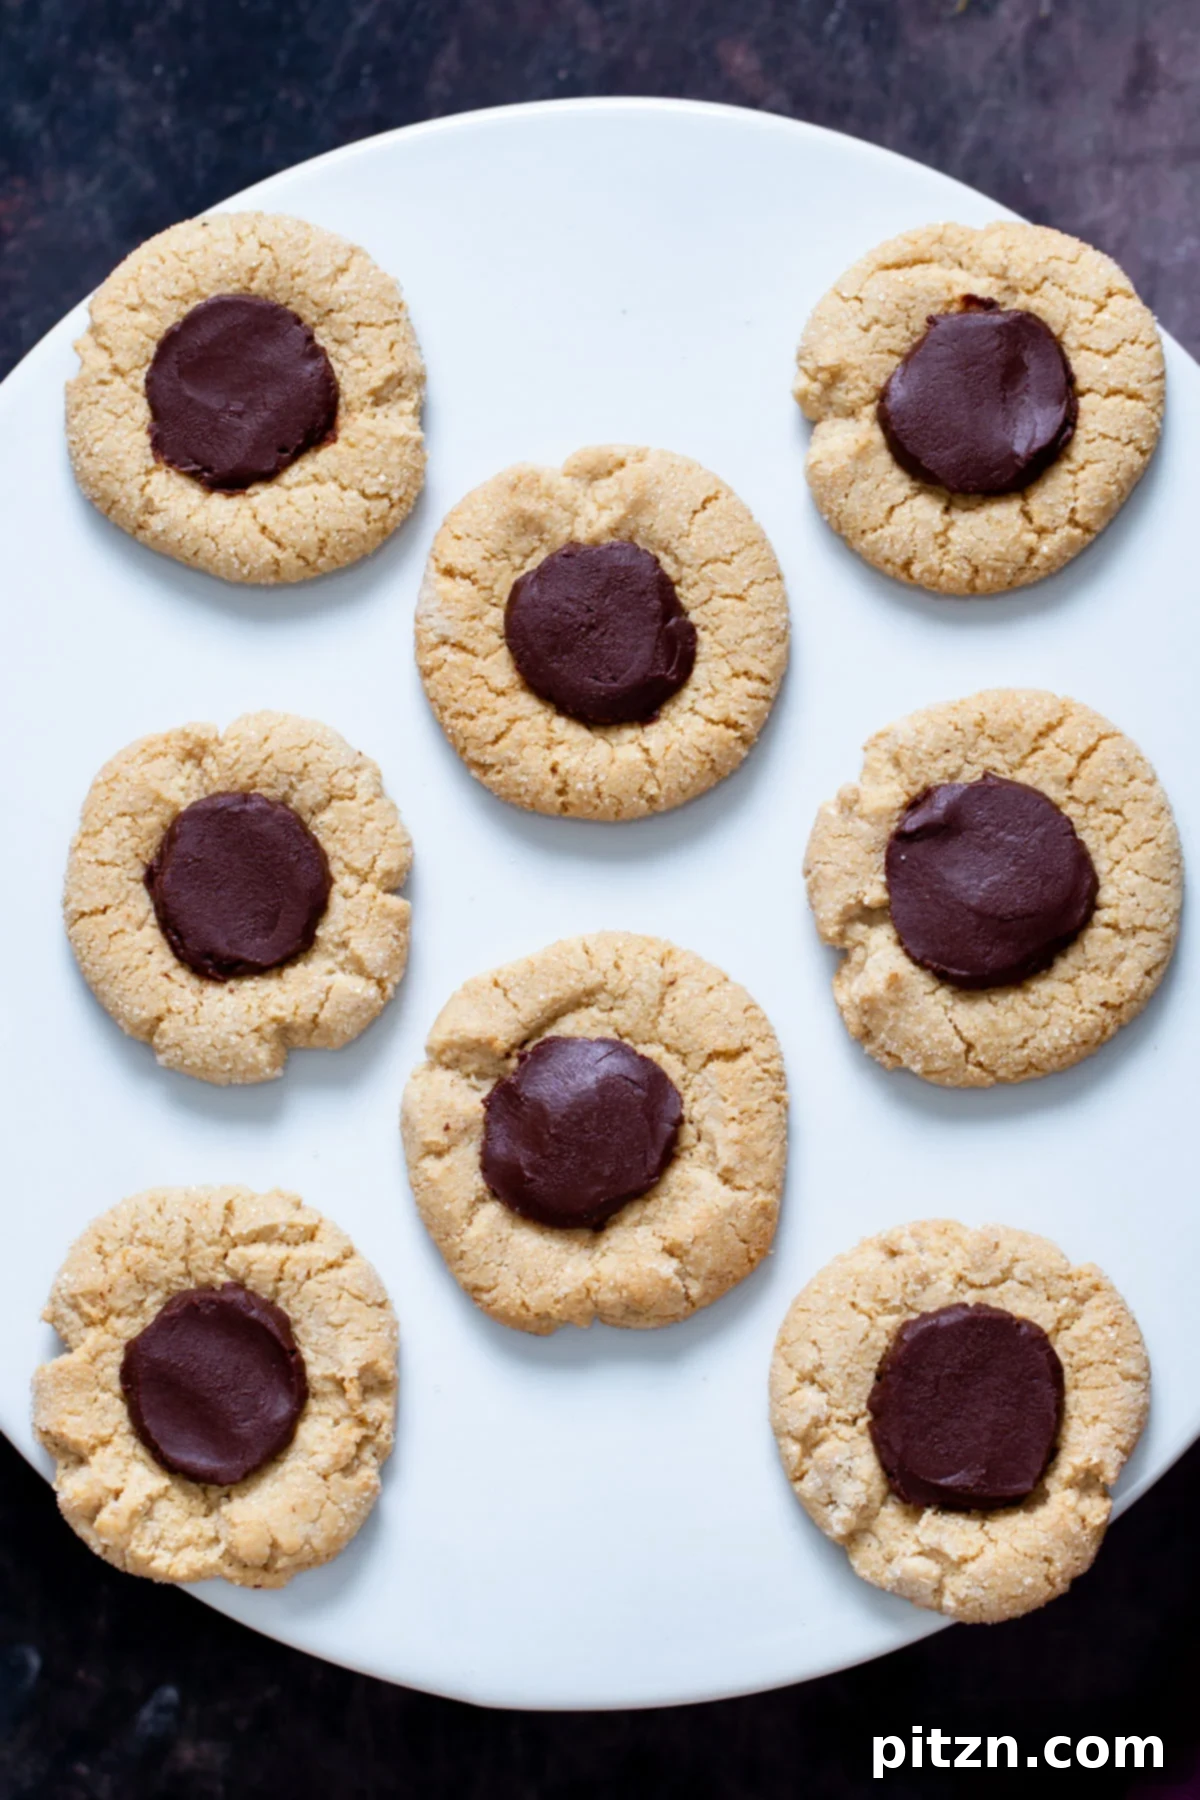
Having explored various vegan thumbprint cookie recipes on our blog, including beloved options like our PB&J Thumbprint Cookies, this chocolate-filled version has quickly risen to become a new favorite. The balance in these cookies is truly remarkable. They strike the perfect note of sweetness—not overly sugary, allowing the rich flavors of the almond and chocolate to shine through. The texture is another highlight; fresh from the oven, they boast a delightful crispness and crumbly tenderness, evolving into a subtly chewy treat once cooled. This evolving texture means there’s a perfect cookie for every preference – some love them warm and soft, others adore the satisfying chewiness after they’ve cooled. Regardless of your preference, their texture is simply addictive!
Beyond their incredible taste and texture, these cookies are surprisingly easy to make. The cookie dough comes together in just a few minutes, requiring minimal effort. Once prepared, a brief 15-minute chill in the refrigerator is all that’s needed before you can effortlessly portion, shape, and bake your way to these delightful treats. This quick and straightforward process makes them an ideal choice for last-minute baking or for getting kids involved in the kitchen. It’s a recipe designed for enjoyment, both in the making and the tasting.
Why You’ll Love These Vegan Gluten-Free Chocolate Thumbprint Cookies
- Perfectly Balanced Sweetness: Unlike many overly sweet cookies, these thumbprints offer a subtle sweetness that allows the natural flavors of the almond flour and rich chocolate filling to truly stand out.
- Irresistible Texture: Enjoy a delightful contrast of textures – a crisp, crumbly exterior that gives way to a soft, tender interior, especially when warm. As they cool, they develop a satisfying chewiness.
- Effortlessly Vegan & Gluten-Free: Made with plant-based ingredients and a thoughtful blend of almond, oat, and tapioca flours, these cookies are naturally vegan, dairy-free, egg-free, and gluten-free, catering to various dietary needs without compromising on flavor or texture.
- Quick & Easy Preparation: The dough comes together in minutes and requires only a short chilling time, making these cookies a fantastic option for impromptu baking sessions or busy schedules.
- Versatile for Any Occasion: While they shine on a holiday cookie platter, their timeless appeal makes them perfect for everyday snacking, lunchbox treats, or a thoughtful homemade gift.
- Rich Chocolate Filling: A smooth, fudgy dark chocolate center replaces traditional jam, offering a sophisticated and decadent twist that chocolate lovers will adore.
- Adaptable Recipe: Easy to customize with different fillings (though they won’t be chocolate thumbprints anymore!) or adapted for an oil-free or grain-free diet.

More Delicious Vegan Cookie Recipes to Explore:
- Chocolate Tahini Cookies (Gluten-Free)
- Cinnamon Roll Cookies
- Best Palm Oil-Free Chocolate Chip Cookies
- Pistachio Cookies
- Lemon Chia Cookies
- Gluten-Free Ginger Molasses Cookies
- Ginger Tahini Cookies
Gluten-Free Chocolate Thumbprint Cookies (Vegan)
By: Vegan Richa
Cook: 15 mins
Total: 35 mins
Servings: 12 cookies
Course: Dessert, Snack
Cuisine: American
These Vegan Gluten-Free Chocolate Thumbprint Cookies are a delightful addition to any cookie platter. Made with almond and oat flours, sweetened with maple syrup, and filled with smooth chocolate, they offer an addictive texture and just the right amount of sweetness.

Print Recipe
Ingredients
Dry Ingredients:
- 1 cup almond flour (blanched almond flour is preferable for a finer crumb)
- 3 tablespoons tapioca starch
- 2 tablespoons oat flour (for a grain-free option, use 1.5 tablespoons coconut flour instead, or use all-purpose flour for a non-GF version)
- 1/8 teaspoon baking soda
- 1/8 teaspoon salt
- 2 tablespoons powdered sugar (optional, add if you prefer sweeter cookies)
Wet Ingredients:
- 1 tablespoon semi-solid refined coconut oil
- 1/2 teaspoon vanilla extract
- 3 tablespoons maple syrup (ensure it’s at room temperature)
For Rolling the Cookies:
- 1 tablespoon cane sugar
For the Chocolate Filling:
- 2 ounces vegan semi-sweet chocolate chips or chocolate chunks (approximately 1/3 cup)
- 2 teaspoons coconut oil
- 2 teaspoons maple syrup
- A pinch of cinnamon or a drop of vanilla extract (for flavor enhancement)
- A good pinch of salt (to balance and enhance chocolate flavor)
Instructions
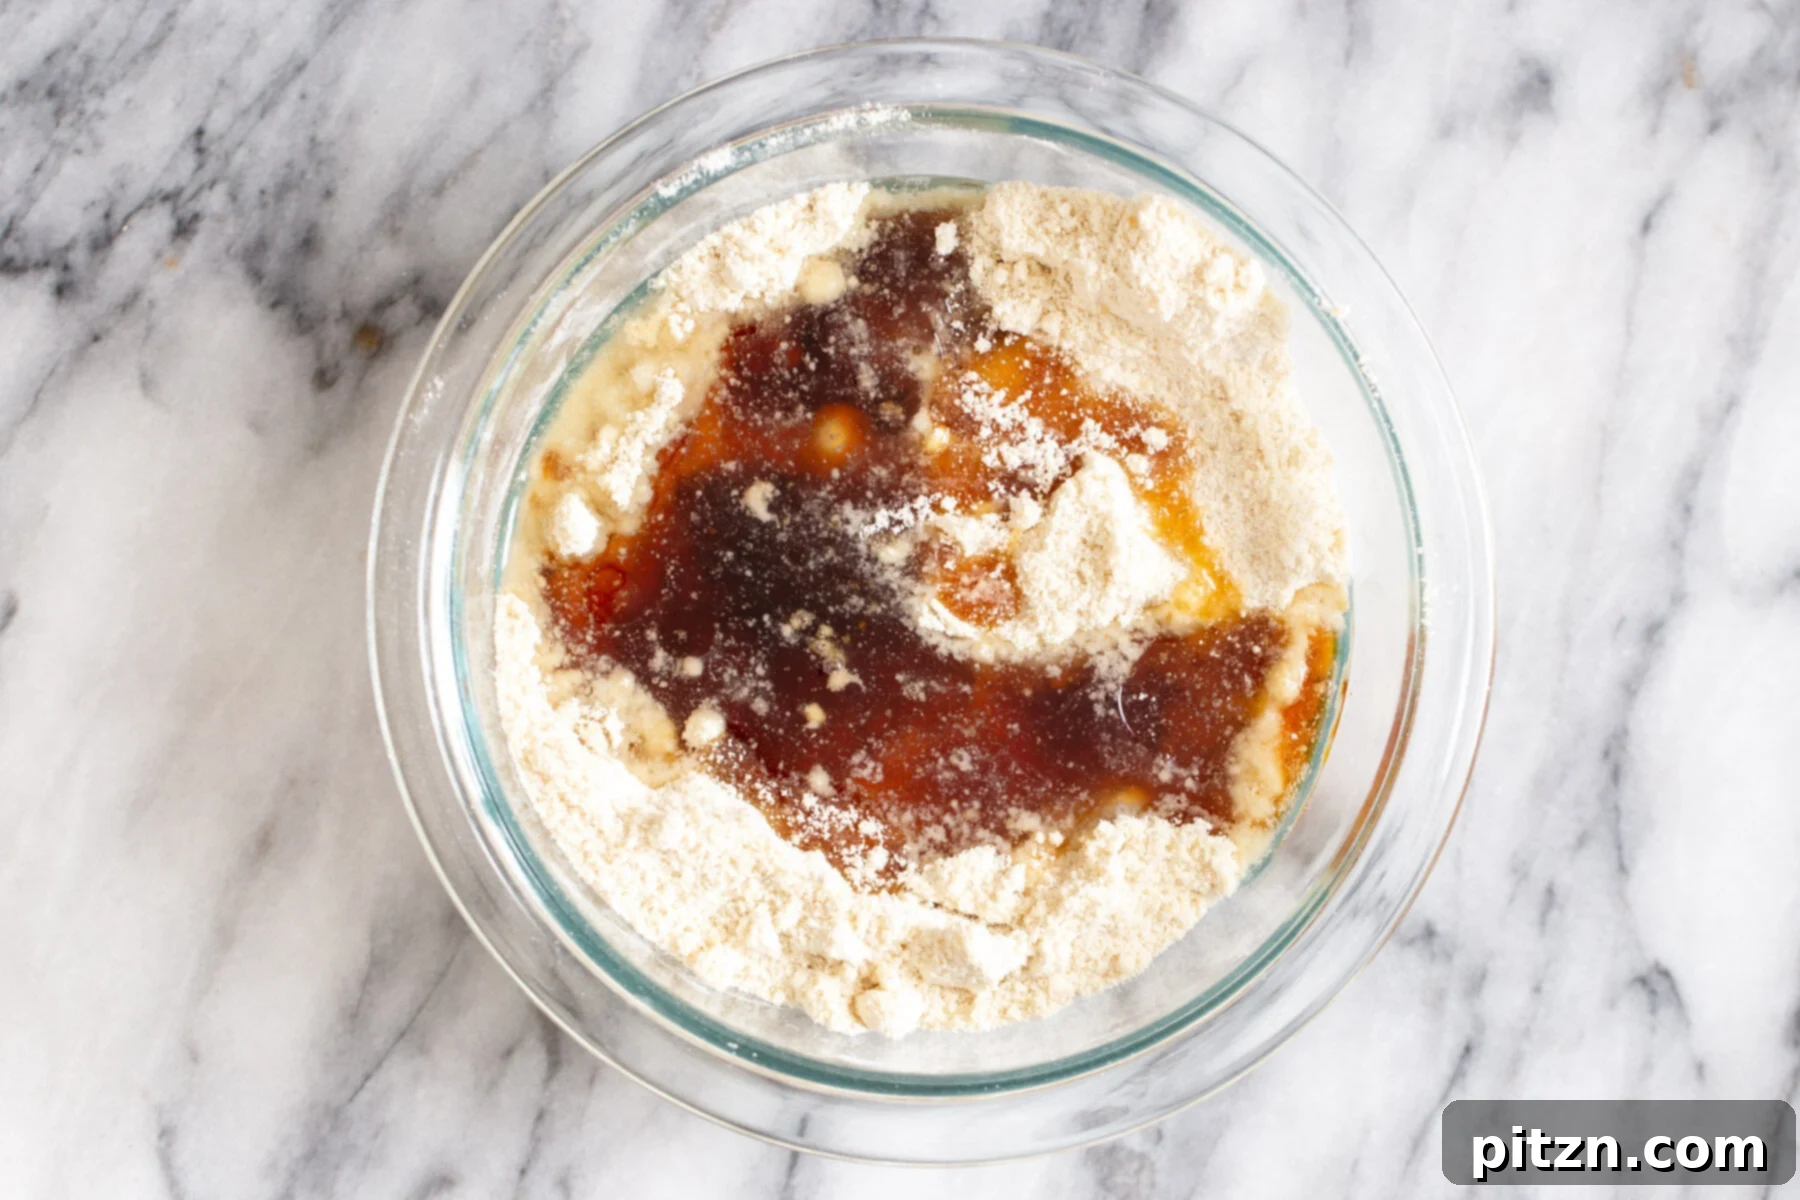
- In a large bowl, combine all the dry ingredients for the cookies (almond flour, tapioca starch, oat flour, baking soda, salt, and powdered sugar if using). Mix thoroughly to ensure even distribution.
- Melt the coconut oil until it’s liquid but not hot. Add the melted coconut oil, vanilla extract, and room temperature maple syrup to the dry ingredients. Mix everything well until a cohesive dough forms.
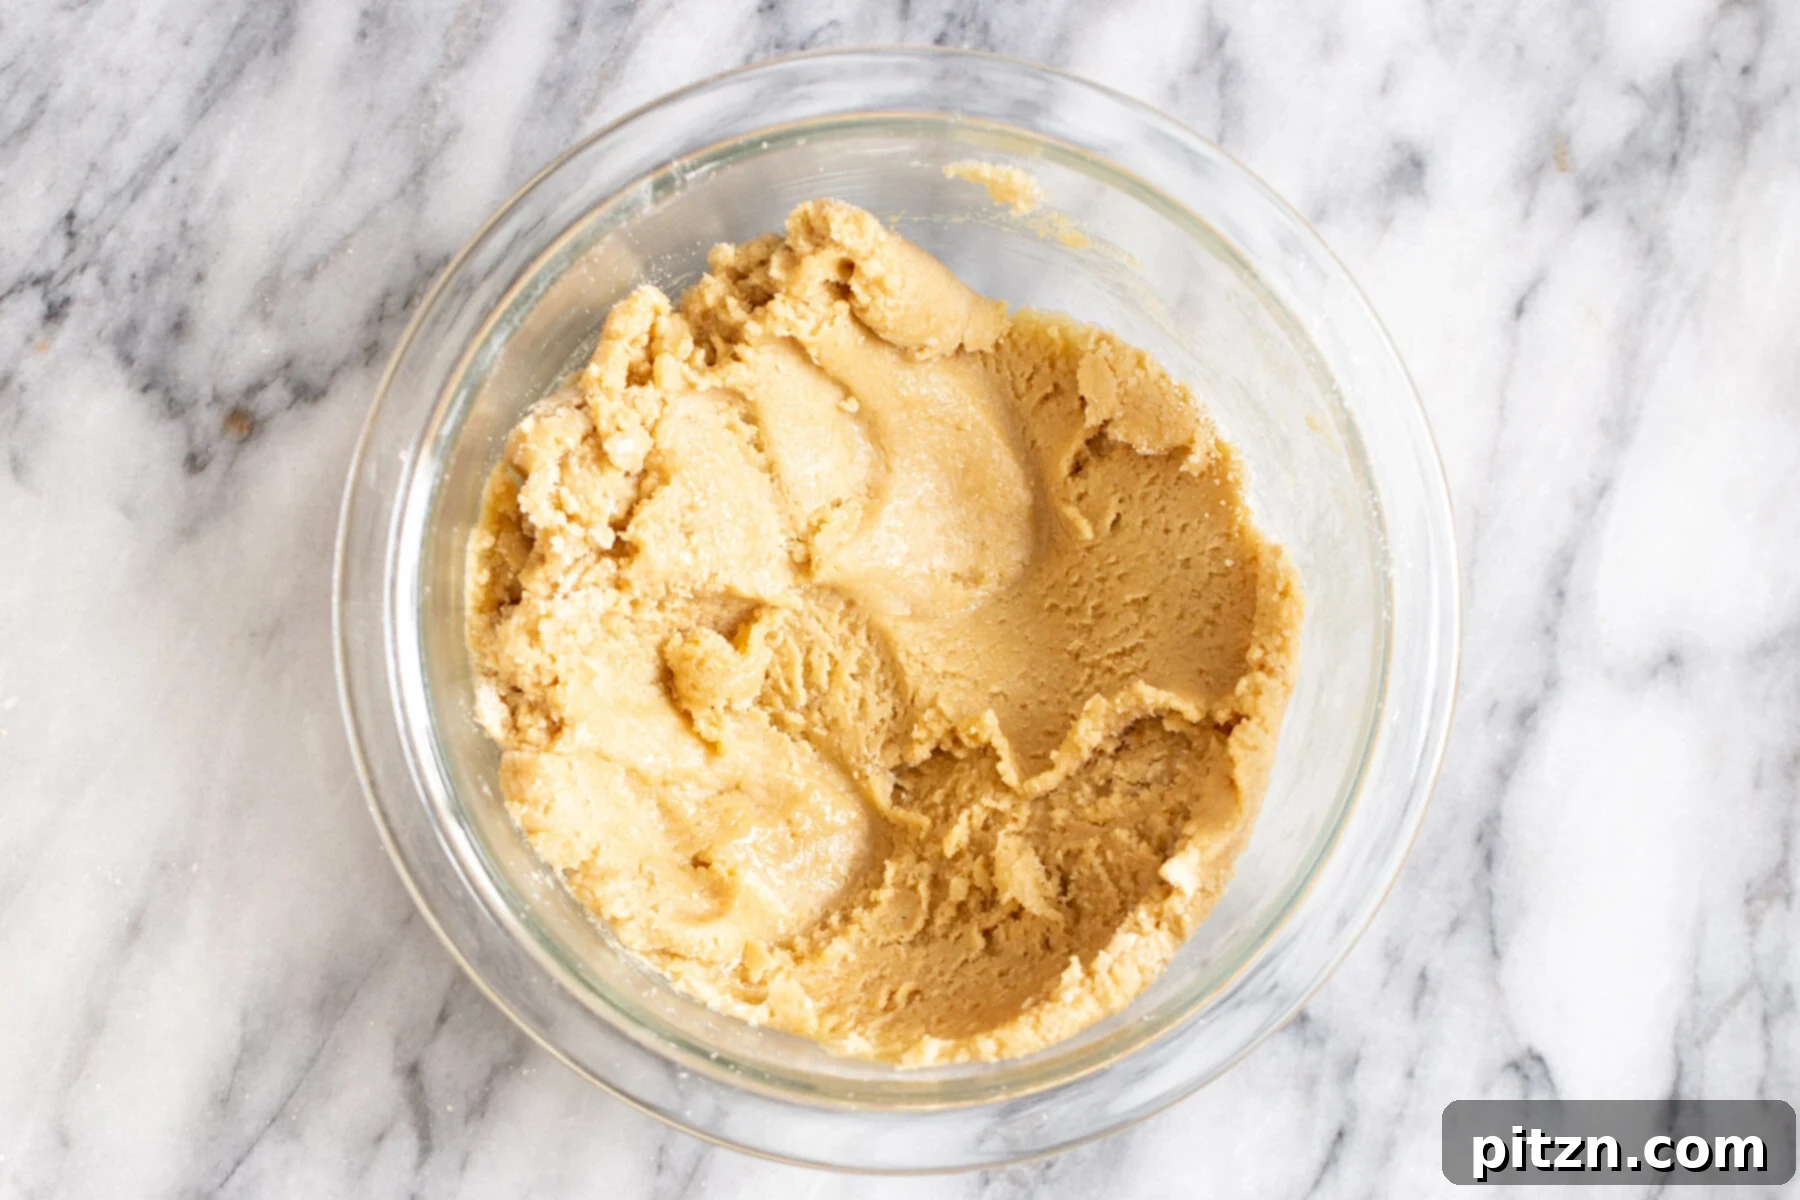
- Check the dough’s consistency. If it appears too crumbly, add an additional teaspoon or so of maple syrup and mix until it comes together smoothly. Once ready, refrigerate the dough for at least 15 minutes to firm up.
- Preheat your oven to 330°F (165°C) and line a baking sheet with parchment paper.
- Remove the chilled dough from the fridge. Use a cookie scoop (or your hands) to portion out equal-sized scoops of dough and place them on the prepared baking sheet.
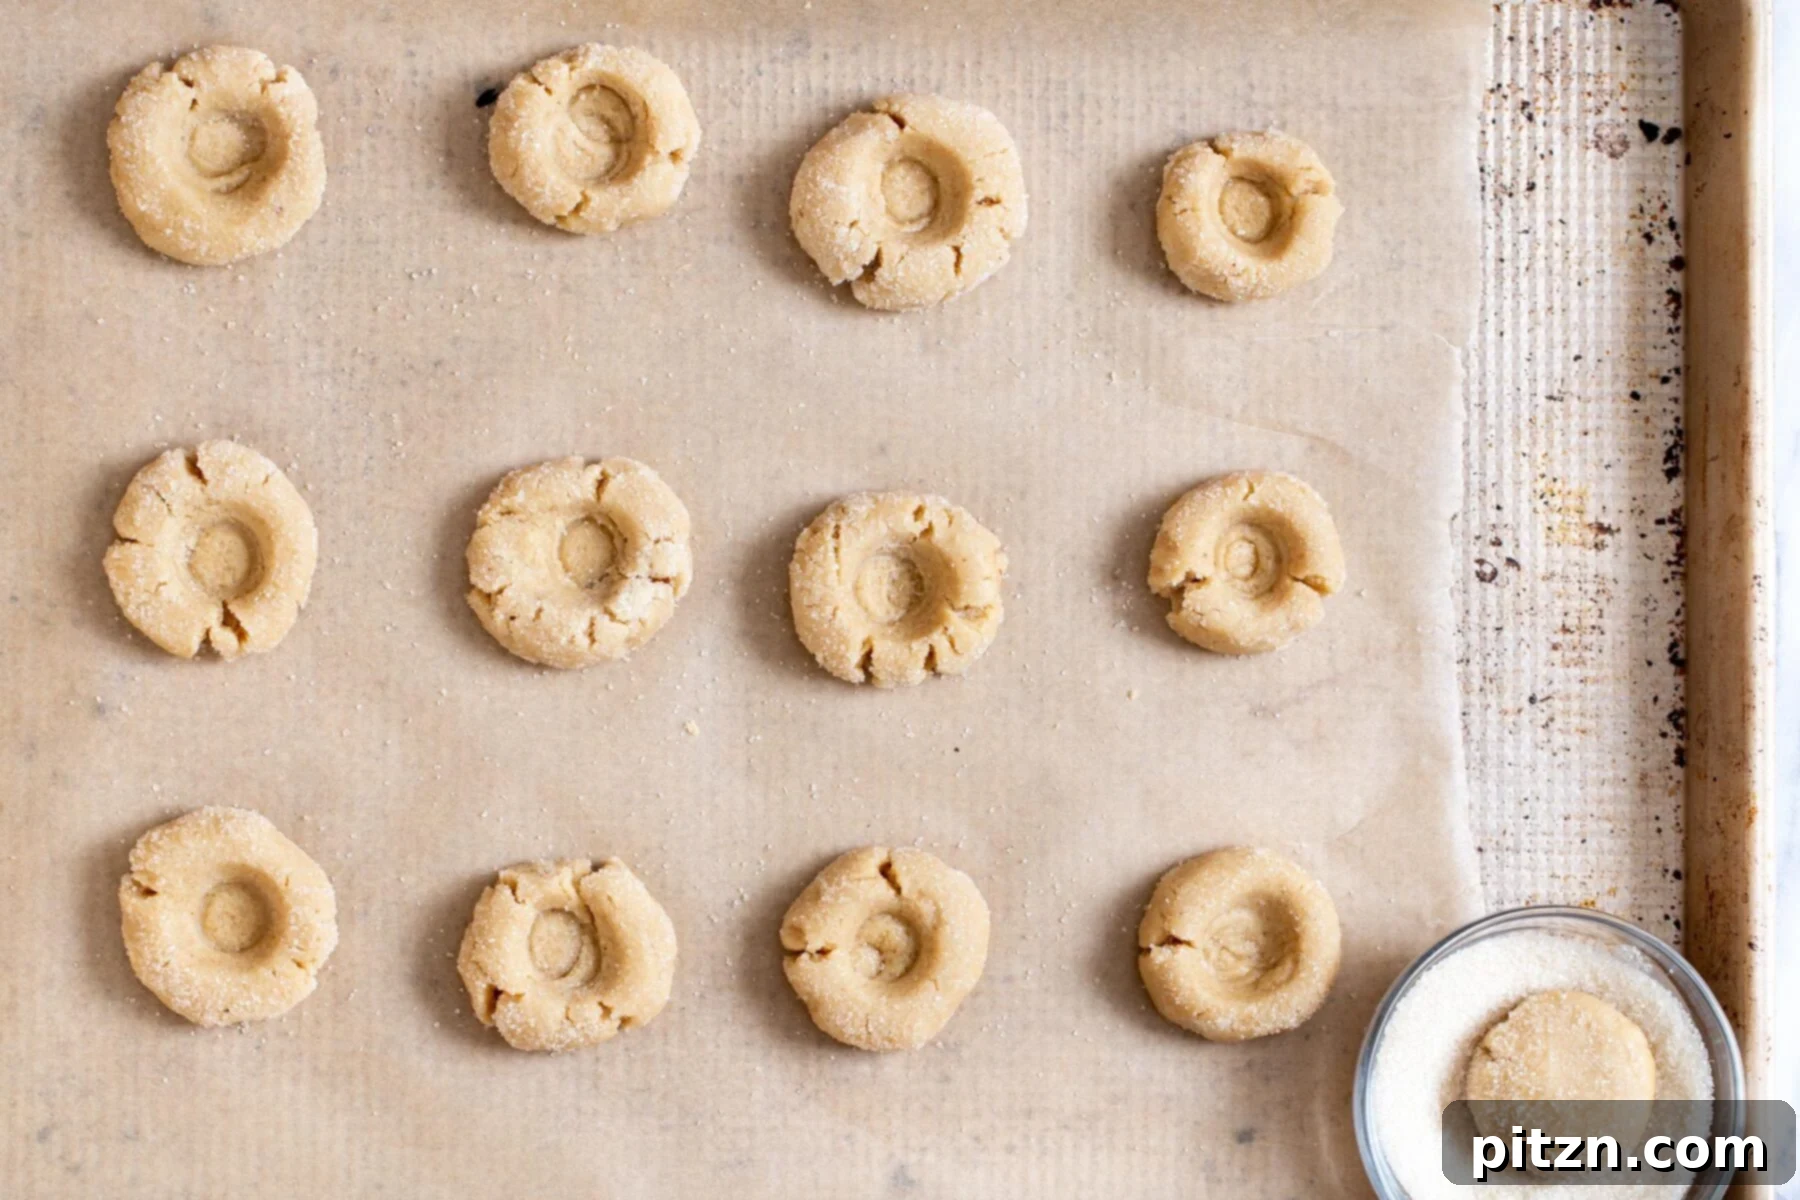
- Gently roll each scoop of dough into a smooth, even ball with your hands. Roll each ball in the cane sugar to coat it lightly, then press it into a flat disk on the parchment-lined baking sheet.
- Using your thumb or a 1-teaspoon measuring spoon, create a clear indentation in the center of each cookie disk.
- Bake the cookies for 12-14 minutes, or until the edges are lightly golden and the cookies are set.
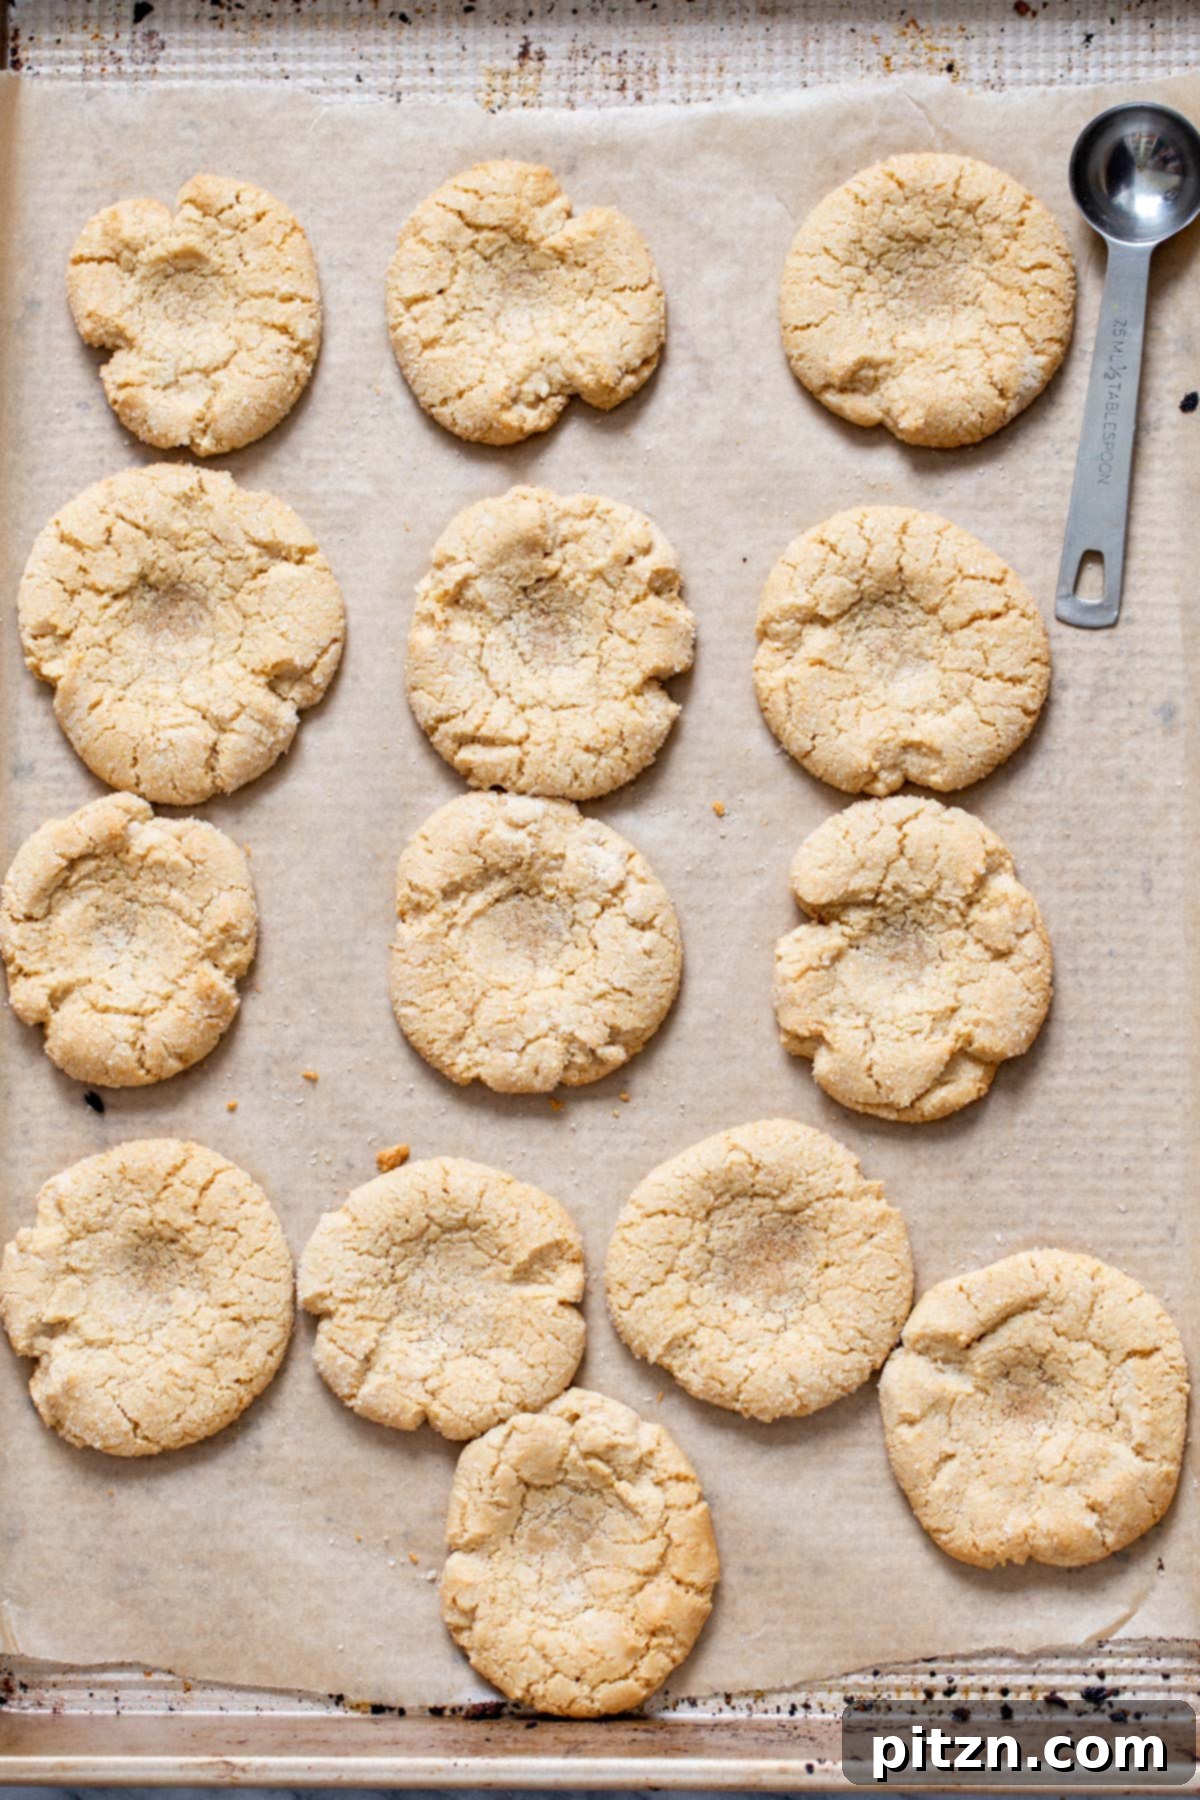
- Remove the baking sheet from the oven and let the cookies cool on the sheet for 5 minutes. The centers might have puffed up slightly; gently re-deepen the dents with your measuring spoon while the cookies are still warm. Transfer the cookies to a wire rack to cool completely.
- While the cookies are cooling, prepare the chocolate filling. Combine the vegan semi-sweet chocolate chips (or chunks), coconut oil, maple syrup, a pinch of cinnamon (or a drop of vanilla extract), and a pinch of salt in a heatproof bowl.
- Melt the chocolate mixture using a double boiler method for smooth, even melting. Alternatively, microwave in 20-second intervals, stirring well after each, until smooth and fully melted. Be careful not to overheat.
- Once the cookies have cooled for another 10 minutes (or are completely cool), carefully spoon the melted chocolate filling into each indentation, spreading it evenly.
- Allow the filled cookies to cool for at least another 10 minutes, or until the chocolate has set slightly, before serving.
- Store the cookies in an airtight container at room temperature for up to one week, or refrigerate for an extended shelf life.
Video Tutorial
Notes
- If your chocolate filling begins to solidify while you’re working, you can gently reheat it in the microwave for a few seconds or over a double boiler until it’s smooth and pliable again.
- For an Oil-Free Version: You can omit the refined coconut oil in the cookie dough. To compensate for the lost moisture and binding, add 2-3 additional teaspoons of maple syrup until the dough reaches the desired consistency. Note that the texture might be slightly different.
- Filling Variations: While these are chocolate thumbprints, feel free to experiment with other fillings for different flavors! Consider warming up your favorite fruit jams or preserves, vegan lemon curd, vegan dulce de leche, or even a homemade chocolate hazelnut spread. Just warm them slightly to make them easier to spoon into the indents.
- The larger and deeper you make the indent in the cookie, the more delicious chocolate filling you’ll be able to fit!
- To keep these cookies strictly grain-free, ensure you use coconut flour instead of oat flour, as oats can sometimes be cross-contaminated with gluten or are not preferred in strict grain-free diets.
Nutrition
Calories: 112kcal
Carbohydrates: 10g
Protein: 2g
Fat: 8g
Saturated Fat: 3g
Sodium: 36mg
Potassium: 3mg
Fiber: 1g
Sugar: 6g
Calcium: 27mg
Iron: 1mg
Nutrition information is automatically calculated and should only be used as an approximation.
Decoding the Ingredients: What You Need and Why
Creating truly exceptional vegan and gluten-free cookies relies on a thoughtful selection of ingredients. Each component in this recipe plays a crucial role in achieving the perfect flavor, texture, and structure. Let’s delve into the specifics:
- The Cookie Dough Base:
- Almond Flour: This is the star of our gluten-free cookie base. Almond flour provides a rich, slightly nutty flavor and a tender crumb, characteristic of many gluten-free baked goods. Using blanched almond flour (where the skins are removed) will result in a finer, smoother cookie texture compared to unblanched.
- Tapioca Starch: A fantastic gluten-free binder, tapioca starch contributes to the slight chewiness and helps to keep the cookies from being too crumbly. It’s essential for achieving that delightful thumbprint cookie texture.
- Oat Flour: Offering a wholesome, slightly earthy flavor, oat flour complements the almond flour beautifully. If you’re looking for a strictly grain-free option, you can substitute this with about 1.5 tablespoons of coconut flour. Keep in mind that coconut flour is very absorbent, so you might need to adjust liquid slightly if making this substitution.
- Leavening and Flavor Enhancers:
- Baking Soda: A small amount of baking soda helps these cookies rise just enough, giving them a lovely, slightly puffed appearance and a tender crumb.
- Salt: Don’t skip the salt! It’s crucial for balancing the sweetness and enhancing all the other flavors in the cookie, especially the rich chocolate.
- Powdered Sugar (Optional): We’ve designed these cookies to be moderately sweet. If you have a sweeter tooth, adding a couple of tablespoons of powdered sugar to the dough will give them that extra touch of sweetness without altering the texture too much.
- Vanilla Extract: A staple in almost any cookie recipe, vanilla extract adds depth and warmth to the overall flavor profile. Always use good quality vanilla for the best results.
- Binding and Sweetening:
- Refined Coconut Oil: Just one tablespoon of refined coconut oil provides richness and helps bind the dough together, contributing to the desirable texture. Refined coconut oil has a neutral flavor, so it won’t impart a coconut taste. For an oil-free version, simply omit the oil and add 2-4 extra teaspoons of maple syrup to achieve the right dough consistency.
- Maple Syrup: Our chosen natural sweetener, maple syrup, not only provides sweetness but also acts as a liquid binder, bringing the dough together without the need for eggs. Ensure it’s at room temperature for easy incorporation into the dough.
- For the Chocolate Filling:
- Vegan Semi-Sweet Chocolate Chips or Chunks: The heart of these thumbprints! Choose a high-quality vegan chocolate for the best flavor. Semi-sweet offers a good balance without being too bitter or too sweet.
- Coconut Oil (for filling): A small amount of coconut oil helps the chocolate melt smoothly and gives it a glossy finish, ensuring a luscious, pourable consistency for filling the cookie indents.
- Maple Syrup (for filling): A touch of maple syrup in the filling adds a subtle sweetness and helps to prevent the chocolate from seizing, ensuring a velvety smooth ganache-like texture.
- Cinnamon or Vanilla Extract (for filling): A pinch of cinnamon or a drop of vanilla extract enhances the chocolate flavor, adding a layer of subtle spice or warmth.
- Pinch of Salt (for filling): A good pinch of salt in the chocolate filling is magical – it amplifies the chocolate’s natural notes, making it taste even richer and more decadent.
Tips for Baking Perfect Vegan Gluten-Free Chocolate Thumbprint Cookies
Achieving bakery-quality cookies at home is entirely possible with a few smart tips and tricks. Here’s how to ensure your vegan gluten-free chocolate thumbprint cookies turn out perfectly every time:
- Dough Consistency is Key: The dough should be firm enough to roll into balls without crumbling excessively, but not sticky. If it’s too crumbly, add a tiny bit more maple syrup (half a teaspoon at a time). If it’s too sticky, a sprinkle of almond flour can help. Chilling the dough is essential to make it easier to handle and prevent spreading during baking.
- Uniform Cookie Size: Use a cookie scoop or a tablespoon measure to ensure all your cookies are roughly the same size. This not only makes them look professionally made but also ensures they bake evenly.
- Creating the Perfect Indent: Your thumb works great, but for a cleaner, more uniform indent, use a 1-teaspoon measuring spoon. Press firmly but gently to create a well without going all the way through the dough. If the dough cracks, gently press it back together around the edges.
- Re-deepen Indents Post-Bake: Cookies tend to puff up slightly in the oven. As soon as they come out, while still warm and pliable, use your measuring spoon to gently press and redefine the indents. This creates more space for your delicious chocolate filling.
- Melting Chocolate Mastery:
- Double Boiler Method: This is the safest way to melt chocolate slowly and evenly, preventing scorching. Place a heatproof bowl over a saucepan of simmering water, ensuring the bowl doesn’t touch the water. Stir frequently until smooth.
- Microwave Method: If using a microwave, melt the chocolate in short bursts (20 seconds initially, then 5-10 second intervals), stirring thoroughly after each. Chocolate can seize or burn quickly, so low power and frequent stirring are your best friends.
- Preventing Solidification: If your chocolate filling starts to thicken as you’re filling the cookies, simply return it to the microwave for a few seconds or over the double boiler to re-melt it to a smooth consistency.
- Filling Variations for Creativity: While this recipe champions chocolate, don’t limit yourself! Once you master the cookie base, you can experiment with other fillings like:
- Your favorite fruit jams or preserves (warm them slightly for easier filling).
- Vegan lemon curd for a tangy twist.
- A homemade vegan caramel or dulce de leche.
- A rich chocolate hazelnut spread for an extra layer of decadence.
(Note: These delicious alternatives will transform them from “chocolate thumbprints” to other delightful varieties!)
- Achieving Grain-Free: If a strict grain-free diet is your goal, remember to swap the oat flour for 1.5 tablespoons of coconut flour. Always check labels for certified gluten-free oat flour if cross-contamination is a concern.
Step-by-Step Guide: How to Craft Vegan Gluten-Free Chocolate Thumbprint Cookies
Follow these detailed steps to create perfectly tender and deliciously chocolatey thumbprint cookies:
Step 1: Prepare the Dry Ingredients
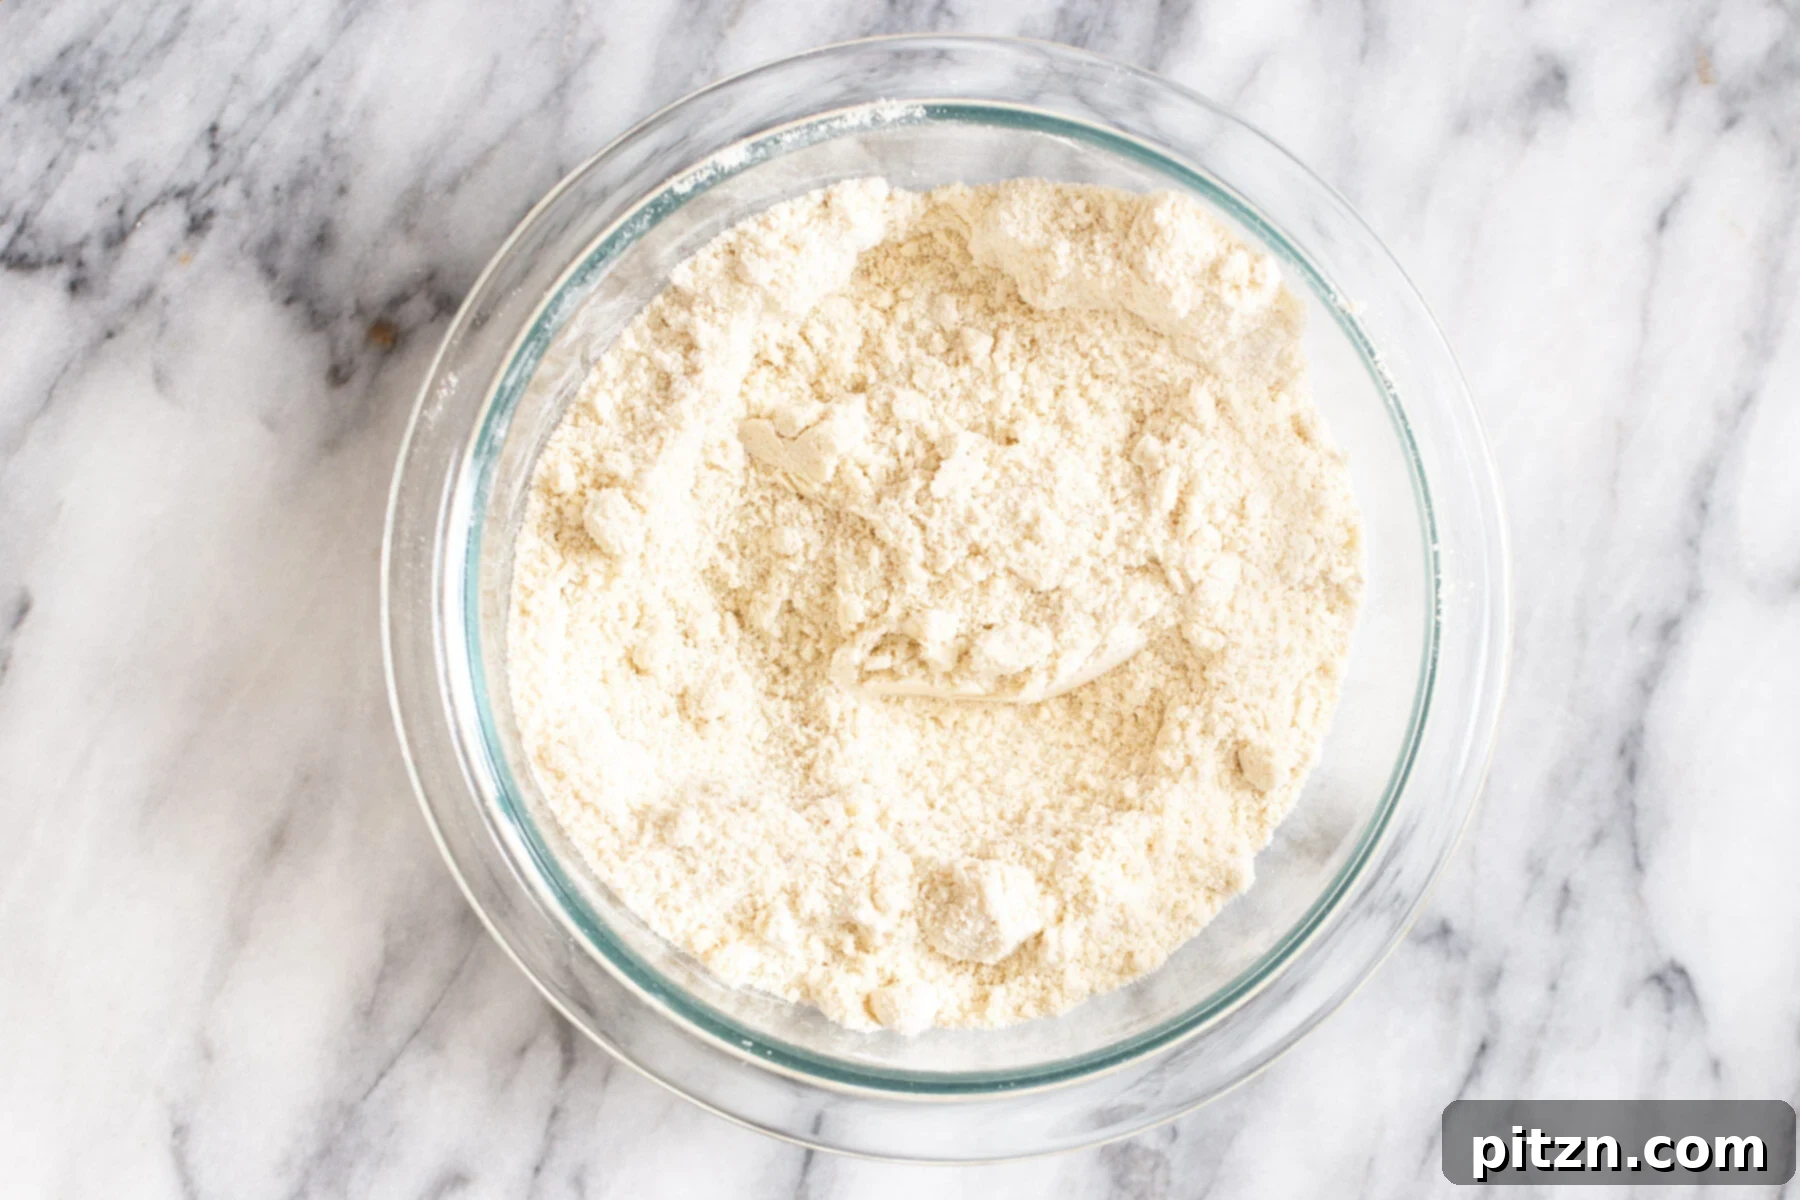
In a spacious mixing bowl, combine all your dry cookie ingredients: almond flour, tapioca starch, oat flour (or coconut flour if making grain-free), baking soda, and salt. If you prefer a sweeter cookie, add the powdered sugar now. Whisk these ingredients thoroughly to ensure they are well combined and there are no lumps.
Step 2: Incorporate the Wet Ingredients to Form Dough
Gently melt your coconut oil until it’s liquid but not excessively hot. Add the melted coconut oil, vanilla extract, and room temperature maple syrup to the bowl with the dry ingredients. Mix everything together with a spoon or your hands until a cohesive, smooth dough forms. It should be pliable but not sticky.
Step 3: Check Dough Consistency and Chill
Once your dough is smooth, perform a quick check: if it feels too crumbly and doesn’t hold together easily, add an additional teaspoon (or a little more) of maple syrup, mixing thoroughly after each addition until the desired consistency is achieved. Cover the bowl and refrigerate the dough for a minimum of 15 minutes. This chilling period is crucial as it firms up the dough, making it easier to handle and preventing excessive spreading during baking.
Step 4: Shape the Cookies
Remove the chilled dough from the refrigerator. Using a cookie scoop (approximately 1.5 tablespoons) or by hand, scoop out uniform portions of dough. Gently roll each portion between your palms to form a smooth, even ball. For added texture and a hint of sweetness, roll each dough ball lightly in cane sugar. Then, place each sugar-coated ball on your parchment-lined baking sheet and gently press it down into a flat disk. Using your thumb or a 1-teaspoon measuring spoon, create a distinct indentation in the center of each cookie. Make sure these indents are deep enough to hold a generous amount of chocolate.
Step 5: Bake to Perfection
Preheat your oven to 330°F (165°C). Carefully transfer the baking sheet with the shaped cookies to the preheated oven. Bake for approximately 13-14 minutes, or until the edges begin to turn a light golden brown and the cookies are set. Remove the baking sheet from the oven and allow the cookies to cool on the sheet for about 5 minutes. During this time, they will firm up slightly. After 5 minutes, gently transfer the cookies to a wire cooling rack to cool completely.
Step 6: Re-deepen Indents (If Needed)
As mentioned, the cookies might have risen slightly in the center during baking. While they are still warm and pliable from the oven, use your measuring spoon to gently press down and deepen the indents once more. This ensures a perfect cavity for your chocolate filling.
Step 7: Prepare the Rich Chocolate Filling
While your cookies are cooling, it’s time to make the luscious chocolate filling. In a heatproof bowl, combine the vegan semi-sweet chocolate chips (or chunks), coconut oil, maple syrup, a pinch of cinnamon (or a drop of vanilla extract), and a pinch of salt. Melt this mixture using a double boiler for even, gentle heat, stirring until smooth. Alternatively, microwave the mixture in 20-second increments, stirring thoroughly after each, until the chocolate is completely melted and silky smooth. Be careful not to overheat to prevent scorching.
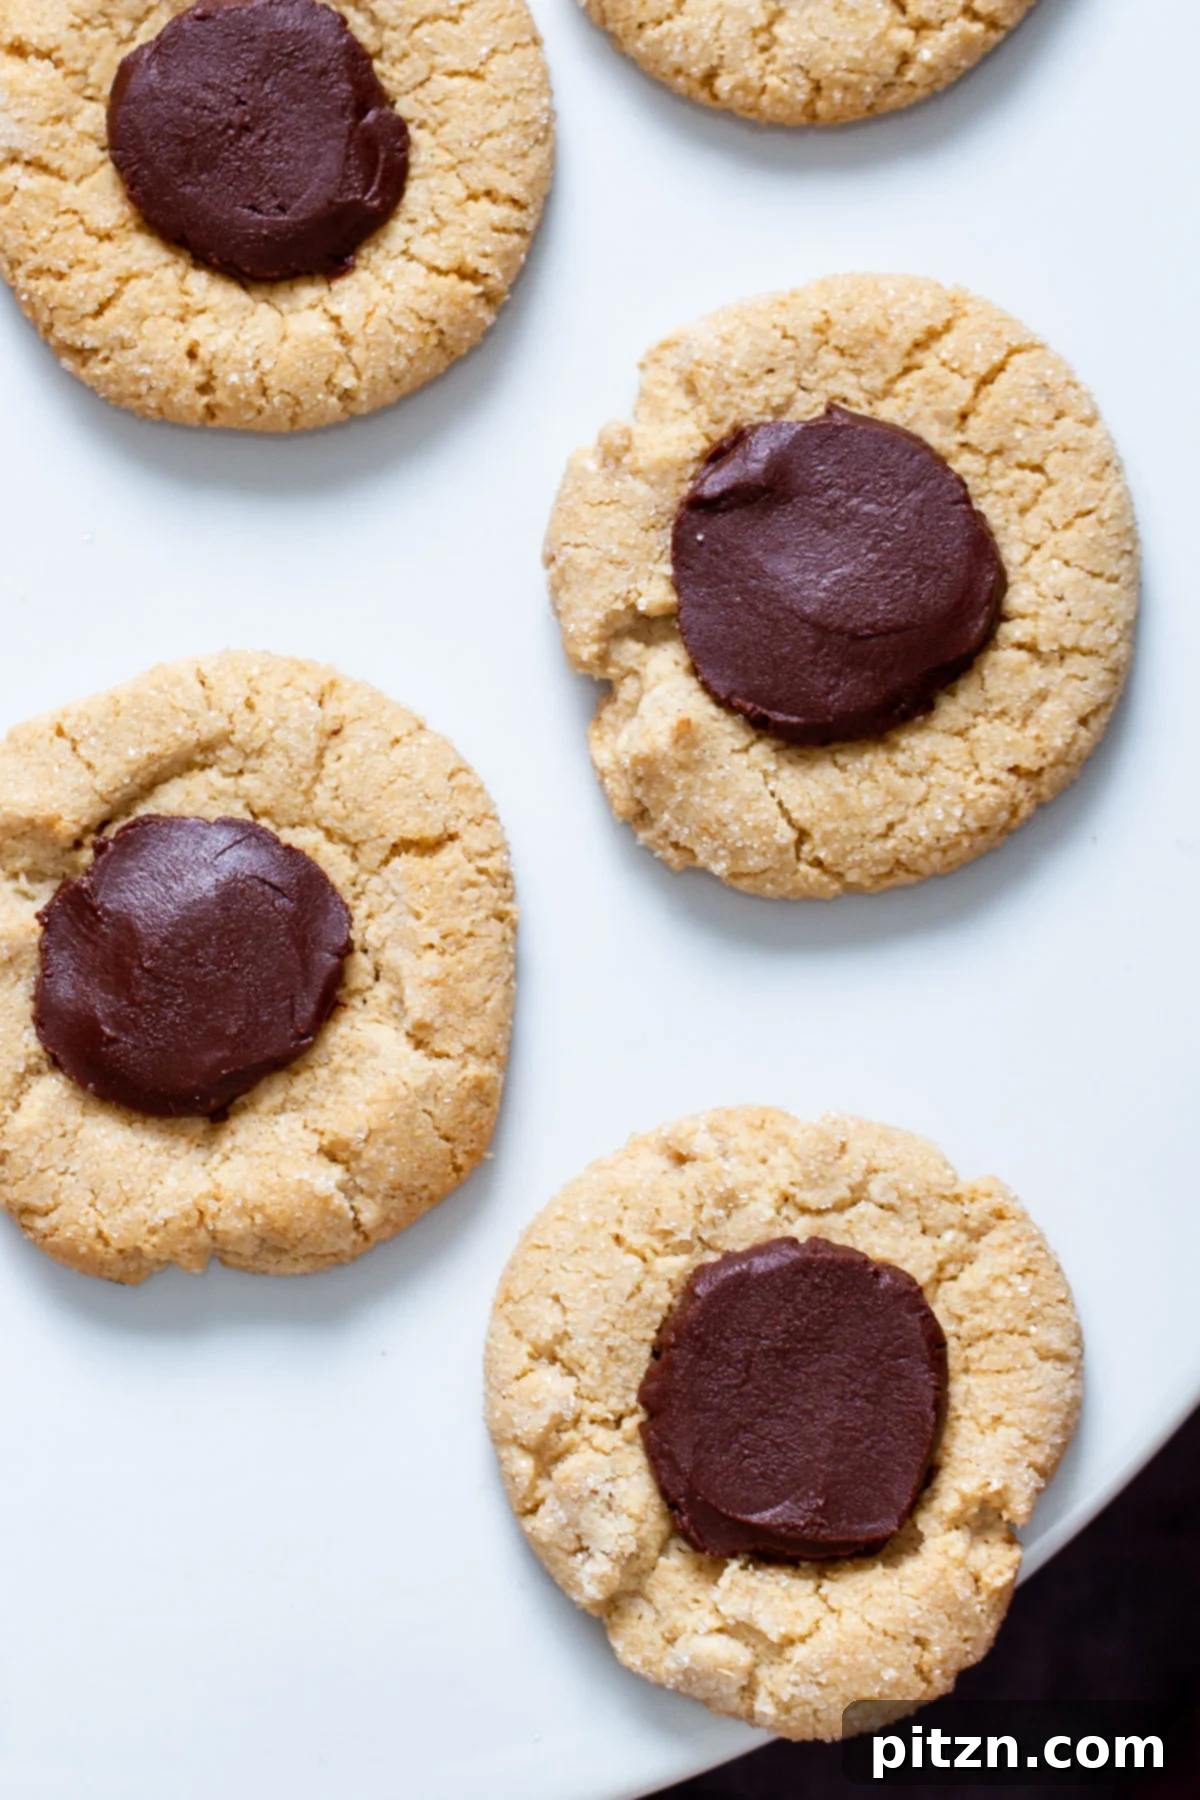
Step 8: Fill and Serve
Once the cookies have cooled for another 10 minutes (or are completely cool), carefully spoon the melted chocolate filling into each indentation, ensuring it’s evenly distributed. Allow the filled cookies to cool for an additional 10 minutes, or until the chocolate has set slightly. Now they are ready to be savored! The chocolate will firm up further as it cools, creating a delightful contrast with the soft cookie.
Step 9: Storage
Store your finished Vegan Gluten-Free Chocolate Thumbprint Cookies in an airtight container at room temperature for up to a week. For longer storage, you can refrigerate them.
Make-Ahead and Freezing Tips for Convenience
These delightful vegan gluten-free chocolate thumbprint cookies are perfect for meal prepping or baking in batches for future enjoyment. Here’s how you can prepare them ahead of time:
- Unbaked Cookie Dough: You can prepare the cookie dough up to 4 days in advance. After mixing, wrap the dough tightly in plastic wrap or place it in an airtight container and store it in the refrigerator. When you’re ready to bake, let it sit at room temperature for about 10-15 minutes to soften slightly, then proceed with shaping and baking as usual.
- Unbaked Cookies (Freezing): For ultimate convenience, you can freeze the unbaked cookie dough balls. Form the cookies and make the indents (without adding the chocolate filling). Place the unbaked cookies on a baking sheet lined with parchment paper and freeze until solid (about 1-2 hours). Once frozen, transfer the solid cookie dough balls to a freezer-safe bag or container. They will keep well for up to 3 months. When ready to bake, you can bake them directly from frozen, adding a couple of extra minutes to the baking time. Add the chocolate filling after baking and cooling.
- Baked Cookies (Freezing with Filling): If you want to freeze fully prepared cookies, ensure they have cooled completely and the chocolate filling has set. Place them in a single layer in a freezer-safe airtight container, separating layers with parchment paper to prevent sticking. They can be frozen for up to 3 months. To serve, thaw them overnight in the refrigerator, then bring them to room temperature for the best taste and texture. If desired, you can gently warm them slightly in a low oven for a few minutes for that freshly baked feel.
Did you make this recipe? Share your experience!
We’d love to hear how your Vegan Gluten-Free Chocolate Thumbprint Cookies turned out. Please rate the recipe and leave a comment below to share your thoughts and any modifications you made!