
Welcome to the delightful world of homemade Ciabatta bread! This rustic Italian classic, known for its airy texture and crisp crust, is surprisingly simple to make right in your own kitchen. Perfect for hearty sandwiches, elegant appetizers, or simply enjoyed as a side with your favorite meal, our recipe ensures a light, bubbly loaf every time. Best of all, it’s completely vegan and nut-free, making it a wonderful option for various dietary needs. Get ready to impress your friends and family with this artisanal bread that brings a touch of Italy to your table.
Jump to Recipe
There’s nothing quite like the satisfaction of baking your own bread, and Ciabatta is a prime example of a loaf that truly shines when made from scratch. Its characteristic open crumb and chewy interior are a testament to the magic of yeast and a long fermentation process. This recipe focuses on creating those sought-after big air bubbles and that signature rustic charm, all while keeping it accessible for home bakers.
The journey to perfect Ciabatta begins with a simple starter, often called a “biga” or “poolish,” which develops deep flavors and encourages the beautiful open structure that Ciabatta is famous for. This initial step, though requiring a bit of patience, is well worth the wait, contributing to the bread’s slightly sour, complex taste that hints at traditional artisan baking.
Why Homemade Ciabatta is a Game Changer
In a world where convenience often dictates our choices, there’s a unique pleasure in crafting something delicious from scratch. Homemade Ciabatta offers numerous benefits that go beyond just saving a trip to the bakery:
- Unmatched Freshness: There’s no comparison to the aroma and taste of bread fresh from the oven. The crust is at its crispiest, and the interior is at its softest and most aromatic.
- Control Over Ingredients: When you bake at home, you know exactly what goes into your bread. This recipe is specifically designed to be vegan and nut-free, making it suitable for those with dietary restrictions or preferences. You can choose high-quality flours and oils, free from unwanted additives.
- Superior Flavor and Texture: The long fermentation process in this Ciabatta recipe develops a depth of flavor that’s hard to find in mass-produced bread. The high hydration results in that characteristic open, airy crumb and chewy texture, along with a delightfully crisp crust.
- A Rewarding Experience: Bread making is often described as therapeutic. The process of mixing, kneading (or rather, folding for Ciabatta!), rising, and baking is incredibly rewarding, culminating in a delicious product you created with your own hands.
- Versatility: A fresh loaf of Ciabatta opens up a world of culinary possibilities. From simple toast to elaborate sandwiches, its neutral yet flavorful profile makes it a perfect canvas for many dishes.
The Signature Ciabatta: Air Bubbles and Rustic Charm
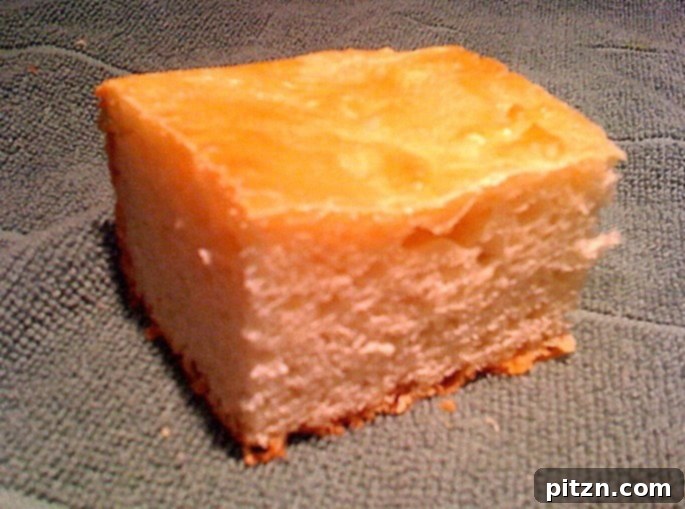
Ah, the rustic Italian, slightly sour Ciabatta! Look at those beautiful, generous air bubbles! These aren’t just for show; they’re a hallmark of a well-made Ciabatta, indicating a light and open crumb structure. The name “Ciabatta” itself means “slipper” in Italian, thought to refer to its flat, elongated shape. Unlike dense loaves, Ciabatta boasts an irregular, airy interior, which is ideal for soaking up olive oil, holding copious sandwich fillings, or simply enjoying with a sprinkle of salt.
The secret to Ciabatta’s unique texture lies in its high hydration dough – it’s much wetter than typical bread doughs. This, combined with a gentle handling technique and a long fermentation period, allows the gluten to develop slowly and create those signature pockets of air. The slight tanginess comes from the extended proofing of the initial “sponge,” which enhances the overall flavor profile, giving it a complexity often associated with sourdough.
Pictured here: My ultimate breakfast sandwich. Imagine a fluffy scrambled egg with perfectly grilled veggies, all nestled between slices of warm, grilled Ciabatta! The bread holds up beautifully, offering a satisfying chew and adding its own subtle flavor to every bite.
Homemade Vegan & Nut-Free Ciabatta Bread
Vegan Richa
30 minutes
30 minutes
1 hour
8
servings
Bread
Italian, Nut-free
Print Recipe
Ingredients
For the Starter/Sponge (Biga):
-
1/4
teaspoon
active dry yeast -
1/3
cup
warm water (approx. 110°F / 43°C) -
1
cup
bread flour
For the Bread:
-
1
teaspoon
active dry yeast -
1/3
cup
warm plant-based milk (such as oat, soy, or almond milk, approx. 110°F / 43°C) -
1/2
cup
water -
2
cups
bread flour -
1
teaspoon
salt -
2
teaspoons
olive oil - Additional olive oil for greasing
Instructions
-
For the Sponge (Biga): Heat the water to approximately 110°F (43°C).
-
Add the 1/4 teaspoon of yeast to the warm water and let it stand for 10 minutes, or until it becomes frothy. This indicates the yeast is active.
-
Stir in 1 cup of bread flour to form a soft, sticky dough. Cover the bowl loosely with plastic wrap or a damp towel and let this sponge ferment at room temperature for 12-15 hours.
-
For the Bread Dough: Once the sponge is ready, warm the plant-based milk to about 110°F (43°C) and add the 1 teaspoon of yeast to it.
-
Let the yeast mixture stand for 10 minutes, or until frothy.
-
In a large mixing bowl, combine the prepared sponge, the yeast-milk mixture, the remaining 2 cups of bread flour, salt, and 1/2 cup of water. Use a hand mixer with dough hooks or a stand mixer to mix everything until well combined and a very sticky, wet dough forms.
-
Add the 2 teaspoons of olive oil to the dough and mix briefly to incorporate. Transfer the dough to a lightly oiled bowl, cover it with a damp towel, and let it rise in a warm place (like a slightly warm oven that’s turned off) for about 1 to 1.5 hours, or until it has significantly increased in volume and is full of air bubbles.
-
The dough will be very sticky and full of visible air bubbles. Generously flour your work surface and carefully turn the dough out onto it. Avoid deflating it too much. Gently cut the dough in half.
-
Transfer each half to a separate sheet of parchment paper. With floured hands, gently stretch and form each half into an irregular oval shape, approximately 9 inches long. Using floured fingers, gently dimple the tops of the loaves to create depressions. Dust the tops with a little more flour.
-
Cover the loaves loosely with a damp kitchen towel. Let them rise at room temperature for another 1 1/2 to 2 hours, or until they have almost doubled in bulk and feel light and airy.
-
Preheat your oven to 350°F (175°C). Carefully transfer the parchment paper with the loaves onto a baking sheet or preheated baking stone.
-
Bake for about 30 minutes, or until the crust is golden brown and the internal temperature reaches around 200-210°F (93-99°C). For a softer, chewier crust, lightly spray water over the bread every 3 minutes during the first 10 minutes of baking.
-
Once baked, remove the Ciabatta from the oven and transfer it to a wire rack to cool completely before slicing.
-
Enjoy your homemade Ciabatta with soups, stews, or your favorite sandwich fillings!
Notes
*Nutritional value is based on 1 serving (1/8th of the recipe).
Nutrition
Calories:
187
kcal
,
Carbohydrates:
34
g
,
Protein:
6
g
,
Fat:
2
g
,
Sodium:
299
mg
,
Potassium:
65
mg
,
Fiber:
1
g
,
Vitamin A:
20
IU
,
Calcium:
19
mg
,
Iron:
0.5
mg
Nutrition information is automatically calculated, so should only be used as an approximation.
Did you make this recipe? Share your thoughts and experiences below!
Tips for Ciabatta Baking Success
While making Ciabatta is relatively straightforward, a few key tips can elevate your homemade loaf from good to truly exceptional:
- Embrace Stickiness: Ciabatta dough is intentionally very wet and sticky. Do not be tempted to add more flour than specified in the recipe during mixing. The high hydration is critical for the characteristic open crumb structure. Use a bench scraper or a well-floured hand to manage the dough on your work surface.
- Long Fermentation is Key: The 12-15 hour rest for the starter (biga) and the subsequent rising times are non-negotiable. These extended periods allow the yeast to develop complex flavors and create those signature air bubbles. Patience is a virtue in Ciabatta making!
- Gentle Handling: When shaping the dough, handle it as little as possible. Avoid excessive kneading or pressing, which can deflate the precious air pockets. The goal is to gently stretch and fold, maintaining the airy structure.
- Creating Steam in Your Oven: For a truly crusty exterior, steam is essential during the initial baking phase. Spraying water into the oven or on the bread itself (as directed in step 11) helps create this environment. You can also place a pan of hot water on the bottom rack of your oven when you preheat it.
- Don’t Skimp on Flour for Dusting: A generous dusting of flour on your work surface and on top of the loaves prevents sticking and contributes to Ciabatta’s rustic appeal.
- Proofing Environment: A warm, draft-free environment is ideal for rising dough. If your kitchen is cool, a slightly warmed (and then turned off) oven can provide the perfect setting. Remember to cover the dough with a damp towel to prevent it from drying out.
Serving Suggestions for Your Homemade Ciabatta
Once your beautiful Ciabatta loaves have cooled, the real fun begins! This versatile bread is a fantastic accompaniment to so many dishes:
- Epic Sandwiches: Its sturdy yet airy structure makes it the ultimate sandwich bread. Load it up with your favorite vegan deli slices, grilled vegetables, hummus, pesto, or a savory tofu scramble for a satisfying meal. The breakfast sandwich pictured earlier is just one delicious idea!
- Bruschetta and Crostini: Slice the Ciabatta, toast it lightly, rub with garlic, and top with fresh diced tomatoes, basil, and a drizzle of olive oil for classic bruschetta. Or get creative with other toppings like roasted red peppers, olive tapenade, or vegan ricotta.
- Dipping Delight: Simply tear off a piece and dip it into high-quality olive oil, balsamic vinegar, or your favorite herbed dip.
- Accompaniment to Soups and Stews: Ciabatta is perfect for soaking up rich broths and sauces. Serve it alongside a hearty lentil soup, a creamy tomato bisque, or a flavorful minestrone.
- Garlic Bread: Slice it horizontally, spread with vegan garlic butter, and toast until golden and fragrant.
- Side Dish: Enjoy it plain alongside a fresh salad, pasta dishes, or any Italian-inspired meal.
Storage and Reheating
To keep your Ciabatta fresh and delicious:
- Room Temperature: Store your cooled Ciabatta in a paper bag or a breathable linen bag at room temperature for up to 2 days. Avoid airtight containers, as they can make the crust soft.
- Freezing: For longer storage, Ciabatta freezes beautifully. Wrap cooled loaves tightly in plastic wrap, then in foil, and freeze for up to 3 months.
- Reheating: To refresh frozen Ciabatta, let it thaw at room temperature, then lightly mist with water and reheat in a preheated oven at 350°F (175°C) for 5-10 minutes, or until crusty again. For day-old Ciabatta, a quick refresh in the oven works wonders to bring back its crispness.
Embrace the Joy of Ciabatta Baking
Making Ciabatta at home is a rewarding culinary adventure that connects you with ancient baking traditions. From the initial humble mixture of yeast and flour to the glorious golden loaves emerging from your oven, every step is a testament to the simple magic of bread making. This vegan and nut-free recipe provides a clear path to creating a rustic, airy, and utterly delicious Ciabatta that will become a staple in your kitchen.
So, roll up your sleeves, embrace the sticky dough, and prepare to be amazed by the results. There’s nothing quite like the smell of freshly baked bread filling your home. We encourage you to try this recipe and discover the joy of homemade Ciabatta for yourself. Don’t forget to share your baking journey and any delicious creations you make!