
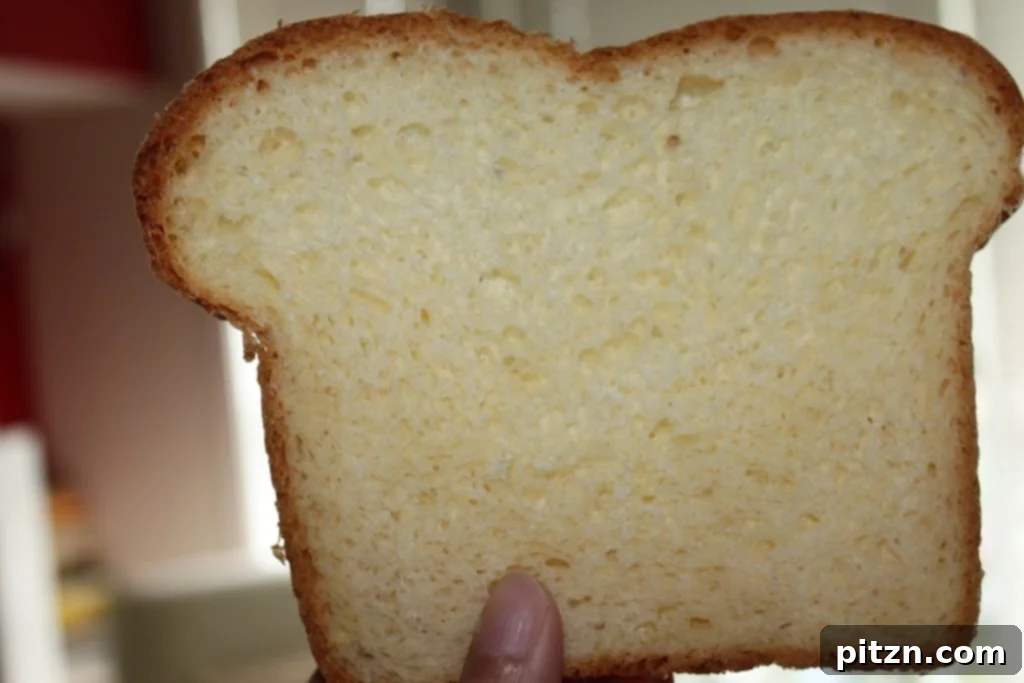
A super light and fluffy white sandwich loaf. Great for everyday sandwiches and toast. Vegan Recipe. Jump to Recipe
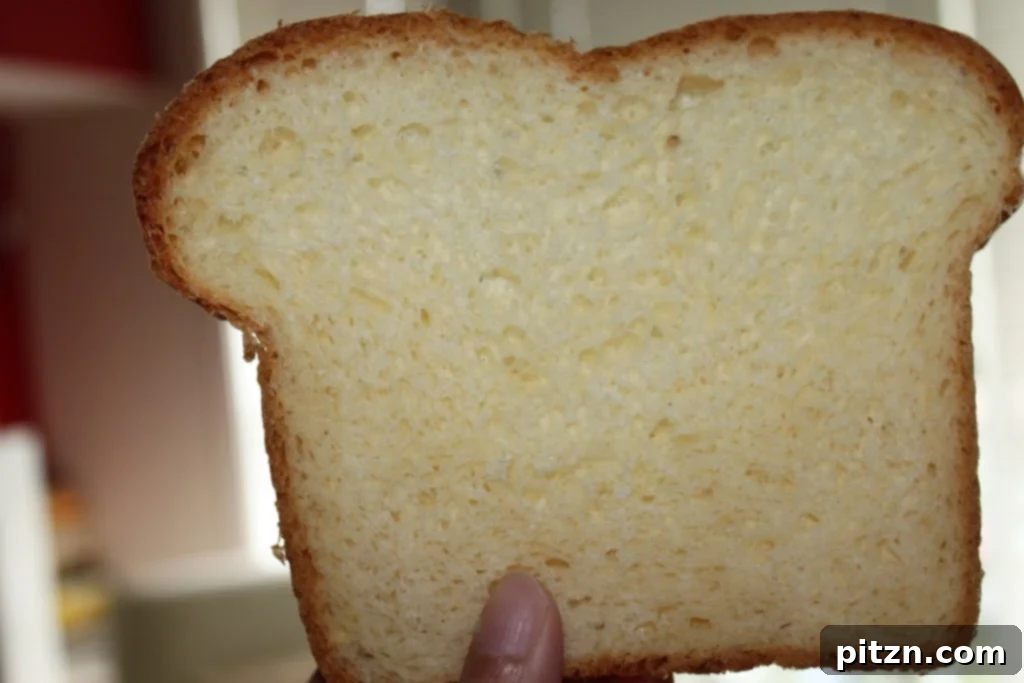
The Ultimate Vegan White Sandwich Loaf: Fluffy, Light, and Perfectly Homemade
Are you searching for that elusive, perfectly soft, and airy white bread that’s also entirely plant-based? Look no further! This incredible vegan white sandwich loaf recipe delivers an astonishingly light, fluffy, and tender result that will undoubtedly become a favorite in your kitchen. Say goodbye to dense, heavy loaves, and welcome a delightful bread that’s ideal for everyday sandwiches, comforting morning toast, or simply enjoying with your favorite spreads. This recipe is surprisingly straightforward to follow and guarantees a delicious, wholesome loaf that caters to all tastes, whether you’re vegan or simply looking for a fantastic homemade bread option.
The inspiration for this particular recipe stemmed from a common household preference: my husband, much like many others, found himself growing tired of the overly wheaty and dense whole grain breads. He yearned for the nostalgic lightness and pillowy texture of classic white bread, but with a crucial plant-based twist. The challenge was to achieve this beloved texture without any dairy, eggs, or traditional butter. The solution lies in a thoughtfully balanced blend of flours, a generous touch of high-quality olive oil for unparalleled moisture and softness, and the natural leavening power of yeast. The outcome is a bread so utterly satisfying, you’ll scarcely believe it’s completely vegan!
More than just a recipe, this creation is about bringing back the simple joy and comfort of white bread, made with accessible, wholesome, and plant-friendly ingredients. Its exceptional crumb and beautiful rise were even recognized and featured on YeastSpotting, a popular platform celebrating outstanding homemade bread. Prepare to impress your family and friends with this vegan masterpiece!
Why You’ll Adore This Vegan White Bread Recipe
This recipe isn’t just about baking bread; it’s about crafting an experience. Here’s why this vegan white sandwich loaf will quickly become your go-to:
- Unbelievably Light and Fluffy: Forget heavy, brick-like bread. This recipe produces a soft, airy crumb that offers a delightful melt-in-your-mouth experience. It’s perfect for those who prefer a less dense texture.
- Perfect for Any Occasion: Its versatile nature makes it suitable for packing school or work lunches, crafting gourmet grilled cheeses, serving as an accompaniment to hearty soups, or simply enjoying a slice toasted with your preferred jam or vegan butter.
- Beginner-Friendly Baking: Even if you’re new to the world of bread making, the detailed, step-by-step instructions are designed to guide you through each stage, ensuring a successful and rewarding baking journey.
- Wholesome and Plant-Powered: Crafted from simple, plant-based ingredients, this homemade loaf offers a healthier and more transparent alternative to many store-bought white breads that often contain hidden additives and preservatives.
- Economical and Sustainable: Baking your own bread at home is not only a deeply satisfying culinary endeavor but also a budget-friendly choice compared to purchasing specialty vegan breads from stores. Plus, it reduces packaging waste!
- The Scent of Home: There’s truly nothing quite like the comforting, warm aroma of freshly baked bread wafting through your home. It’s an inviting scent that promises deliciousness and coziness.
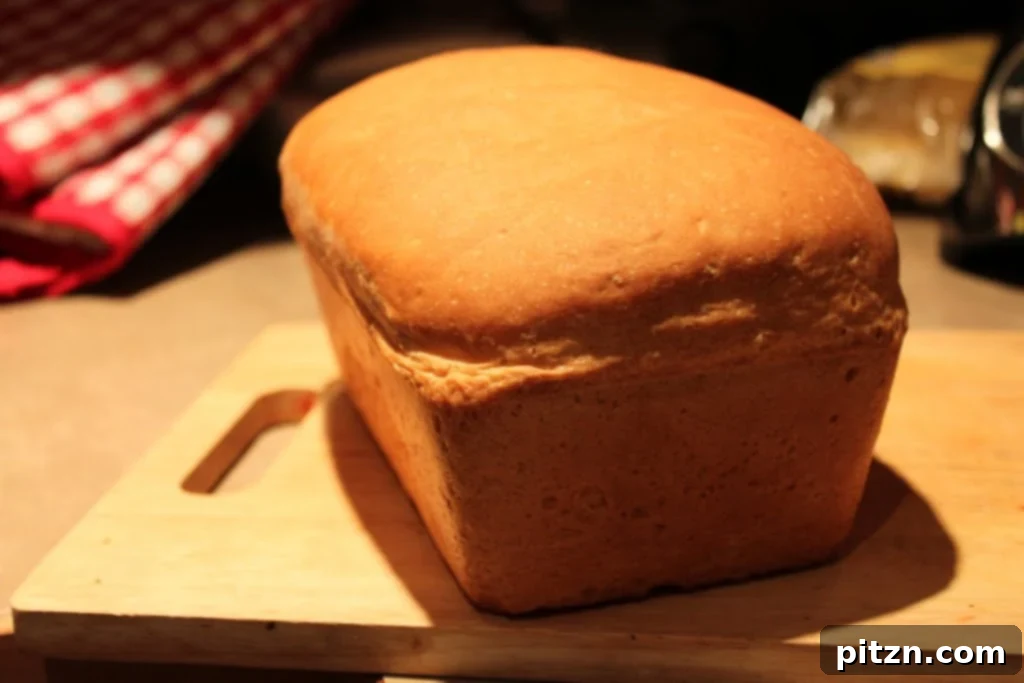
The secret to this bread’s exceptional tenderness and softness lies in the precise combination and proportion of its key ingredients. Specifically, the careful balance between high-protein bread flour and softer all-purpose flour works wonders. This is further enhanced by the inclusion of extra virgin olive oil. While many traditional recipes rely on dairy butter, olive oil serves as a fantastic vegan alternative, imparting a rich flavor, deep moisture, and significantly contributing to the bread’s incredibly soft and pliable crumb. It ensures the bread is just as, if not more, tender than its dairy-inclusive counterparts, all while maintaining its delightful vegan integrity.
Essential Ingredients for Your Perfect Vegan Loaf
Crafting this delightful vegan white sandwich loaf requires a selection of readily available pantry staples. Each component plays a vital role in developing the ideal texture, rich flavor, and impressive rise of your bread. Understanding the purpose of each ingredient will not only deepen your appreciation for the baking process but also help you troubleshoot if needed.
- Bread Flour (2 cups / 250g): This is the structural backbone of your loaf. With its higher protein content, bread flour fosters the development of strong gluten networks. This gluten is crucial for giving the bread its characteristic chewiness, elasticity, and the ability to rise beautifully and hold its shape throughout the baking process.
- All-Purpose Flour (2-3 cups / 250-375g): While bread flour provides strength, all-purpose flour contributes to the bread’s overall tenderness and softness. Using a blend ensures your loaf isn’t overly dense or excessively chewy, striking a perfect balance between structure and delicate crumb. The exact amount can be adjusted slightly based on the dough’s consistency.
- Extra Virgin Olive Oil (1/3 cup / 80ml): Our chosen vegan fat, olive oil, is a fantastic substitute for butter. It infuses the dough with richness and essential moisture, playing a significant role in achieving that sought-after soft and moist texture. Its subtle flavor integrates seamlessly, becoming virtually undetectable in the final baked product.
- Flax Egg (1 tablespoon ground flaxseed + 3 tablespoons water): This brilliant vegan binder effectively replaces a traditional egg. It helps to bind the dough, adds a touch of moisture, and contributes to a finer, more consistent crumb. Simply combine the ground flaxseed with water and let it sit for 5-10 minutes until it thickens into a gel-like consistency before adding to your dough.
- Warm Water (1 cup / 240ml, divided): Water is the lifeblood of your dough, providing the necessary hydration. It’s crucial that the water is warm (ideally 105-115°F or 40-46°C) to properly activate the yeast. Be careful not to use water that is too hot, as it can kill the yeast, preventing your bread from rising.
- Granulated Sugar (2 teaspoons): A small quantity of sugar serves as immediate fuel for the yeast, encouraging it to activate and ensuring a vigorous rise. Additionally, it aids in achieving that lovely golden-brown crust and imparts a very subtle, balanced sweetness to the bread.
- Quick Rise Yeast (1 packet / 1.25 teaspoons / 5g): Also known as instant yeast, this variety is designed for faster action, which contributes to a more efficient rising process. One packet is typically sufficient to create a lively and active dough.
- Salt (1 teaspoon): Absolutely indispensable for flavor! Salt deepens and enhances the taste of the bread, bringing out the nuances of the other ingredients. It also plays a critical role in controlling the yeast’s activity, preventing the dough from rising too quickly and ensuring a more even fermentation.
- Orange Juice (1/4 cup / 60ml): This might seem like an unconventional ingredient, but it’s a fantastic secret weapon! The acidity in orange juice provides an optimal environment for yeast activity, leading to a lighter, airier loaf. Rest assured, your bread will not taste like oranges; the flavor is completely neutralized during baking.
Fluffy Vegan White Sandwich Loaf
35 mins
35 mins
1 hr 10 mins
10 servings
Bread
American, Vegan

Print Recipe
A super light and fluffy white sandwich loaf. Perfect for everyday sandwiches and toast. This easy-to-follow vegan recipe yields a wonderfully tender and versatile bread that everyone will love.
Ingredients
- 2 cups (250g) bread flour
- 2-3 cups (250-375g) all-purpose flour, plus more for dusting
- 1/3 cup (80ml) extra virgin olive oil
- 1 flax egg (made from 1 tbsp ground flaxseed + 3 tbsp water, mixed and rested)
- 1 cup (240ml) warm water, divided
- 2 teaspoons granulated sugar
- 1 packet quick rise yeast (approx. 1.25 teaspoons or 5g)
- 1 teaspoon salt
- 1/4 cup (60ml) orange juice
Instructions
-
Activate the Yeast: In a small bowl, warm 1/4 cup (60ml) of water until it’s comfortably warm to the touch (around 105-115°F or 40-46°C). Stir in the granulated sugar and the quick rise yeast. Mix well until the sugar dissolves and the yeast is fully incorporated. Set this mixture aside for 10 minutes. During this time, you should observe a frothy, foamy layer forming on top, which indicates that your yeast is active and ready to be used.
-
Combine Dry Ingredients: In the bowl of a stand mixer fitted with a dough hook attachment (or a large mixing bowl if you plan to knead by hand), combine 2 cups (250g) of bread flour, 2 cups (250g) of all-purpose flour, and the salt. Whisk these dry ingredients together thoroughly to ensure they are well combined and the salt is evenly distributed throughout the flours.
-
Add Wet Ingredients & Knead: Once your yeast mixture is actively frothy, pour it into the mixer bowl containing the dry ingredients. Add the extra virgin olive oil, orange juice, and the remaining 3/4 cup (180ml) of warm water. Begin kneading the dough on a low speed, gradually increasing to medium, for 10-12 minutes until it forms a soft, pliable, and smooth ball that is no longer sticky to the touch. If kneading by hand, this process will take approximately 15-20 minutes on a lightly floured surface. For stand mixer users, periodically stop to scrape down the sides of the bowl and allow the motor to cool if it becomes too warm.
-
First Rise (Proofing): Lightly grease a clean, large bowl with a small amount of olive oil. Transfer the kneaded dough into this bowl, turning it once to ensure it’s lightly coated with oil on all sides. Cover the bowl securely with plastic wrap or a damp kitchen towel to prevent the dough from drying out. Place the covered bowl in a warm, draft-free location (an ideal spot might be a slightly warmed oven that has been turned off, or a sunny windowsill) for approximately 1.5 hours, or until the dough has visibly doubled in size. This crucial first rise is essential for developing the bread’s flavor and achieving a light, airy texture.
-
Punch Down & Shape: Gently deflate the risen dough by punching it down to release the accumulated air. Transfer the dough onto a lightly floured surface and knead it briefly, for about a minute, to redistribute the yeast and gluten. To shape your loaf, flatten the dough into a rectangular shape. Take one of the longer sides and fold it tightly towards the center, pressing firmly to seal. Repeat this action with the opposite long side. Then, starting from one of the shorter ends, tightly roll the dough into a compact log, pinching the seam shut along the bottom. Use a minimal amount of flour on your hands if the dough starts to feel sticky.
-
Second Rise: Lightly oil a standard loaf pan (approximately 9×5 inches or 23×13 cm). Carefully transfer the shaped dough, with the seam side down, into the prepared loaf pan. Cover the pan loosely with a damp kitchen towel and allow it to rise again in a warm place for another 30 minutes, or until the dough has noticeably increased in size and nearly fills the pan. During the final 15 minutes of this second rise, preheat your oven to 375°F (190°C).
-
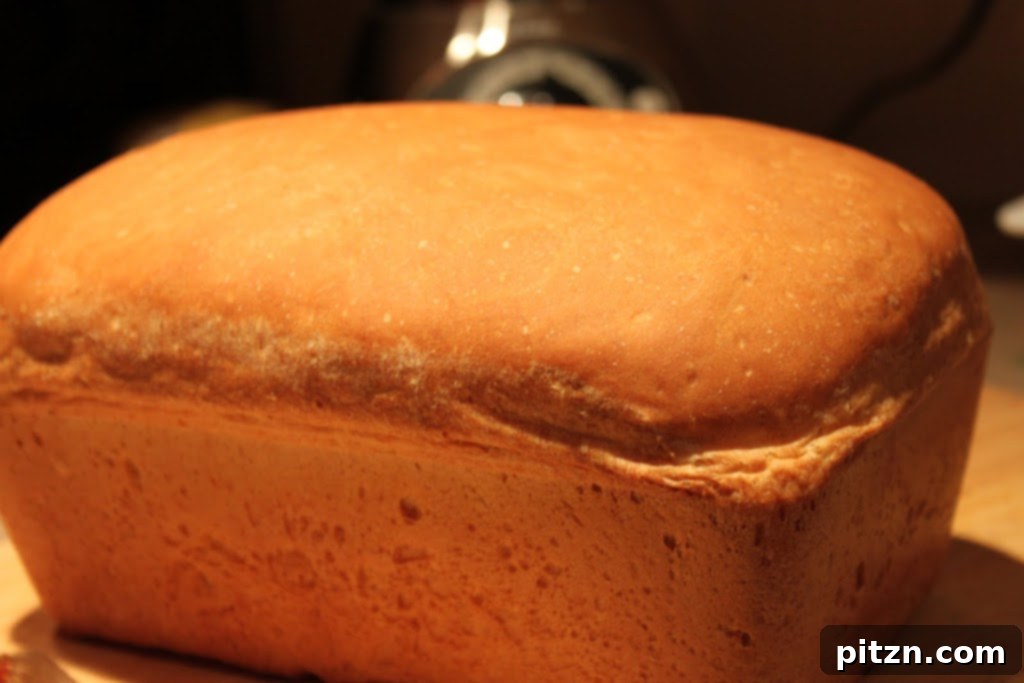
Bake the Loaf: Once your oven is preheated and the loaf has completed its second rise, carefully place the loaf pan into the preheated oven. Bake for approximately 35 minutes, or until the crust develops a beautiful golden-brown color and the internal temperature of the bread registers between 200-210°F (93-99°C) when checked with an instant-read thermometer. If you notice the top browning too rapidly, you can loosely tent the loaf with aluminum foil to prevent over-browning.
-
Cool Completely: This step is critical, no matter how tempting it is to slice into your freshly baked bread! Remove the loaf from its pan immediately after baking and place it on a wire rack to cool down completely. This process typically takes 1-2 hours. Cooling allows the internal structure of the bread to set properly, preventing it from becoming gummy when sliced. For exceptionally clean and uniform slices, especially if using an electric knife, you might even consider refrigerating the fully cooled bread for about half an hour before slicing.
Notes
- The total preparation and cook time (1 hr 10 mins) listed above does not include the essential 1.5 hours of initial dough proving time. Please factor this into your overall baking schedule.
- Nutritional values provided are approximate and are based on a single serving.
- For optimal results and a reliable rise, always ensure your yeast is fresh and active. Store opened yeast packets in an airtight container in the refrigerator or freezer to prolong their shelf life.
- If your kitchen tends to be on the cooler side, you can create a warm environment for your dough to rise. Briefly warm your oven to its lowest setting for a few minutes, then turn it off. Place the covered dough inside the slightly warm, turned-off oven.
Nutrition Information (per serving)
Calories: 256 kcal,
Carbohydrates: 38g,
Protein: 5g,
Fat: 8g,
Saturated Fat: 1g,
Sodium: 235mg,
Potassium: 72mg,
Fiber: 1g,
Sugar: 1g,
Vitamin A: 10 IU,
Vitamin C: 3.1mg,
Calcium: 10mg,
Iron: 1.5mg
Nutrition information is automatically calculated and should only be used as an approximation. Actual values can vary significantly based on specific ingredients, brands, and precise preparation methods used.
Tips for Success: Achieving the Best Vegan Bread Every Time
Baking homemade bread is a rewarding process, and these tips will help ensure your vegan white sandwich loaf turns out perfectly fluffy and delicious:
- Yeast Activation is Paramount: Always perform the frothy test described in the instructions to confirm your yeast is active. If your yeast doesn’t become foamy within 10 minutes, it may be expired, or your water temperature was incorrect. Using inactive yeast will result in a dense, flat loaf, so it’s best to start over with fresh yeast.
- Embrace Proper Kneading: Kneading is more than just mixing; it’s the process that develops the gluten in the flour, which is essential for giving the bread its structure, elasticity, and airy texture. Do not cut short the kneading time. The dough should feel smooth, springy, and elastic. You can test for proper gluten development with the “windowpane test”: stretch a small piece of dough thin enough to see light through it without it tearing.
- Cultivate a Warm Rising Environment: Yeast thrives in warmth! An ideal temperature range of 75-80°F (24-27°C) in a draft-free location is crucial for optimal dough rising. If your kitchen is cool, consider turning your oven on for a few minutes until it’s slightly warm, then turn it off and let your covered dough rise inside. This creates a perfect proofing box.
- Resist Over-Flouring: It’s a common temptation to add more flour when dealing with sticky dough. However, adding too much flour can lead to a dry, dense, and heavy loaf. Add flour sparingly during the kneading process, only as much as needed to prevent the dough from sticking excessively to your hands or the work surface. The dough should remain slightly tacky but still manageable.
- Learn to “Read” Your Dough: While recipes provide estimated rise times, these are just guidelines. The actual time needed for dough to double in size can vary significantly based on the ambient temperature and humidity of your kitchen. Always rely on visual cues—the dough should clearly double in volume and feel airy—rather than strictly adhering to the clock.
- Cooling is Non-Negotiable: This might be the hardest step, but it’s vital! Slicing into a hot loaf of bread can collapse its delicate internal structure, resulting in a gummy, unappetizing texture. Allow the bread to cool completely on a wire rack for at least 1-2 hours. This patience will be richly rewarded with perfectly structured, beautiful slices.
Serving Suggestions & Storage for Your Homemade Loaf
This wonderfully versatile vegan white sandwich loaf is a perfect foundation for a myriad of culinary creations. Its neutral flavor and fluffy texture make it an excellent choice for almost anything. Here are some delightful ways to enjoy your freshly baked bread:
- Classic Sandwiches: Whether it’s a simple peanut butter and jelly, a hearty vegan deli sandwich, or a stack of fresh vegetables, this bread provides a sturdy yet soft base that holds up beautifully.
- Perfect Toast: Enjoy it lightly toasted with your favorite vegan butter, a creamy spread of avocado, or a generous dollop of fruit preserves for a delightful breakfast or snack.
- Homemade Croutons & Breadcrumbs: If you find yourself with any leftover bread that’s a day or two old, it’s ideal for transforming into crispy homemade croutons for salads or fresh breadcrumbs to top casseroles and pasta dishes.
- Garlic Bread: Slice the loaf, generously spread with a homemade vegan garlic butter, and lightly toast for an aromatic and flavorful side dish that pairs well with Italian meals.
- Vegan French Toast: Day-old slices of this bread are absolutely perfect for whipping up a decadent vegan French toast breakfast. Its ability to absorb the batter without falling apart makes it an excellent choice.
Storage Recommendations:
To keep your homemade vegan white sandwich loaf fresh and delicious, allow it to cool completely after baking. Once cooled, store the loaf at room temperature in an airtight container, a clean bread box, or a sealed bread bag. It will maintain its freshness and delightful texture for up to 3-4 days.
For longer-term storage, we recommend slicing the fully cooled bread before freezing. Arrange the slices in a single layer on a baking sheet to flash freeze for about 30 minutes, then transfer them to a freezer-safe bag or container. This prevents sticking and allows you to grab individual slices. Frozen slices can be kept for up to 2-3 months and can be toasted directly from the freezer, making breakfast or snack time incredibly convenient.
Frequently Asked Questions (FAQ) About Vegan White Bread
- Can I use only all-purpose flour for this recipe?
- While it is technically possible to use only all-purpose flour, this recipe is specifically formulated with a combination of bread flour and all-purpose flour to achieve the optimal balance of structure and softness. Using only all-purpose flour might result in a loaf that is slightly less chewy and lacks the robust structure provided by bread flour.
- Can I substitute the olive oil with a different type of oil?
- Yes, you can substitute the extra virgin olive oil with other neutral-flavored vegetable oils, such as canola oil, sunflower oil, or grapeseed oil. Melted vegan butter can also be used, but note that olive oil often contributes to a particularly soft and moist crumb in this recipe.
- My dough isn’t rising; what could have gone wrong?
- The most common culprits for dough failing to rise are inactive or expired yeast. Always check the expiration date on your yeast package. Another frequent issue is incorrect water temperature during yeast activation – water that is too hot will kill the yeast, while water that is too cold will inhibit its activity. Ensure your yeast is fresh and your proofing environment is consistently warm and free of drafts.
- How can I tell when the bread is fully baked?
- The crust of a fully baked loaf should be a beautiful golden-brown. When you remove it from the pan and tap the bottom, it should produce a hollow sound. For the most accurate assessment, insert an instant-read thermometer into the center of the loaf; it should register an internal temperature between 200-210°F (93-99°C).
- Is it possible to make this bread gluten-free?
- This particular recipe relies heavily on the gluten development from wheat flour to achieve its characteristic light and fluffy texture and robust structure. Adapting it to be completely gluten-free would require significant modifications, including the use of specialized gluten-free bread flour blends and potentially additional binders, which would fundamentally alter the intended texture and outcome of this specific recipe.
Conclusion
Baking your own vegan white sandwich loaf is an immensely satisfying and rewarding experience. From the moment the comforting aroma begins to fill your kitchen to the first delightfully soft bite of a freshly baked slice, this recipe is crafted to bring both joy and unparalleled deliciousness to your table. It serves as wonderful proof that embracing a plant-based diet doesn’t mean you have to compromise on classic comforts or the sheer pleasure of homemade goods. So, gather your ingredients, follow these clear and simple steps, and prepare to indulge in what might just be the best homemade vegan white bread you’ve ever tasted. We sincerely hope this recipe earns a cherished spot in your culinary repertoire and brings a touch of homemade magic to your everyday meals!
Did you make this delicious vegan bread?
We’d love to hear about your baking success! Share your experience and leave a comment below.