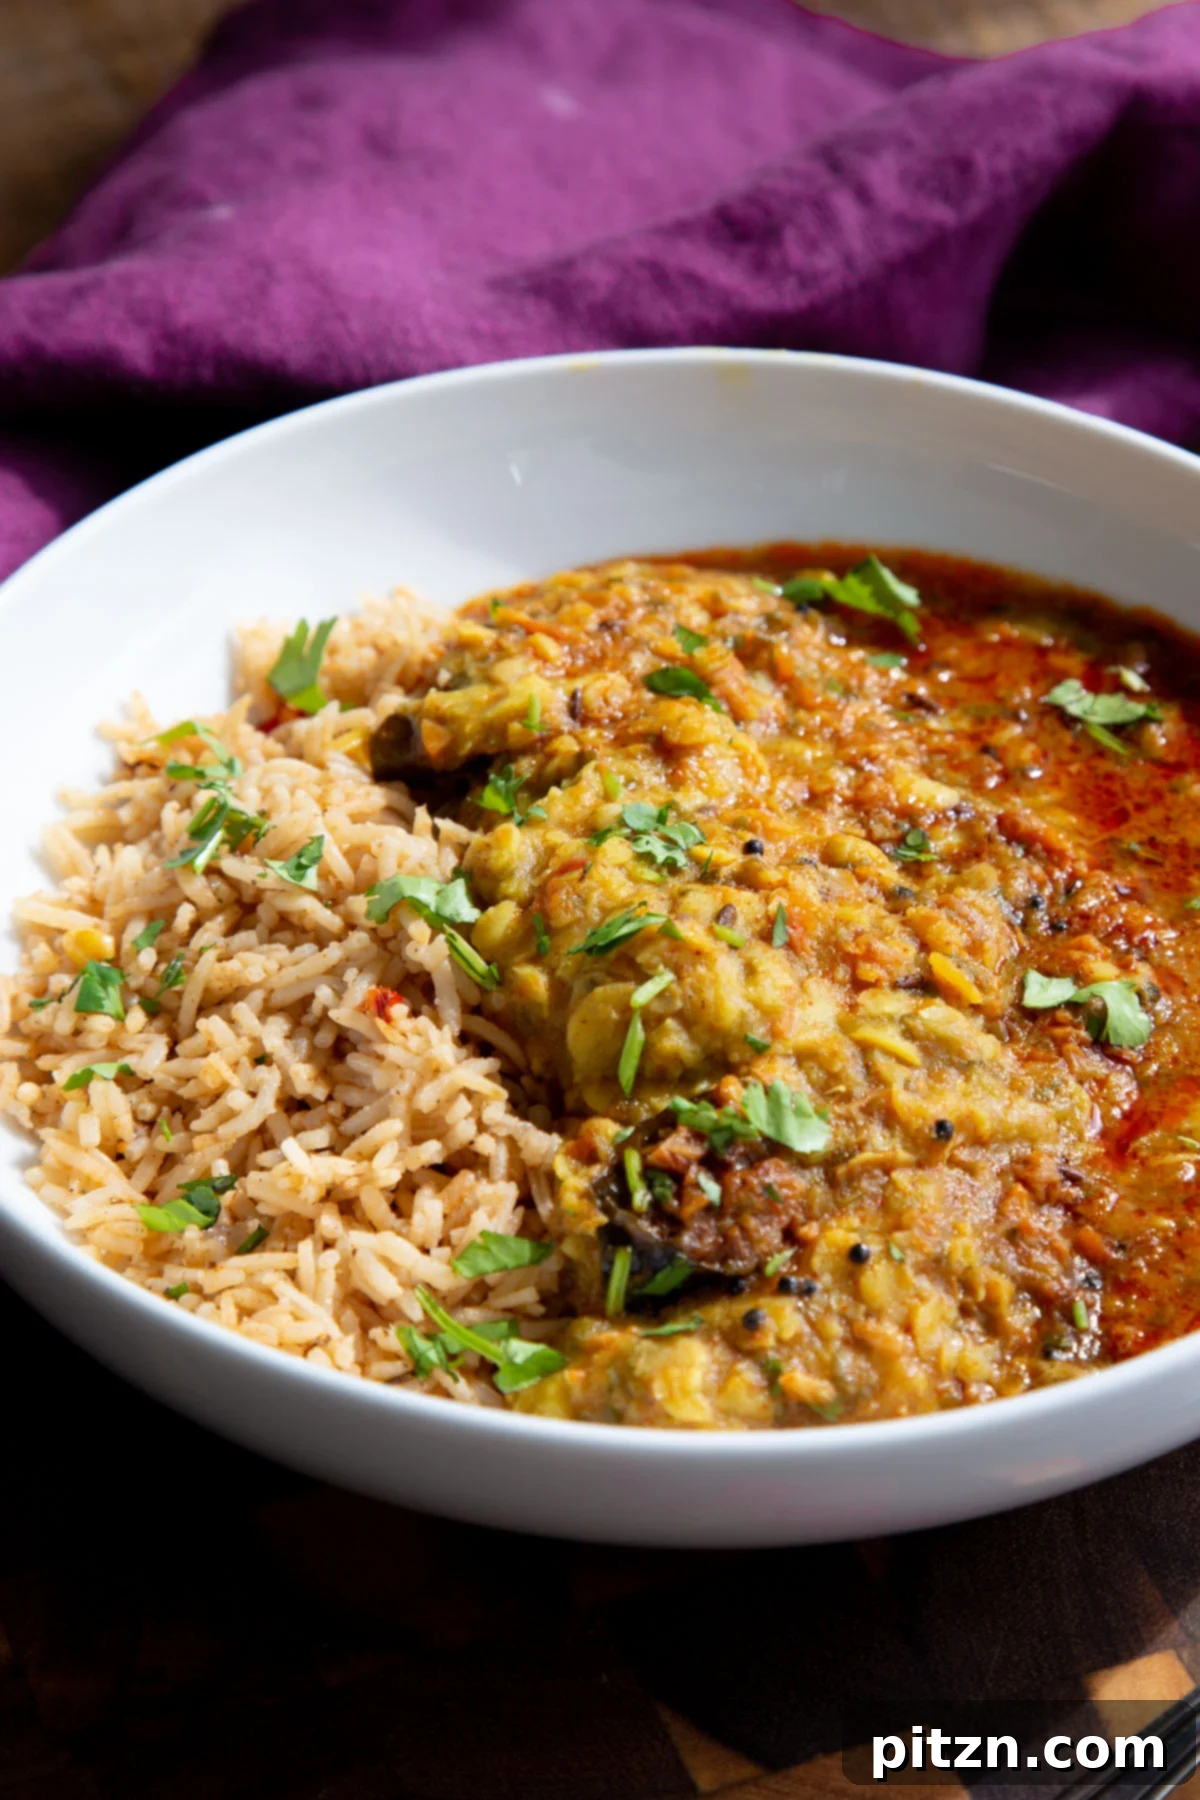
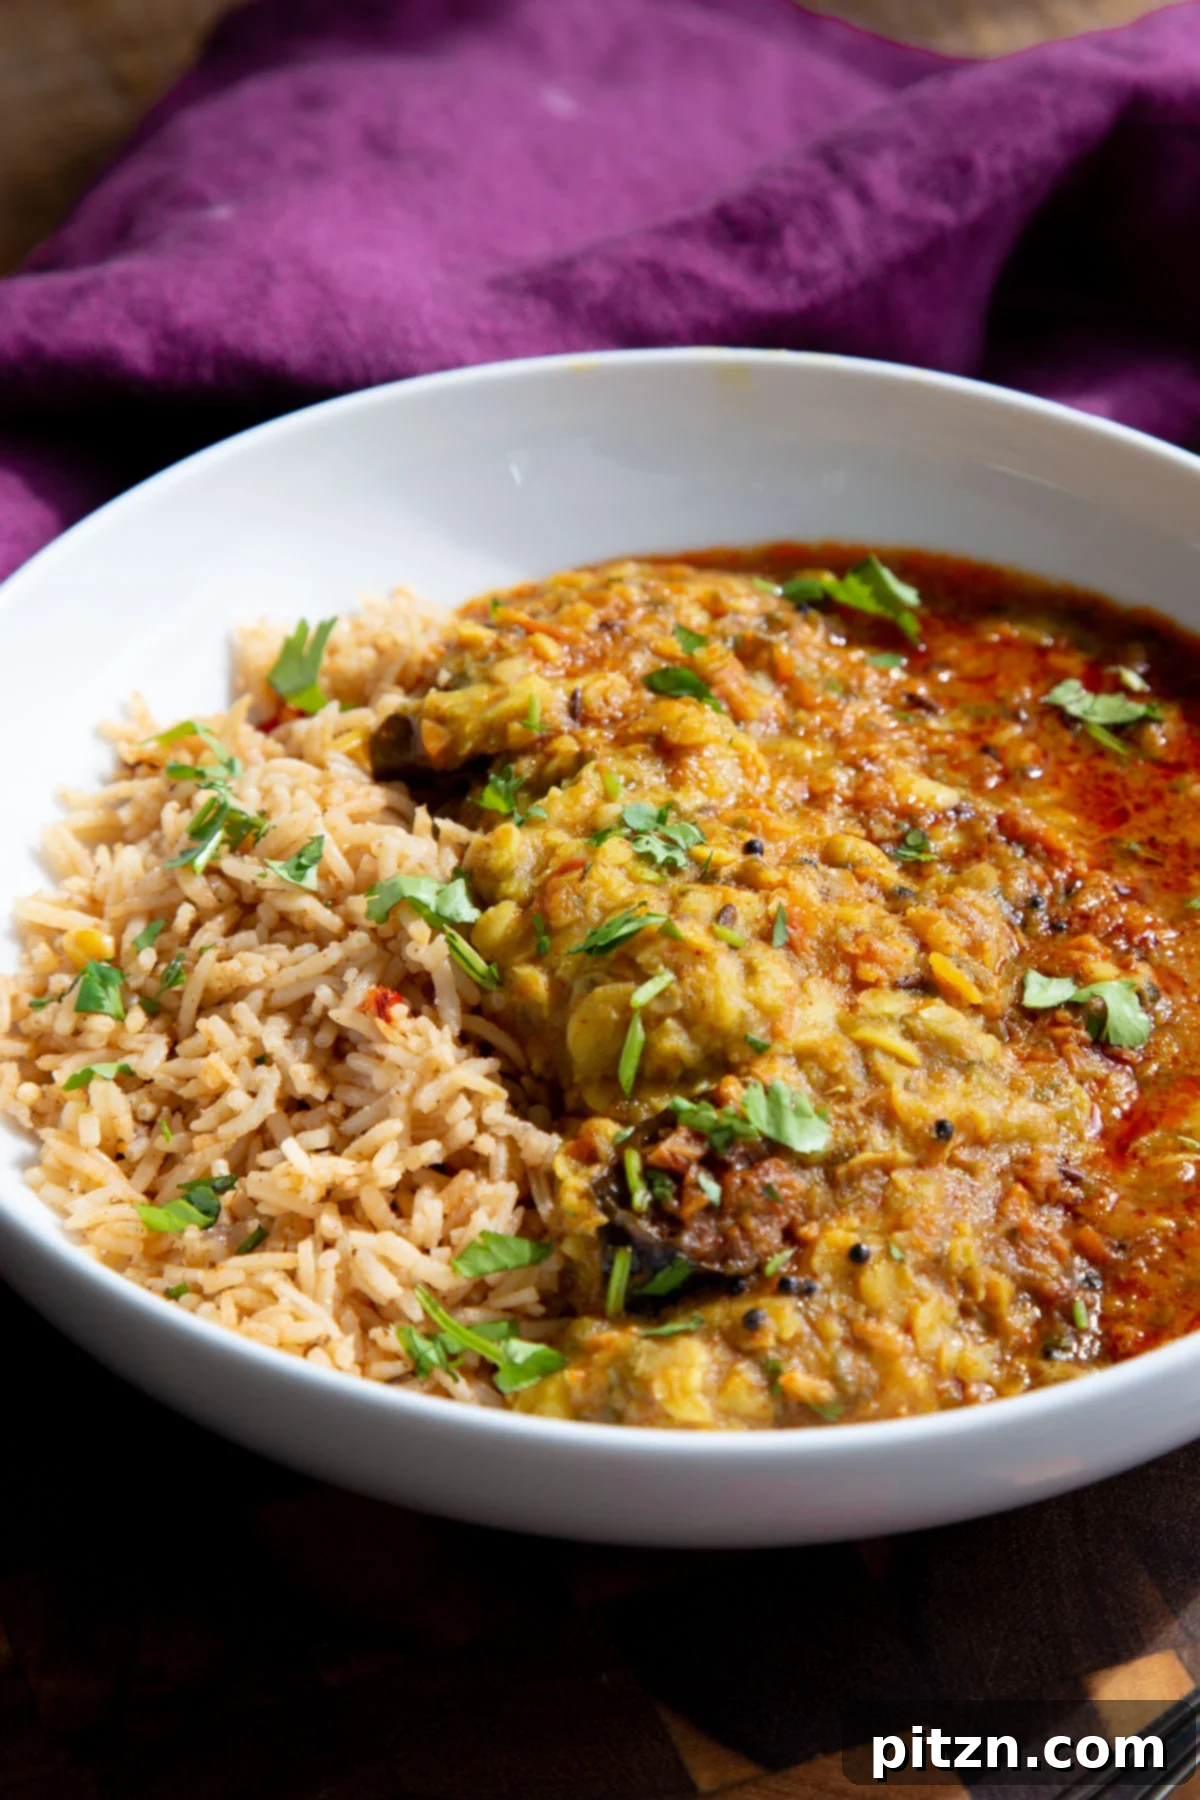
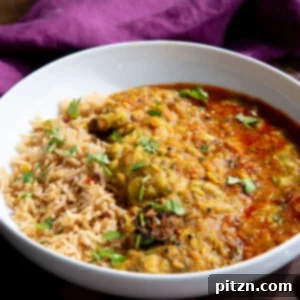
Delve into the vibrant and spicy flavors of Maharashtra with Chataka Dal, a truly invigorating lentil dish that promises to awaken your palate. Hailing from the heart of India’s western state, this Maharashtrian specialty is crafted from humble yellow split pigeon peas (toor dal), slow-simmered with ripe tomatoes, and then brought to life with a sizzling, aromatic chili tempering, known as tadka. It’s a culinary masterpiece that embodies comfort with a fiery kick, making it a beloved staple in homes across the region. Best of all, this hearty and flavorful dal is naturally gluten-free, soy-free, and nut-free, making it a fantastic option for a wide array of dietary preferences and an excellent addition to any vegan meal plan.
The Heart of Maharashtrian Cuisine: A Culinary Journey with Chataka Dal
Growing up in the diverse and culturally rich state of Maharashtra, I developed a profound appreciation for its unique culinary traditions. The flavors of Maharashtrian cuisine hold an incredibly special place in my heart, evoking memories of home and vibrant family meals. Our blog already celebrates many of these regional gems, showcasing the incredible diversity of Indian cooking. From the simplest dals to the most intricate bhaji preparations, Maharashtrian food offers a spectrum of tastes. You can explore my flavorful Jackfruit Brown Chickpea Bhaji (Fanasachi Bhaji), the intensely spiced Saoji (Savji) dishes, the rich and robust Kolhapuri gravies, and the rustic charm of Zunka, all of which capture the essence of this regional cooking. For those eager to delve even deeper, my cookbook features authentic recipes like the iconic Misal Pav and the tangy Amti Dal, offering a comprehensive guide to Maharashtra’s culinary heritage.
Among these cherished recipes, Chataka Dal stands out as a personal favorite. While it calls for a relatively short list of everyday ingredients, its flavor profile is anything but simple. The magic truly happens with the addition of a fiery chili tempering, known as tadka, which infuses the dal with its signature heat and complexity. This tempering is where the “Chataka” – meaning “spicy,” “piquant,” or “fiery” – truly comes to life, distinguishing it from other dal varieties. The interplay of soft, creamy lentils with the vibrant, spicy tempering creates a deeply satisfying and invigorating experience. Rest assured, the spice level is entirely customizable; you can easily adjust the amount of chili powder to tailor it to your personal preference, ensuring a delightful experience for all. This makes Chataka Dal a versatile and approachable dish, perfect for both seasoned enthusiasts of Indian cuisine and newcomers alike.
This Maharashtrian lentil dish is not just a meal; it’s an experience. The comforting texture of the perfectly cooked pigeon peas, combined with the bright tang of tomatoes and the explosive flavor of the tempering, creates a symphony of tastes that is both nourishing and exciting. It’s the kind of dish that warms you from the inside out, making it perfect for a cozy weeknight dinner, a satisfying lunch, or a special family gathering. Whether you’re seeking traditional Indian comfort food or a bold new flavor adventure, Chataka Dal offers an accessible yet profound introduction to the rich culinary landscape of Maharashtra, highlighting the region’s love for vibrant, spiced dishes.
Understanding Dal: India’s Quintessential Soul Food
Dals are the very essence of Indian comfort food, offering an incredible variety of flavors and textures that differ vastly from state to state and region to region. These versatile lentil-based dishes are not merely side accompaniments; they are often the star of the meal, providing essential plant-based protein, fiber, and a comforting warmth that satisfies the soul. The culinary ingenuity of Indian cuisine shines through in its meticulous use of numerous types of dals and legumes, each bringing its unique character, texture, and nutritional profile to the plate. If you’re curious to explore the vast and fascinating world of Indian lentils and their diverse names, you can find a comprehensive visual guide with pictures here, which serves as an excellent resource for navigating these nutritious staples.
Chataka Dal, in particular, stands out for its relatively quick preparation and undeniably delicious taste. Its straightforward cooking process makes it accessible for home cooks, while its robust flavors make it a memorable dish. Traditionally, this dal would feature a more generous amount of Indian chili powder in its tempering, often calling for 1 to 2 tablespoons, delivering an intensely high level of heat. However, to cater to a broader range of palates, I typically adjust this quantity, using less chili powder to achieve a perfectly balanced spice level that is still vibrant and flavorful but not overwhelmingly fiery for most individuals. This flexibility in spice adjustment is one of the many beauties of Indian cooking, empowering each chef to personalize their creations to suit individual preferences. The goal is a lively warmth that enhances the dal, rather than overpowering it.
Another great aspect of this Chataka Dal recipe is its adaptability regarding the choice of lentils. While yellow split pigeon peas (toor dal) are the traditional choice and lend a distinct creaminess, you can easily substitute them with other common lentils or split peas you might have on hand. Chana dal (split skinned brown chickpeas) offers a slightly nuttier flavor and firmer texture, while moong dal (split mung beans) provides a quicker-cooking and lighter alternative. Regardless of your choice, the key is to cook your chosen dal thoroughly until it reaches a tender, creamy consistency that melts in your mouth. Once your dal is perfectly cooked, the final, crucial step of adding the signature tempering (Tadka) will transform it into the rich, aromatic, and flavorful Chataka Dal you’re craving. This dish truly showcases how simple, wholesome ingredients, when combined with thoughtful technique, can create extraordinary and deeply satisfying culinary experiences.
Explore More Delicious Dal Recipes:
If you’ve enjoyed the comforting flavors of Chataka Dal and are eager to discover more lentil-based masterpieces from Indian cuisine, here are some other highly recommended dal recipes from our collection:
- Sabut Masoor Ki Daal: A Hearty Spiced Whole Lentil Soup
- Dhaba Style Butter Dal (Vegan & Incredibly Creamy)
- Vegan Handi Lentils: A Rich and Creamy Indian Dal with a Unique Flavor
- Instant Pot Dal Bukhara: A Dump-and-Done Recipe for Creamy Black Lentils
- Spicy Urad Dal: A Comforting and Robust Black Gram Lentil Dish
Chataka Dal: Spicy Maharashtrian Toor Dal
⭐⭐⭐⭐⭐
Print Recipe
Ingredients
- 3/4 cup toor dal (yellow split pigeon peas) (You can also use chana dal (split skinned brown chickpeas) or moong dal (split mung beans))
- 1 tomato, chopped small
- 1/4 cup fresh cilantro, chopped
- 1/4 teaspoon turmeric powder
- 1/2 teaspoon salt (adjust to taste)
- 4 cups water
For the Tadka (Tempering):
- 2 teaspoons oil (preferably a neutral cooking oil)
- 1/2 teaspoon mustard seeds
- 1/2 teaspoon cumin seeds
- 1/8 teaspoon asafoetida, (hing)
- 12 curry leaves, fresh, frozen, or dried
- 6 to 8 cloves of garlic, finely chopped
- 1 teaspoon Kashmiri chili powder, (or use paprika for milder heat and color)
- 1 teaspoon cayenne pepper (adjust to desired spiciness, or use 1/2 tsp cayenne and 1/2 tsp paprika for less heat)
- Fresh lemon juice and additional chopped cilantro (for garnish)
Instructions
-
1. Prepare the Dal: Begin by thoroughly washing 3/4 cup of toor dal (split pigeon peas) under cold running water until the water runs completely clear. This step is essential to remove any impurities and excess starch. For optimal cooking and improved digestion, soak the washed dal in hot water for about 10 minutes. This brief pre-soaking helps to soften the lentils, reducing their overall cooking time. After 10 minutes, drain the water completely. Transfer the soaked and drained dal into a heavy-bottomed saucepan or pot. Add 1 chopped small tomato, 1/4 cup of freshly chopped cilantro, 1/4 teaspoon of turmeric powder, and 1/2 teaspoon of salt. Pour in 4 cups of fresh water. Gently stir all the ingredients together to ensure they are well combined and the spices are distributed.
-
2. Simmer to Perfection: Bring the mixture to a rolling boil over medium heat. Once boiling, reduce the heat to medium-low, cover the saucepan partially (leaving a small gap for steam to escape), and let it simmer gently. The cooking time will vary depending on the specific type of dal and its freshness. Typically, toor dal will take anywhere from 35 to 55 minutes to become completely tender and creamy, easily mashable with the back of a spoon. Stir occasionally to prevent sticking to the bottom of the pan, and add a little more hot water if the dal becomes too thick during simmering.
-
3. Pressure Cooker Method (Optional for Faster Cooking): If you prefer a quicker cooking process, especially if using a dal like chana dal (which can take up to 2 hours in a saucepan if older), an Instant Pot or traditional pressure cooker is highly recommended. For pressure cooking, significantly reduce the water quantity to only 2 cups. Combine the washed and drained dal with all the other initial ingredients (chopped tomato, 1/4 cup cilantro, turmeric, and salt) directly into your Instant Pot or pressure cooker. Set the cooking time as follows: pressure cook for 10 minutes for toor dal (split pigeon peas), 6 minutes for moong dal (split mung beans), and 18-20 minutes for chana dal (split skinned brown chickpeas). After the cooking cycle, allow the pressure to release naturally for about 10 minutes before performing a quick release of any remaining pressure. Then, carefully open the lid. The dal should be wonderfully soft and creamy.
-
4. Prepare the Tempering (Tadka): In a separate small skillet or a dedicated tempering pan, heat 2 teaspoons of oil over medium-high heat. The key to a good tadka is ensuring the oil is at the optimal temperature. You can easily test this by dropping 1 or 2 mustard seeds into the oil; they should sizzle vigorously and immediately begin to change color. If they don’t, allow the oil to heat for another minute or two. Conversely, if they pop out too quickly and aggressively, the oil is likely a bit too hot, so reduce the heat slightly to prevent burning.
-
5. Bloom the Seeds: Once the oil is at the right temperature, add the remaining mustard seeds. Cook them, stirring frequently, until they begin to splutter vigorously, pop, and turn a visibly lighter color. This indicates they are fully cooked and their distinctive nutty flavor has been released. Immediately follow with 1/2 teaspoon of cumin seeds and stir for just a few seconds, allowing them to become fragrant and slightly darken. Be extremely careful not to burn the cumin seeds, as they can quickly turn bitter.
-
6. Add Aromatics and Curry Leaves: Reduce the heat to medium. Add 12 curry leaves (whether fresh, frozen, or dried) and 1/8 teaspoon of asafoetida (hing) to the pan. Stir constantly for another few seconds to allow their vibrant aromas to infuse the hot oil. Next, carefully add the 6 to 8 finely chopped cloves of garlic to the pan. Sauté the garlic, stirring continuously to ensure even cooking, until it starts to turn a beautiful light golden color. This step is crucial for developing a deep, savory, and aromatic base for the tempering.
-
7. Expert Tip for Electric Stoves: If you are cooking on an electric stove, which tends to retain heat longer, it’s a wise practice to briefly remove the pan from the heat at this stage, as the garlic begins to turn golden. This extra caution helps prevent the garlic from burning while you prepare to add the dry spices. If the pan still feels excessively hot, you can also add an additional teaspoon of oil; this helps to slightly cool the pan and prevent scorching of the delicate chili powders.
-
8. Introduce the Chili Powders: As soon as the garlic achieves that beautiful golden hue, stir vigorously, then quickly add 1 teaspoon of Kashmiri chili powder (primarily for its vibrant red color and mild heat) and 1 teaspoon of cayenne pepper (this is where the true “chataka” or spiciness comes from – adjust this amount precisely to your desired spice level). Mix them into the hot oil swiftly for only a few seconds to toast the spices and release their full aroma and color. Immediately take the pan off the heat to prevent the chili powders from burning, which can unfortunately lead to a bitter and unpleasant taste in your dal.
-
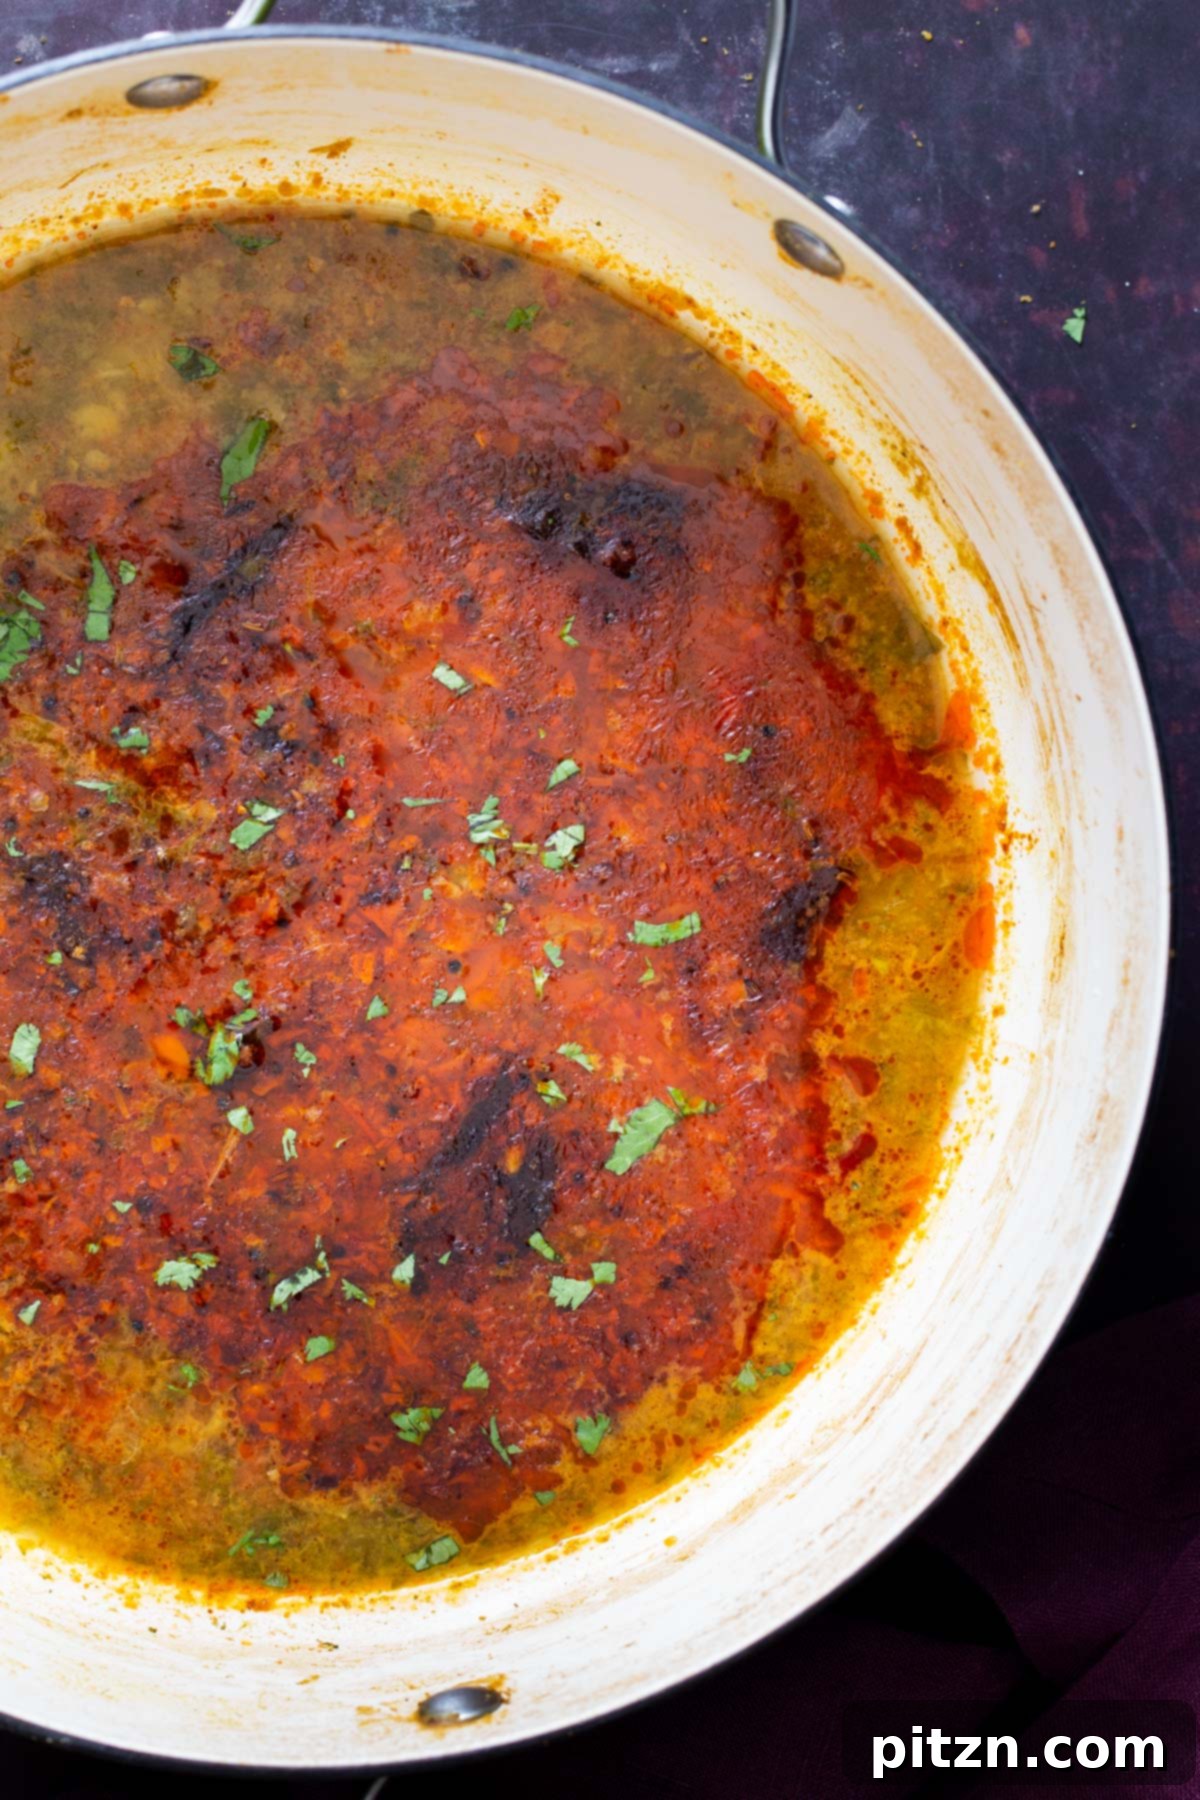
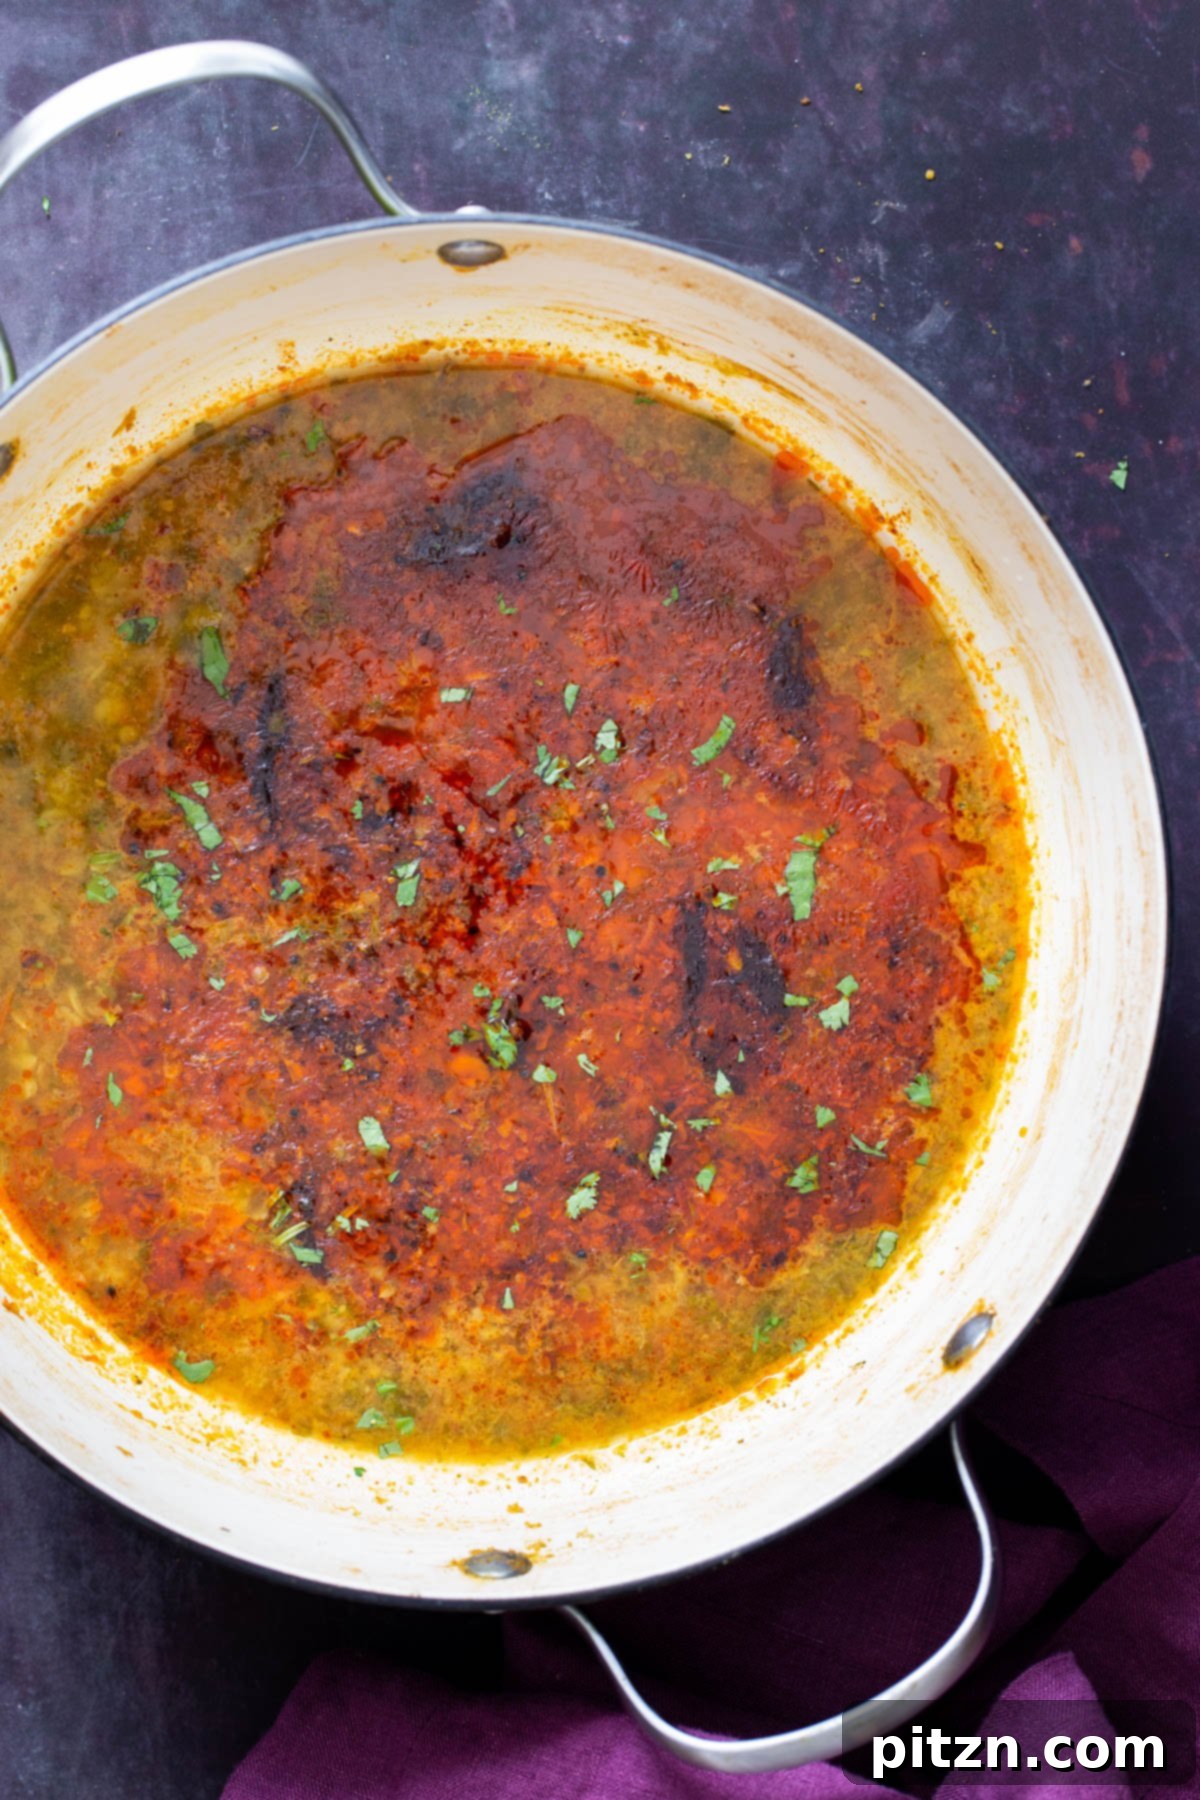
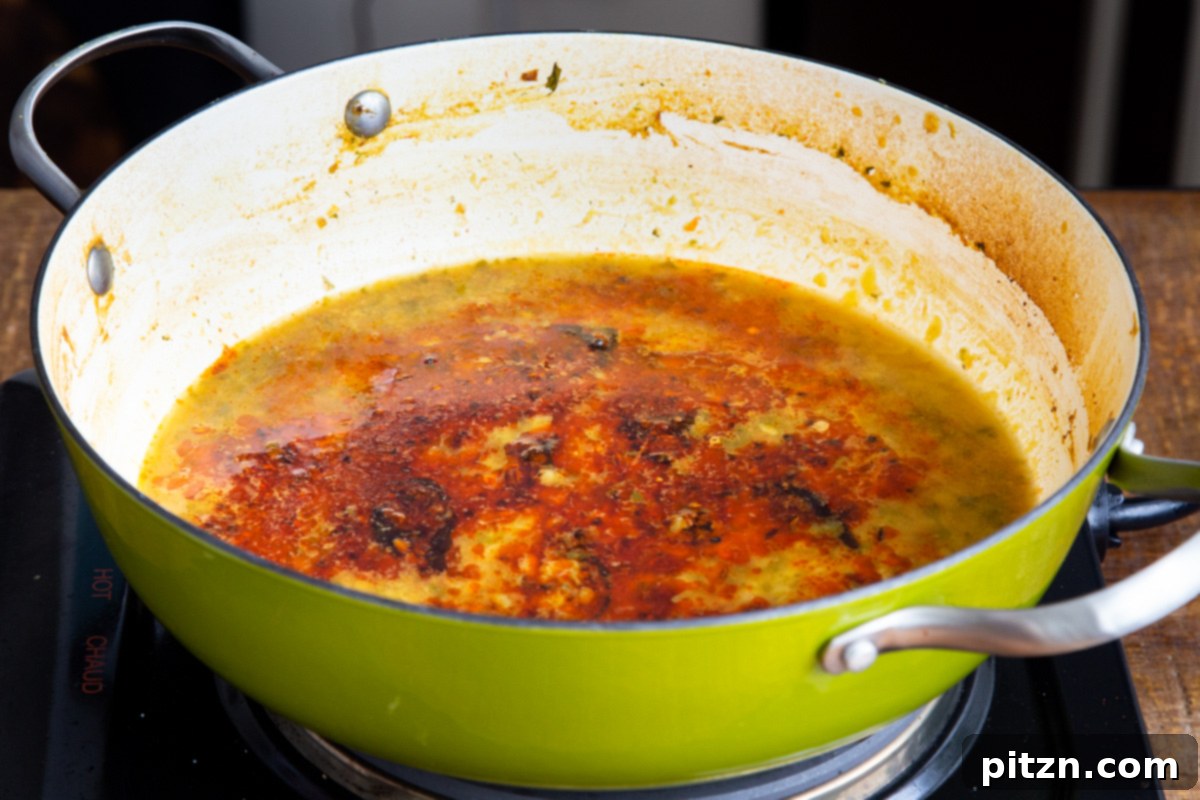
9. Combine Tadka with Dal: Now for the grand finale that brings Chataka Dal to life! Carefully pour this hot, incredibly aromatic, and sizzling tadka directly over your beautifully cooked dal. For a visually appealing presentation where the tempering creates a distinct, colorful layer rather than being fully mixed into the dal, I often transfer the cooked dal into a separate serving bowl or container before adding the tadka. You can then gently swirl it in without fully incorporating it, allowing the vibrant colors and flavors to remain distinct.
-
10. Maximize Flavor Transfer: If you notice some spices or flavorful oil clinging to your tempering pan after pouring, don’t let them go to waste! You can add a few splashes of hot water to the tempering pan, swirl it around vigorously to loosen any remaining flavorful tempering, and then pour this infused liquid over the dal. This ensures you capture every last bit of flavor and aroma, enriching the entire dish. Gently swirl the tempering into the dal, allowing its spicy aroma to permeate and infuse the entire dish.
-
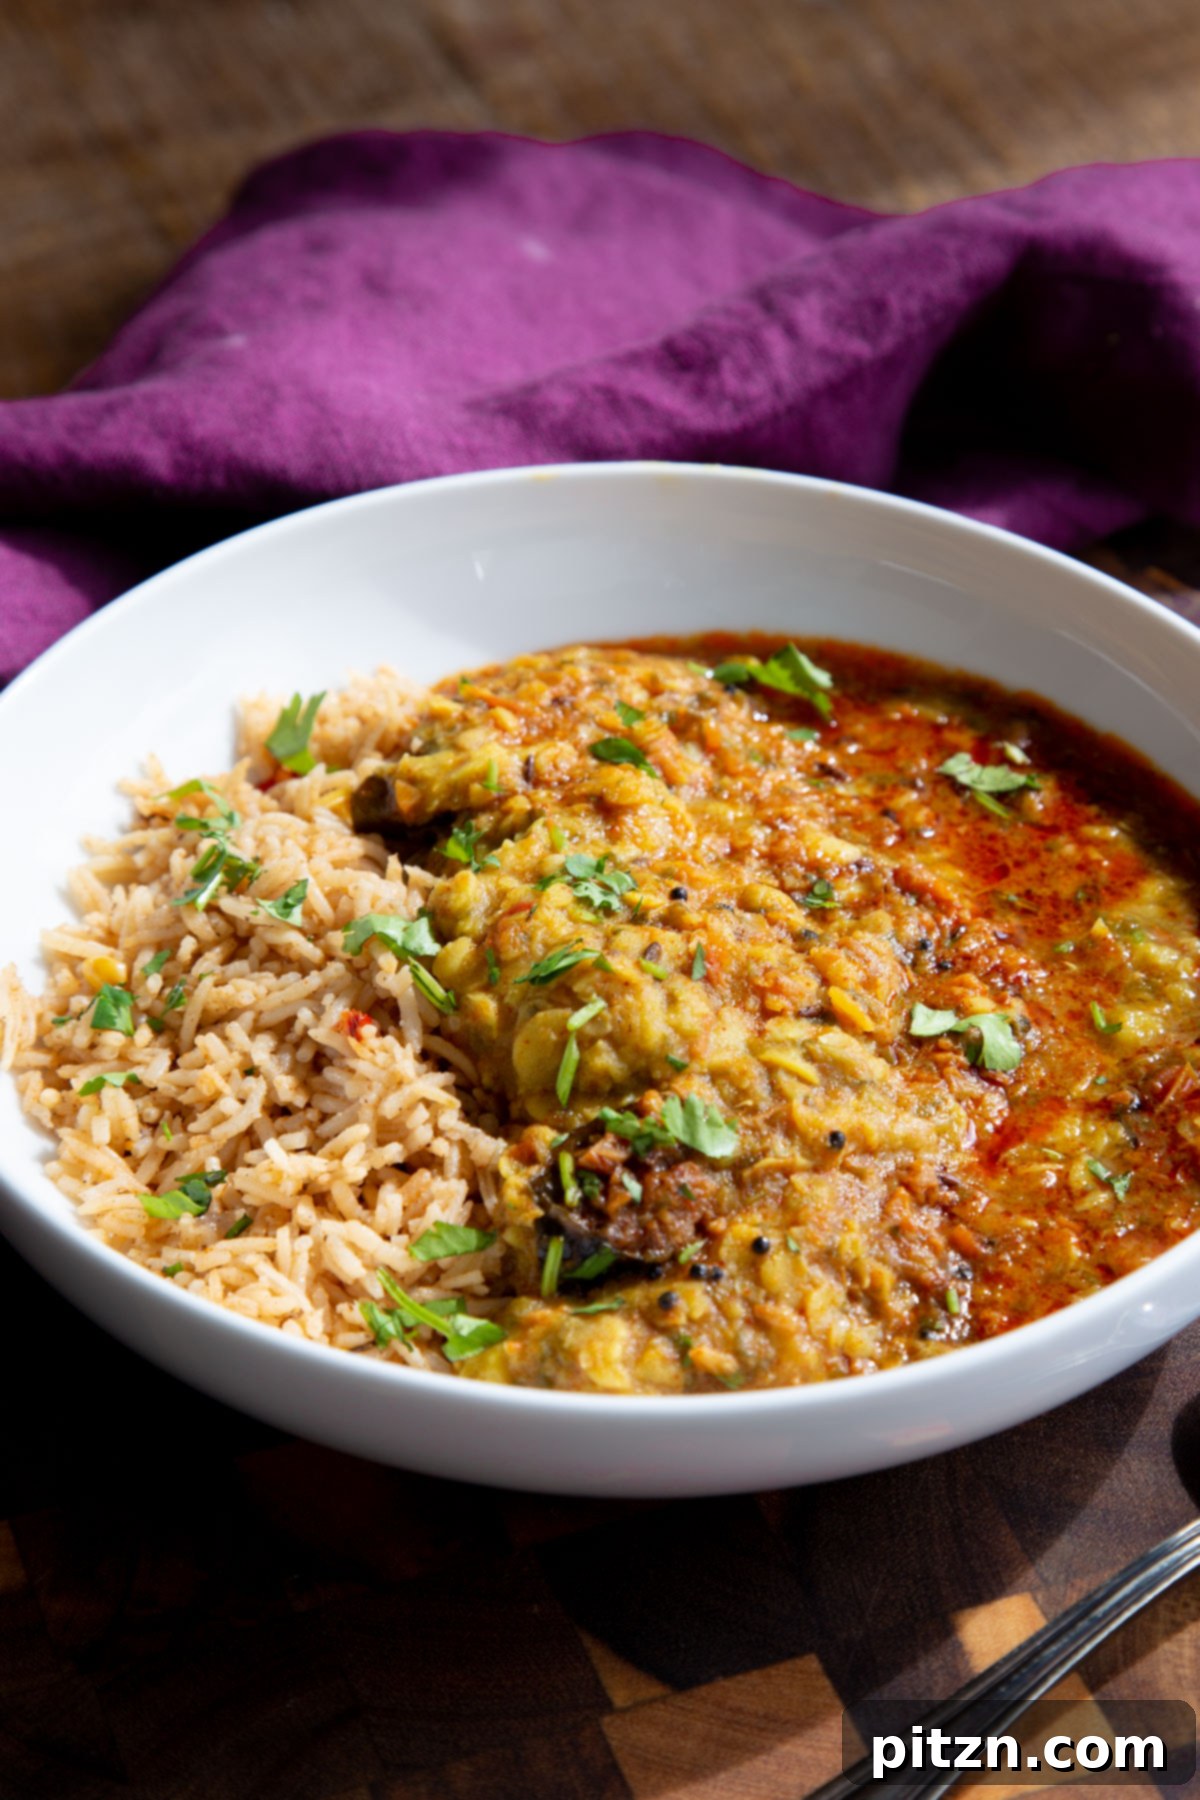
11. Serve: Garnish generously with a fresh squeeze of lemon juice, which brightens all the flavors, and an additional sprinkle of freshly chopped cilantro for a burst of freshness. Serve your exquisite Chataka Dal immediately and hot, accompanied by warm flatbreads like roti, bhakri, or steaming basmati rice. This dal’s robust, spicy, and comforting flavors pair exceptionally well with rice, creating a wholesome, satisfying, and truly authentic Maharashtrian meal experience.
Video Tutorial: Learn to Make Chataka Dal
Chef’s Notes & Expert Tips for Chataka Dal
- Adjusting the Heat: Chataka Dal is famously known for its spicy character, but you have full control over the intensity. If you prefer a milder version, feel free to significantly reduce the amount of cayenne pepper and Kashmiri chili powder in the tempering. You can even replace some of the cayenne with an equal amount of sweet paprika to achieve a beautiful color without adding excessive heat. Tailor it to your personal preference for the perfect kick!
- Dietary Considerations: One of the remarkable advantages of Chataka Dal is its inherent suitability for various dietary needs. This flavorful lentil dish is naturally gluten-free, soy-free, and nut-free, making it an excellent and safe choice for those with common food allergies or specific dietary restrictions. This ensures that almost everyone can enjoy this delicious and wholesome Indian classic.
- Serving Suggestions: Elevate your meal by serving Chataka Dal with a variety of traditional Indian sides, creating a truly authentic and balanced feast. Consider delightful pairings like a fresh poriyal (South Indian style carrot and green beans stir-fry), my savory jackfruit bhaji, the rustic Maharashtrian Zunka, delightful crunchy spicy potatoes, or a comforting eggplant and potato stir-fry. For an authentic Maharashtrian experience, serving it with sorghum bhakri flatbread is highly recommended.
- Garlic-Free Option: For those who prefer to avoid garlic in their diet, this recipe can be easily adapted. Simply omit the garlic from the tempering. To compensate for the missing flavor and to add a unique depth, consider adding an extra pinch of asafoetida (hing) and about 1/2 teaspoon of dried fenugreek leaves (kasuri methi). These ingredients will lend a subtle, earthy, and aromatic profile to your dal, ensuring it remains incredibly flavorful.
Nutrition Information (Approximate per serving)
Calories: 127 kcal
Carbohydrates: 20g
Protein: 7g
Fat: 3g
Saturated Fat: 0.2g
Sodium: 337mg
Potassium: 117mg
Fiber: 5g
Sugar: 2g
Vitamin A: 589IU
Vitamin C: 66mg
Calcium: 52mg
Iron: 1mg
Disclaimer: Nutrition information provided is an approximation, automatically calculated, and should be used as a general guide. Actual values may vary based on ingredients and preparation methods.
Did you try this amazing Chataka Dal recipe? We’d absolutely love to hear from you! Please take a moment to rate the recipe and share your thoughts in the comments below!
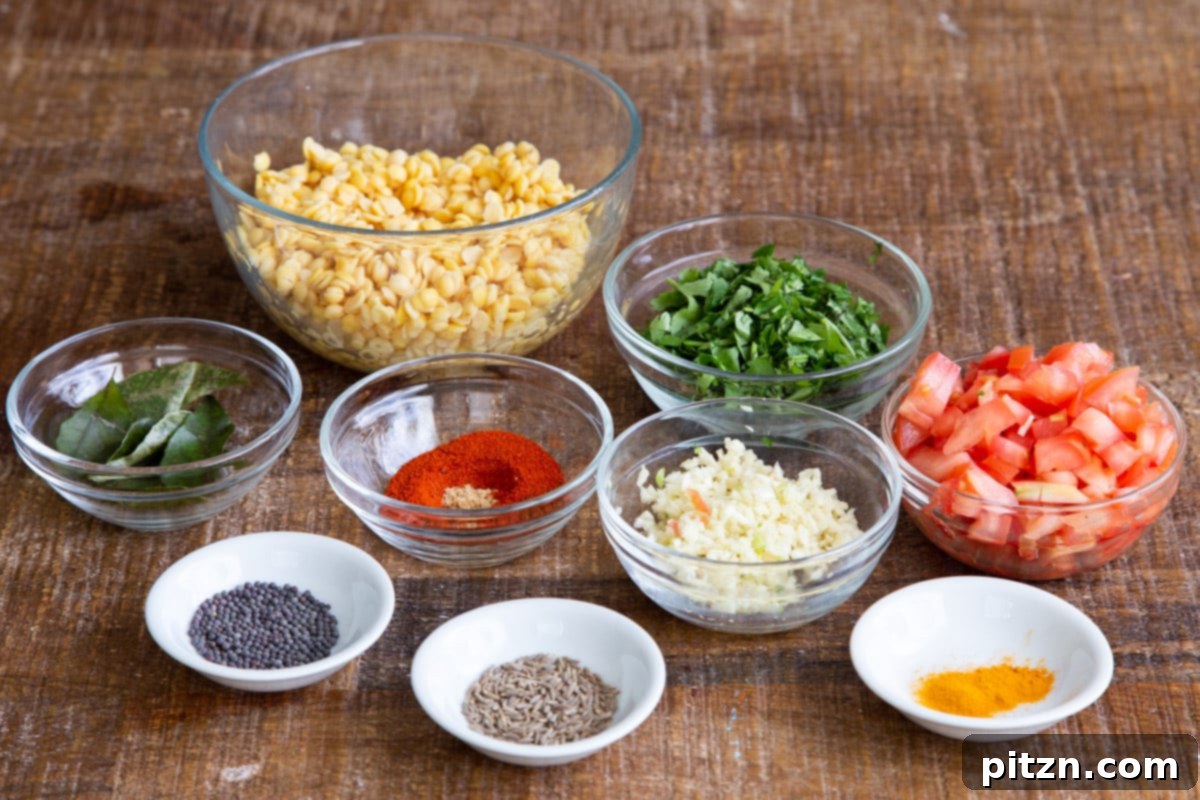
Key Ingredients for Authentic Chataka Dal: A Detailed Breakdown
Crafting the perfect Chataka Dal requires a thoughtful selection of staple Indian ingredients. Each component plays a vital role in building the layered and complex flavors that define this beloved Maharashtrian classic. Understanding the purpose of each ingredient will help you appreciate the depth of this dish and also guide you in making any necessary substitutions.
- Toor Dal (Yellow Split Pigeon Peas): This is the fundamental ingredient and the heart of our dal. Toor dal, also known as Arhar dal, cooks down to a wonderfully creamy, comforting consistency, providing a subtly earthy and slightly sweet base that perfectly absorbs the flavors of the tempering. While toor dal is traditional, this recipe is quite forgiving. You can also successfully use chana dal (split skinned brown chickpeas) for a slightly nuttier flavor and firmer texture, or moong dal (split mung beans) for a quicker-cooking and lighter alternative, yielding a slightly different but equally delicious result.
- Fresh Tomatoes: Finely chopped ripe tomatoes are essential. They are simmered directly with the dal, contributing a crucial tanginess and depth of flavor that beautifully balances the richness of the lentils and the heat of the spices. They also add a lovely body and a hint of natural sweetness to the final dish, making the dal more wholesome.
- For the Aromatic Tadka (Tempering): The tadka is undeniably the soul of Chataka Dal, a quintessential Indian culinary technique. It involves frying specific whole and ground spices in hot oil to release their essential oils and intense aromas, which are then poured over the cooked dal. Our signature tempering includes:
- Oil: A neutral cooking oil is best as it allows the natural flavors of the spices to truly shine without imparting any unwanted taste of its own. Vegetable oil, sunflower oil, or even coconut oil can work well.
- Mustard Seeds: These tiny, dark seeds are fried until they splutter and pop, releasing a distinct pungent, earthy, and slightly sharp flavor that is characteristic of Maharashtrian cuisine.
- Cumin Seeds: Providing a warm, earthy, and slightly pungent aroma, cumin seeds add a foundational layer of flavor to the tempering. They should be fried until fragrant and slightly browned.
- Asafoetida (Hing): A powerful, pungent resin often used in Indian vegetarian cooking to mimic the flavors of onion and garlic. It’s particularly beneficial for digestive properties, especially when cooking with lentils, and adds a unique savory depth.
- Curry Leaves: Whether fresh, frozen, or dried, these aromatic leaves are indispensable. They impart a distinct, slightly nutty, and citrusy aroma that is quintessential to South Indian and Maharashtrian tempering, adding an irreplaceable layer of fragrance.
- Fresh Garlic: Finely chopped garlic adds a robust, pungent, and savory depth that perfectly complements the creamy lentils and the array of spices. It’s fried until golden brown, contributing a rich caramelized note.
- Ground Spices (for heat and color):
- Turmeric Powder: Known for its vibrant golden color and earthy, slightly bitter notes, turmeric is a powerhouse of flavor and is also revered for its numerous health benefits and anti-inflammatory properties.
- Kashmiri Chili Powder: This specific type of chili powder is prized for providing a beautiful, bright red color to dishes with a relatively moderate heat level. If unavailable, a good quality sweet or smoked paprika can be used as a substitute for color, though the flavor profile will be slightly different.
- Cayenne Pepper: This is precisely where the “chataka” (spiciness) truly comes from. Cayenne pepper delivers a straightforward heat. You can adjust the quantity of cayenne to precisely control the level of spiciness, from mildly warm to intensely fiery. For a truly balanced heat, a combination of cayenne and paprika works well.
- Fresh Garnish: A generous sprinkling of freshly chopped cilantro (coriander leaves) and a vibrant squeeze of fresh lemon juice at the very end brighten the entire dish, adding a crucial element of freshness, a herbaceous aroma, and a zesty, uplifting finish that cuts through the richness of the dal.
Essential Tips for a Perfect Chataka Dal: Master the Maharashtrian Art
Achieving a truly outstanding Chataka Dal is simpler than you might think, especially with a few key considerations and expert tips in mind. These insights will help you navigate the cooking process and ensure a delicious outcome every time:
- Mastering Spice Level Control: This dal is celebrated for its spicy kick, but everyone’s tolerance for heat is different. The beauty of homemade Chataka Dal is its customizability. If you prefer a milder taste, it’s very easy to adjust: simply reduce the amount of cayenne pepper and Kashmiri chili powder in the tempering. For a beautiful color without excessive heat, you can even swap out some of the cayenne for sweet paprika. Don’t be afraid to experiment to find your perfect balance of flavor and heat!
- Dietary Friendliness & Inclusivity: One of the great advantages and appeals of Chataka Dal is its inherent suitability for various dietary preferences and restrictions. It is naturally gluten-free, soy-free, and nut-free. This makes it an excellent, safe, and delicious option for individuals with common food allergies, celiac disease, or specific dietary requirements, ensuring it’s an inclusive dish that almost everyone can enjoy at your table.
- Lentil Versatility: Don’t Be Limited: While toor dal (yellow split pigeon peas) is the traditional and recommended choice for its classic creamy texture, don’t hesitate to use other split lentils if that’s what you have on hand. Chana dal (split skinned brown chickpeas) will yield a slightly firmer, nuttier dal, while moong dal (split mung beans) will cook faster and result in a lighter consistency. Remember that cooking times will vary with different lentils, but the fundamental technique and robust flavor profile of Chataka Dal will remain wonderfully similar.
- The Art of Tempering (Tadka): The Flavor Bomb: The tadka is not just an addition; it’s the critical flavor bomb that defines Chataka Dal. Pay extremely close attention to the oil temperature and the precise timing of adding each spice. Mustard seeds need to vigorously splutter and pop, cumin seeds should sizzle until fragrant but not burnt, and the garlic should just turn a light, appealing golden brown. Over-frying any of these spices can lead to a bitter taste, while under-frying won’t fully release their complex aromas and flavors. This step is where the magic happens, so be attentive.
- Serving Suggestions for a Complete Meal: While delicious on its own, Chataka Dal truly shines when paired thoughtfully with complementary accompaniments. For a classic Indian meal, consider serving it with fluffy basmati rice, traditional Indian flatbreads like soft roti, hearty bhakri (especially sorghum bhakri for an authentic Maharashtrian touch), or even a lighter side of cauliflower rice for a low-carb option. The dal’s rich, spicy, and savory flavor beautifully complements the mildness and comforting nature of these staples.
- Aromatic Garlic-Free Option: For those who follow a garlic-free diet or simply prefer to omit it, you can easily adapt this recipe. Simply skip the garlic entirely from the tempering. To compensate for the missing pungent flavor and to add a unique depth, incorporate an extra pinch (about 1/4 teaspoon more) of asafoetida (hing) and approximately 1/2 teaspoon of dried fenugreek leaves (kasuri methi). These ingredients will lend a subtle, earthy, and highly aromatic profile to your dal, ensuring it remains incredibly flavorful and satisfying.
Step-by-Step Guide: How to Make Authentic Chataka Dal
Making this authentic Maharashtrian Chataka Dal at home is a truly rewarding experience. Follow these detailed steps to create a comforting, spicy, and incredibly flavorful lentil dish that will impress your family and friends. The process is straightforward, but attention to detail, especially in the tempering, will yield the best results.
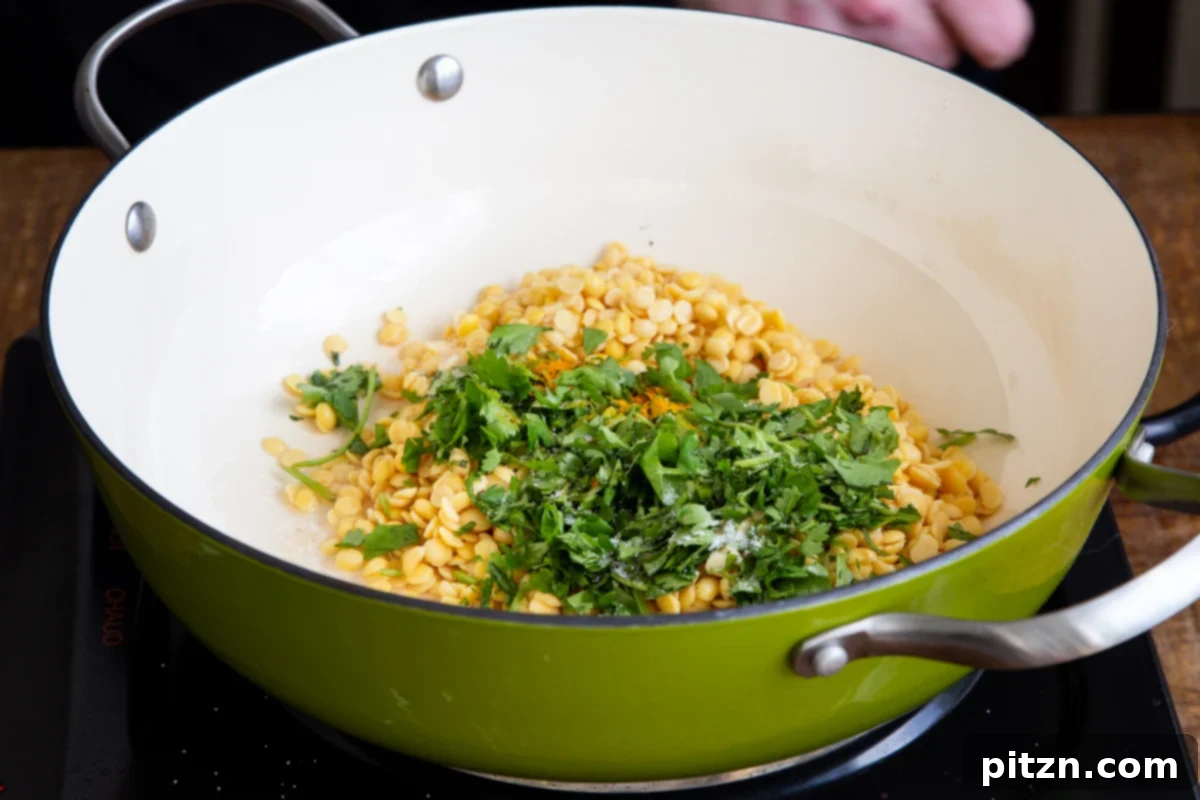
Part 1: Cooking the Split Peas or Lentils to Perfection
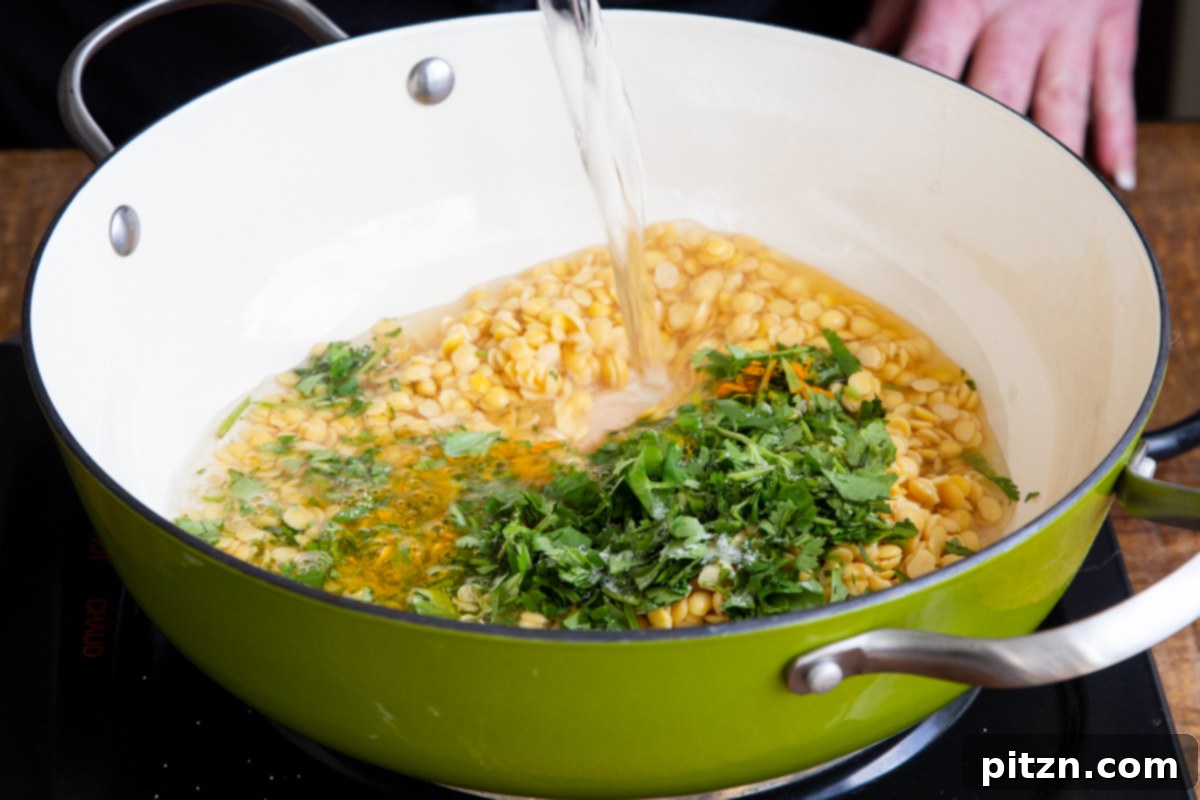
- Wash and Soak the Dal: Begin by thoroughly washing 3/4 cup of toor dal (yellow split pigeon peas) under cold running water. Continue rinsing until the water runs completely clear, indicating that impurities and excess starch have been removed. For optimal cooking and to aid in digestion, transfer the washed dal to a bowl and soak it in hot water for approximately 10 minutes. This crucial pre-soaking step helps to soften the lentils, which significantly reduces their overall cooking time. After 10 minutes, carefully drain all the water from the dal.
- Combine Main Ingredients for Simmering: Transfer the soaked and meticulously drained dal into a heavy-bottomed saucepan or a sturdy pot. To this, add 1 finely chopped small tomato, 1/4 cup of freshly chopped cilantro (coriander leaves), 1/4 teaspoon of turmeric powder (for color and earthy notes), and 1/2 teaspoon of salt (adjust this later to your taste). Pour in 4 cups of fresh water. Gently stir all these ingredients together to ensure they are well combined and the spices are evenly distributed throughout the mixture.
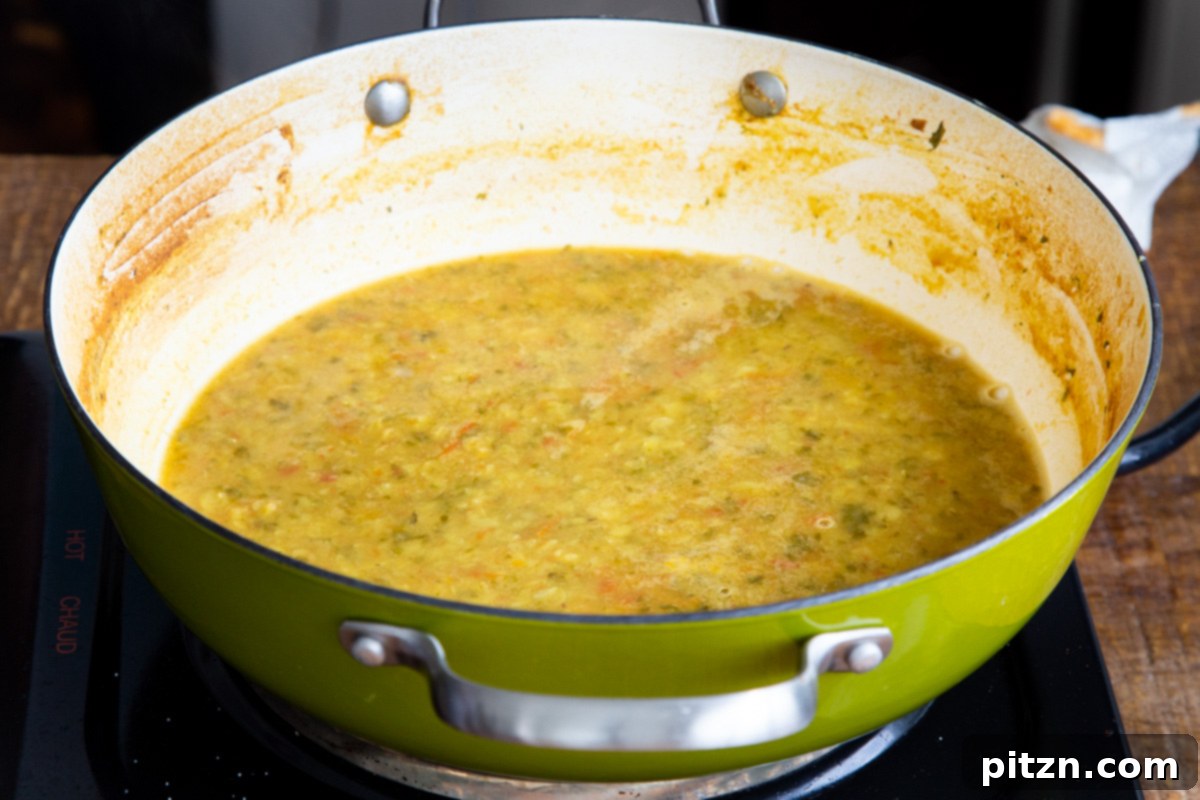
- Simmer to Creamy Perfection: Place the saucepan over medium heat and bring the dal mixture to a rolling boil. Once it begins to boil vigorously, immediately reduce the heat to medium-low. Partially cover the pan (leaving a small gap for steam to escape to prevent overflowing) and let the dal simmer gently. The cooking time will vary depending on the specific type of dal and its freshness; typically, toor dal will take anywhere from 35 to 55 minutes to become completely tender, creamy, and easily mashable. Stir the dal occasionally during this process to prevent it from sticking to the bottom of the pan, and add a little more hot water if the dal becomes too thick for your desired consistency.
- Pressure Cooker Method (for Faster Results): If you’re looking to expedite the cooking process, especially if you’re using harder lentils like chana dal (which can take up to 2 hours in a saucepan if older), an Instant Pot or a traditional pressure cooker is highly recommended. For pressure cooking, significantly reduce the water quantity to only 2 cups. Combine the washed and drained dal along with the chopped tomato, 1/4 cup cilantro, turmeric, and salt directly into your Instant Pot or pressure cooker. Set the cooking time as follows: pressure cook for 10 minutes for toor dal (split pigeon peas), 6 minutes for moong dal (split mung beans), and 18-20 minutes for chana dal (split skinned brown chickpeas). After the cooking cycle, allow the pressure to release naturally for about 10 minutes before performing a quick release of any remaining pressure. Then, carefully open the lid. The dal should be wonderfully soft, creamy, and ready to be tempered.
Part 2: Crafting the Aromatic Tempering (Tadka), The Heart of Chataka Dal’s Flavor
- Heat the Oil Correctly: In a separate small skillet or a dedicated tempering pan, heat 2 teaspoons of oil over medium-high heat. The key to a successful tadka is ensuring the oil is at the optimal temperature. You can confidently test this by dropping just 1 or 2 mustard seeds into the hot oil; they should immediately sizzle vigorously and begin to change color. If they don’t react instantly, allow the oil to heat for another minute or two. Conversely, if they pop out too quickly and aggressively, the oil might be a bit too hot, so reduce the heat slightly to prevent burning the spices.
- Bloom the Whole Spices: Once the oil is perfectly hot, add the remaining mustard seeds. Cook them, stirring frequently, until they visibly begin to splutter, pop loudly, and turn a lighter color. This indicates they are fully cooked and their distinctive, pungent flavor has been released into the oil. Immediately follow with 1/2 teaspoon of cumin seeds and stir them for just a few seconds, allowing them to become fragrant and slightly darken. It is crucial to be extremely careful not to burn the cumin seeds, as overcooked cumin can quickly turn bitter and ruin the taste of the tempering.
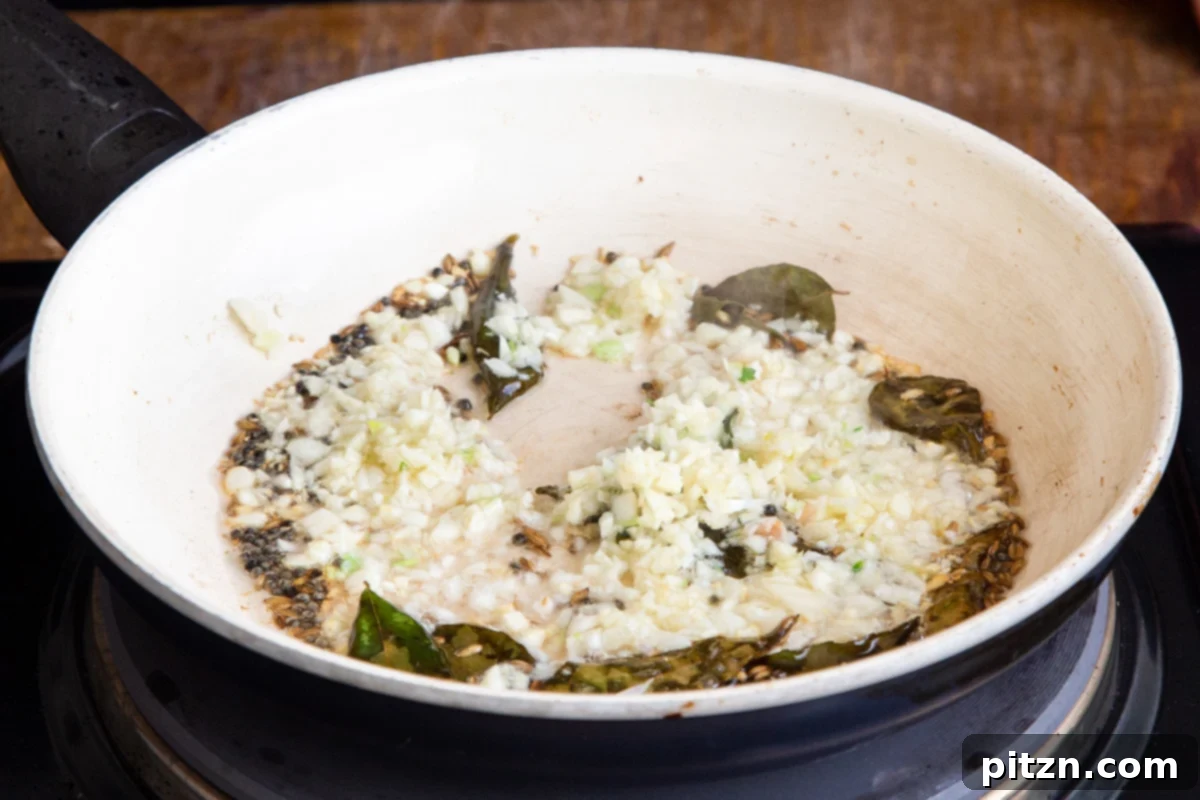
- Infuse Aromatics and Curry Leaves: Reduce the heat to medium. Add 12 fresh, frozen, or dried curry leaves and 1/8 teaspoon of asafoetida (hing) to the pan. Stir constantly for another few seconds to allow their vibrant, earthy aromas to thoroughly infuse the hot oil. Next, carefully add the 6 to 8 finely chopped cloves of garlic to the pan. Sauté the garlic, stirring continuously to ensure even cooking, until it starts to turn a beautiful light golden color. This step is crucial for developing a deep, savory, and aromatic base that forms the backbone of the tadka’s flavor.
- Pro-Tip for Electric Stoves: If you are using an electric stove, which is known to retain heat longer than gas stoves, it’s a very good practice to briefly remove the pan from the heat at this stage, precisely as the garlic begins to turn golden. This extra caution helps significantly prevent the garlic from burning while you prepare to add the dry ground spices. If the pan still feels excessively hot, you can also add an additional teaspoon of oil; this helps to slightly cool the pan and prevent scorching of the delicate chili powders, ensuring a perfect tempering.
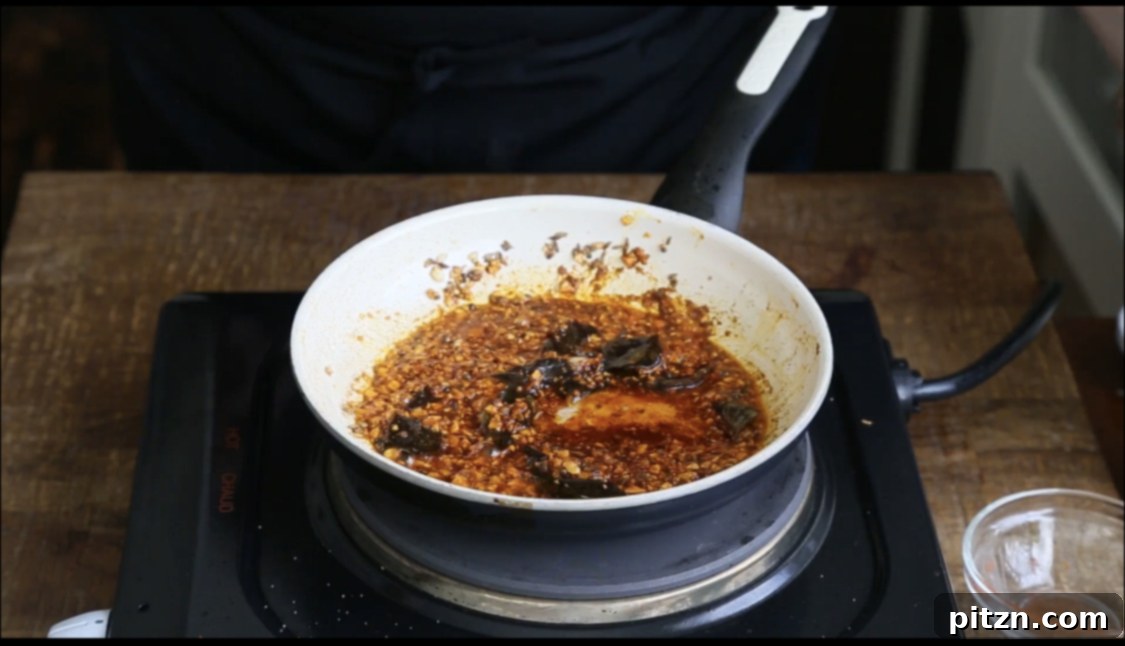
- Introduce the Chili Powders: As soon as the garlic achieves that beautiful golden hue, stir vigorously one last time. Then, quickly add 1 teaspoon of Kashmiri chili powder (primarily valued for its vibrant red color and mild heat contribution) and 1 teaspoon of cayenne pepper (this is the primary source of the fiery “chataka” kick – remember to adjust this amount precisely to your desired personal spice level). Mix these dry spices into the hot oil swiftly for only a few seconds to gently toast them, releasing their full aroma and vivid color. Immediately remove the pan from the heat entirely to prevent the chili powders from burning, which can unfortunately lead to a harsh, bitter, and unpleasant taste in your otherwise exquisite dal.
Part 3: Finishing and Serving Your Exquisite Chataka Dal
- Combine Tadka with Dal: Now for the grand finale that brings Chataka Dal to its aromatic and flavorful peak! Carefully pour this hot, incredibly aromatic, and sizzling tadka directly over your beautifully cooked dal. For a visually appealing presentation where the tempering creates a distinct, colorful layer rather than being fully mixed into the dal, I often transfer the cooked dal into a separate serving bowl or container before adding the tadka. You can then gently swirl it in without fully incorporating it, allowing the vibrant colors and rich flavors to remain distinct and visually enticing.
- Maximize Flavor Transfer: If you happen to notice some valuable spices or flavorful oil clinging stubbornly to your tempering pan after pouring, don’t let them go to waste! You can easily add a few splashes of hot water to the tempering pan, swirl it around vigorously to loosen any remaining flavorful tempering, and then pour this infused liquid over the dal. This clever trick ensures you capture every last bit of flavor and aroma, enriching the entire dish and leaving no deliciousness behind. Gently swirl the tempering into the dal, allowing its spicy aroma to permeate and infuse the entire dish for maximum impact.
- Garnish and Serve Immediately: Finish your exquisite Chataka Dal with a generous squeeze of fresh lemon juice, which brightens all the complex flavors and adds a zesty tang, and a sprinkle of additional freshly chopped cilantro for a burst of herbaceous freshness and vibrant color. Serve your Chataka Dal immediately and piping hot, accompanied by warm, freshly made flatbreads like soft roti, hearty bhakri (especially sorghum bhakri for an authentic Maharashtrian touch), or steaming basmati rice. This dal’s robust, spicy, and deeply comforting flavors pair exceptionally well with the mildness and subtle textures of rice, creating a wholesome, satisfying, and truly authentic Maharashtrian meal experience that is sure to delight.
How to Serve Chataka Dal: Perfect Pairings for a Wholesome Indian Meal
Chataka Dal, with its bold, spicy, and deeply comforting profile, is an incredibly versatile dish that often forms the backbone of many authentic Indian meals. Its robust and layered flavors make it an excellent standalone dish, capable of satisfying hunger on its own, but it truly shines when thoughtfully paired with complementary accompaniments. For a classic, wholesome, and incredibly satisfying Indian meal, serve your piping hot Chataka Dal with:
- Steaming Rice: Whether it’s fluffy basmati rice, nutrient-rich brown rice, or even a lighter, low-carb cauliflower rice, rice is the quintessential canvas for soaking up the dal’s rich, spicy gravy and aromatic tempering. The subtle, neutral flavors and soft texture of rice provide a wonderful contrast to the dal’s intensity, creating a harmonious bite.
- Traditional Indian Flatbreads: Warm, freshly made Indian flatbreads are excellent for scooping up every last drop of this delicious dal. Options include soft, pliable roti (chapati), hearty bhakri (especially sorghum bhakri for an authentic Maharashtrian touch), or even paratha. These breads add another layer of texture and flavor to your meal.
Remember, Chataka Dal is inherently a spicy dish (“Chataka” literally means spicy). If you or your guests prefer a milder culinary experience, it’s very easy to adjust the heat level. Simply reduce the amount of cayenne pepper and Kashmiri chili powder used in the tempering. While traditional recipes might call for a generous amount, sometimes up to a tablespoon of chili powder, a smaller amount can still deliver incredible depth of flavor and a pleasant warmth without being excessively fiery. It’s all about finding your personal preference and tailoring the dish to your liking.
To further enhance your meal and create a truly well-rounded and diverse Indian feast, consider serving Chataka Dal alongside these delightful side dishes. These additions will introduce contrasting textures and flavors, making your meal even more exciting:
- Fresh Vegetable Stir-fries (Bhaji/Poriyal): Complement the dal with a vibrant, fresh vegetable preparation. Options include a colorful and aromatic carrot and green bean poriyal (a South Indian style dry vegetable dish) or a unique and savory jackfruit bhaji. These vegetable dishes add texture, freshness, and often a slightly sweet or tangy counterpoint to the dal’s spiciness.
- Hearty Dry Preparations: A side of perfectly crispy and spicy potatoes or a comforting eggplant and potato stir-fry (Baigan Aloo) can add another dimension of texture and flavor to your meal. Don’t forget to explore the rustic charm of Zunka, a traditional Maharashtrian dry dish made with chickpea flour and spices, which offers a unique, crumbly texture.
Beyond its incredible taste and comforting nature, this dal is also naturally gluten-free, soy-free, and nut-free, making it an inclusive and healthy choice for almost any diner. Enjoy the rich, comforting, and wonderfully spicy flavors of Chataka Dal as a centerpiece of your next Indian meal, celebrating the authentic tastes of Maharashtra!