
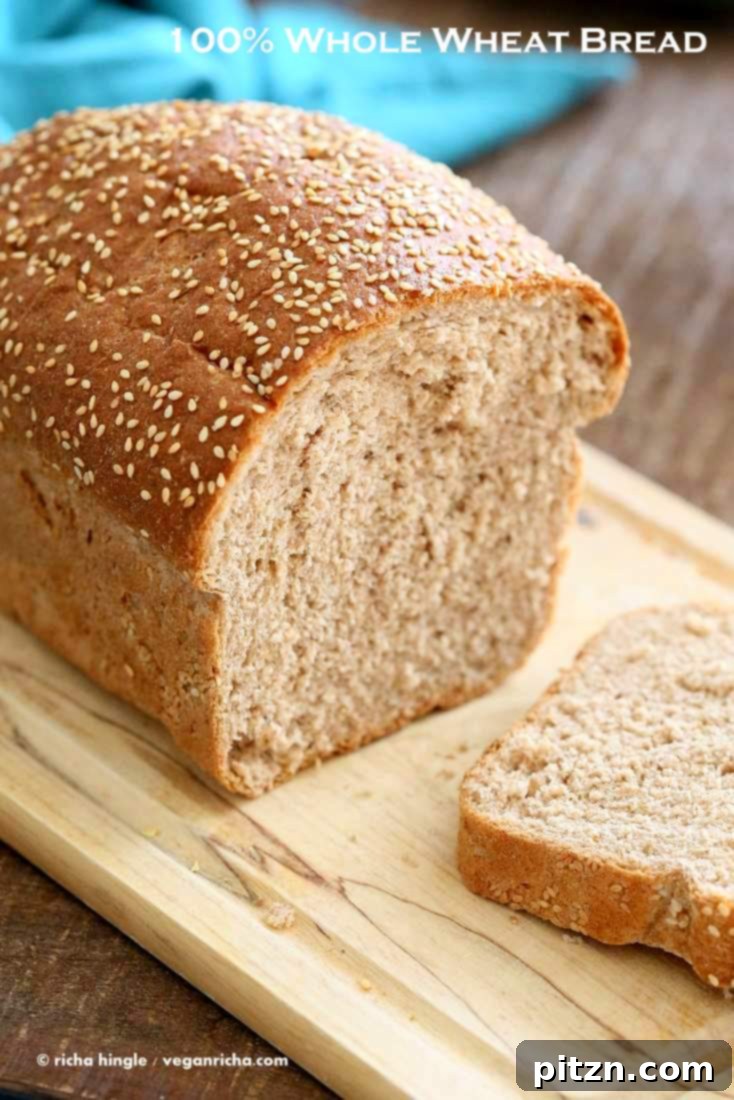
Welcome to the ultimate guide for baking a truly delightful Soft and Fluffy 100% Whole Wheat Bread. This isn’t just any loaf; it’s a game-changer for your sandwiches, toasts, and beyond. Crafted entirely from whole grains, without a trace of refined flour, this bread boasts an incredibly soft crumb and a taste that will make you forget store-bought alternatives. And yes, it’s a completely vegan recipe, perfect for a plant-based lifestyle that prioritizes wholesome, homemade goodness.
Jump to Recipe
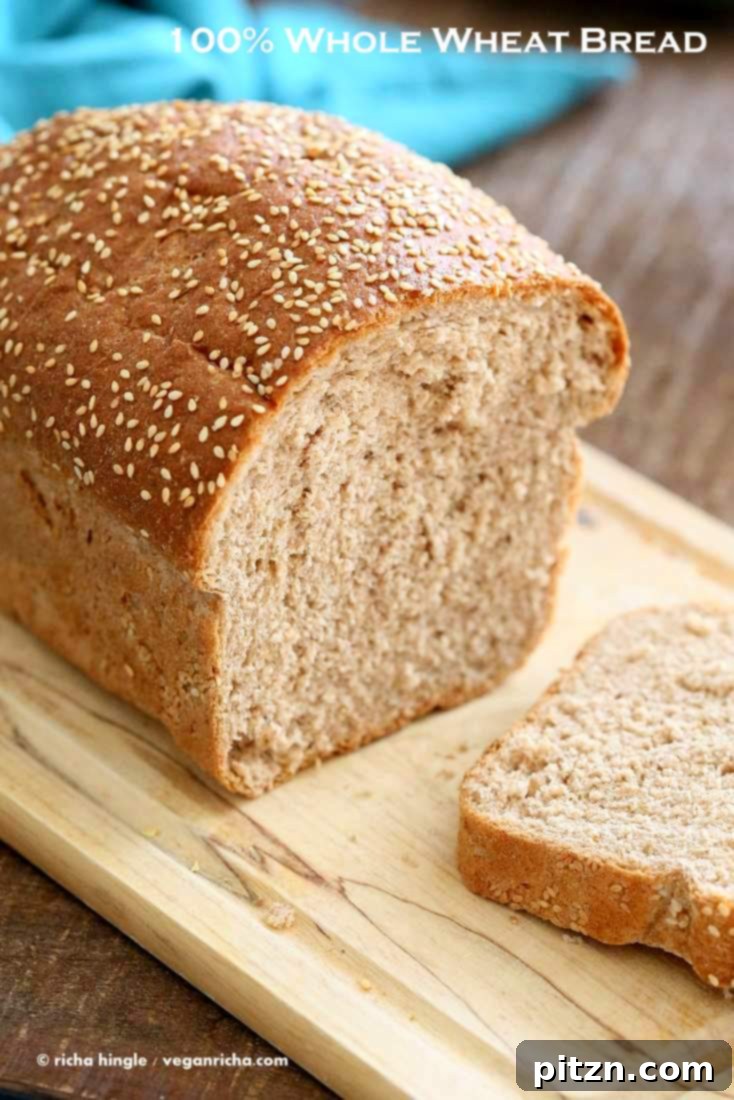
Crafting the Perfect Loaf: Why Homemade 100% Whole Wheat Bread Reigns Supreme
Imagine a slice of bread that’s the epitome of perfection: exceptionally soft, wonderfully airy, with a beautiful, even crumb. Now, picture that bread being 100% whole grain, free from any unknown additives, artificial dough conditioners, or excessive sweeteners. Most importantly, it tastes genuinely amazing. Achieving this dream loaf, especially when working solely with whole wheat flour, can seem like a formidable challenge for home bakers. However, with this meticulously crafted recipe, that dream becomes a delicious reality right in your own kitchen.
The quest for a truly satisfying whole grain sandwich bread often leads to disappointment in the grocery store aisles. Many commercially available whole grain or multi-grain breads tend to fall short. They frequently carry an overly sweet profile, often masking the natural flavor of the grains and leaving an odd aftertaste that can detract from your meal. These industrial loaves often lack the structural integrity needed for culinary versatility – they tend to get soggy and fall apart when transformed into savory or sweet French toast, and can become unpleasantly dry or resemble cardboard when grilled, offering little more than a vehicle for toppings. Even some artisan-style whole grain breads, while impressive in their rustic appearance, can be so dense and chewy that they challenge even the strongest teeth.
This recipe, however, is designed to eliminate those common frustrations. Our 100% whole wheat bread is uniquely formulated to be soft, moist, and incredibly flavorful, completely bypassing the undesirable density often associated with whole grain loaves. The beauty of this recipe lies in its remarkable simplicity, utilizing just a handful of core ingredients: high-quality whole wheat flour, warm water, and active yeast. That’s truly it for the foundational elements! There’s no need for a complex array of specialty flours or obscure ingredients to achieve its desirable light texture and wholesome taste. The result is a genuinely soft, utterly delicious, and surprisingly easy-to-make loaf that will undoubtedly elevate your daily sandwiches and inspire new culinary creations.
Beyond the Basics: Enhancing Flavor and Texture in Your Homemade Whole Wheat Loaf
This versatile 100% whole wheat bread is engineered to be the perfect base for an array of culinary creations. Its inherent strength and moisture content mean it holds up beautifully in classic sandwiches, providing a sturdy yet yielding texture that perfectly complements both sweet and savory fillings. What’s more, its robust structure and ideal moisture levels prevent it from becoming a soggy mess when prepared as French toast, ensuring a delightful breakfast experience every single time.
To subtly enhance the deep, earthy notes characteristic of whole wheat, we incorporate a touch of fresh lemon juice and a hint of ground cumin into the dough. This simple yet effective addition introduces a bright, zesty acidity and a warm, aromatic depth that beautifully complements the grains, creating a more complex and engaging flavor profile. For those who enjoy experimenting with different flavor nuances, consider substituting the lemon juice with an equal amount of fresh orange juice for a slightly sweeter, distinctly citrusy twist that adds a wonderful fragrance to the finished bread.
For an even more robust and consistent crumb structure, and to significantly reduce crumbling when slicing, a small addition of vital wheat gluten is highly recommended. Vital wheat gluten, a natural protein derived from wheat, plays a crucial role in strengthening the gluten network. It dramatically improves the elasticity and overall strength of whole wheat dough, leading to a noticeably lighter, airier loaf that slices cleanly and holds its shape impeccably. While optional, incorporating this ingredient can make a remarkable difference in the final texture, providing a refined, professional-bakery finish to your homemade masterpiece. It helps achieve that perfect balance of softness and chewiness that’s often sought after in premium sandwich breads.
Why Choose 100% Whole Wheat? The Unmatched Health Benefits of Whole Grains
Opting for 100% whole wheat bread means embracing a wealth of unparalleled nutritional benefits that are frequently diminished or entirely stripped away in products made with refined flours. Whole wheat flour contains the entire grain kernel — the bran, germ, and endosperm. Each component is a powerhouse of nutrients: the bran provides insoluble fiber, B vitamins, and trace minerals; the germ offers healthy fats, vitamin E, B vitamins, and antioxidants; and the endosperm contains carbohydrates and protein. This comprehensive nutritional profile, in contrast to refined flours which primarily retain only the endosperm, contributes significantly to better digestive health, can help stabilize blood sugar levels, and provides sustained energy throughout your day, preventing the energy crashes often associated with refined carbohydrates. By baking your own whole wheat bread, you gain complete and transparent control over every single ingredient, ensuring a truly wholesome, nourishing, and incredibly healthy staple for your table. It’s a delicious investment in your well-being.
Ready to experience the satisfaction of baking your own wholesome loaf? Let’s make this incredible 100% Whole Wheat Bread!

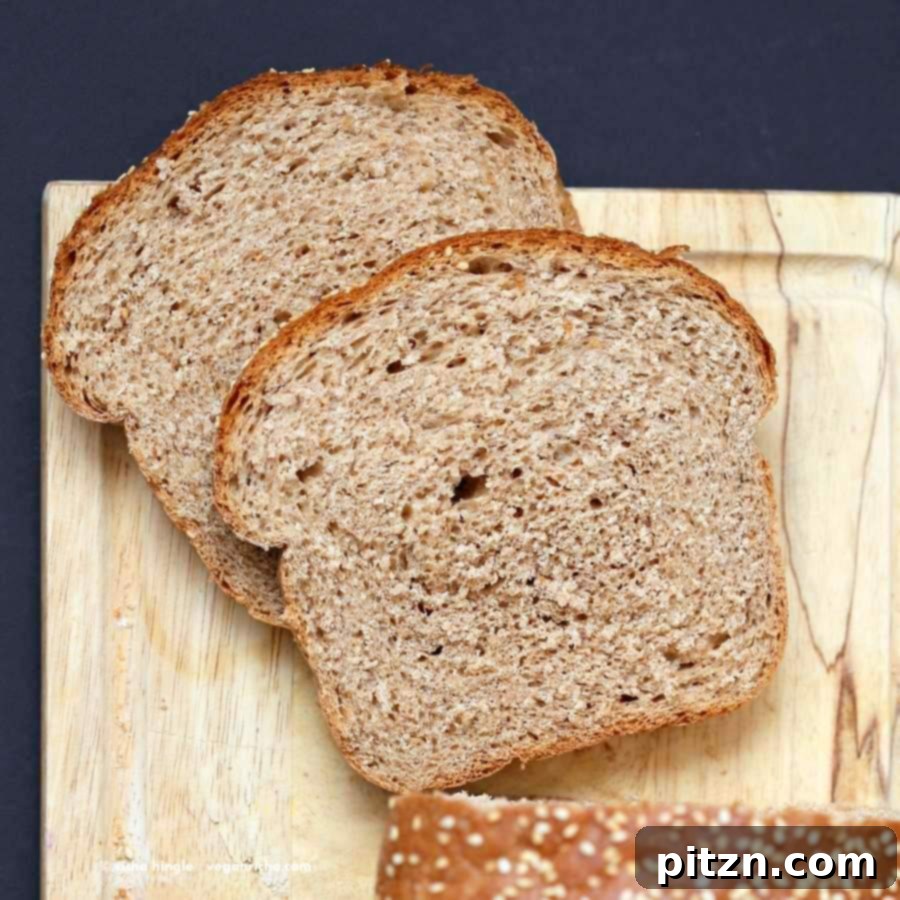
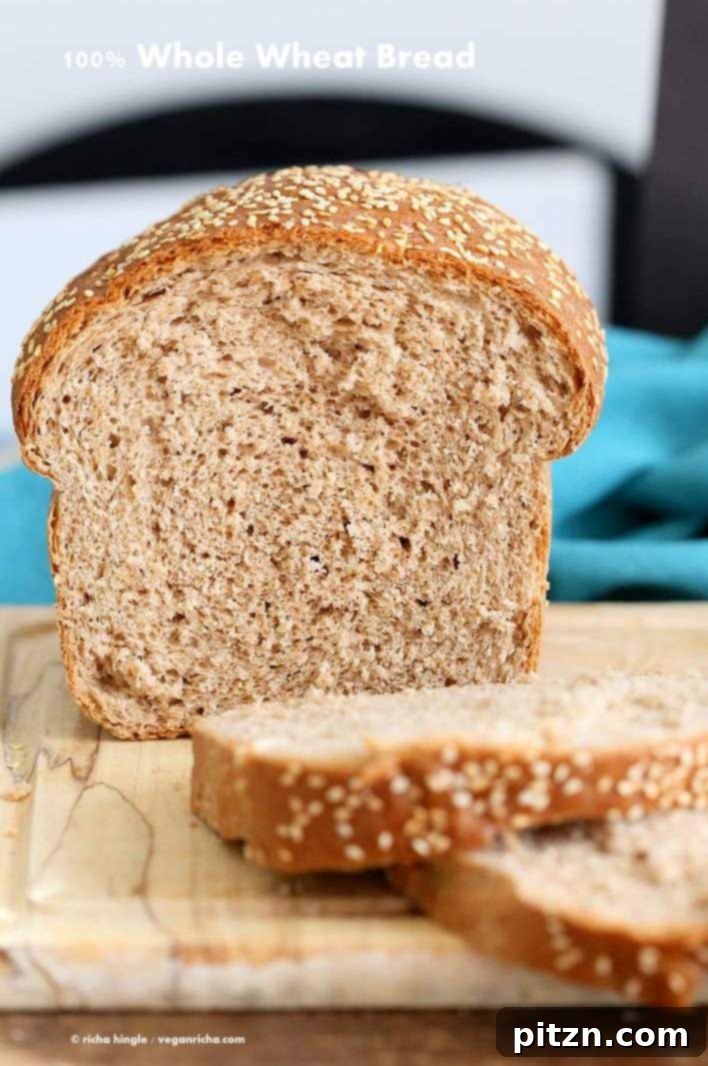
Just look at those perfectly soft and uniform slices! A testament to the careful crafting of this healthy, homemade loaf – ready for your favorite fillings.
Explore More Delicious Vegan Sandwich Bread Recipes from Our Collection
If you’re looking to expand your homemade bread repertoire beyond this amazing whole wheat loaf, explore these other delicious and diverse vegan sandwich bread recipes available on our blog. Each offers a unique flavor and texture profile, perfect for any occasion:
- Wholesome Seeded Bread Recipe
- Savory White Bean Sandwich Bread Loaf (Vegan)
- Nutritious Sprouted Wheat & Millet Sandwich Bread Recipe
- Sweet Strawberry Sandwich Loaf (Gluten-Free, Vegan)
Mastering the Art of Whole Wheat Bread: A Step-by-Step Visual Guide
Achieving a perfect loaf of soft, airy 100% whole wheat bread involves a few key steps. Each stage is crucial and contributes significantly to the final desirable texture and flavor. Let’s walk through the process together, ensuring success from start to finish. For precise measurements and complete instructions, please refer to the detailed recipe card below.
The Sponge Method: Building a Flavorful Foundation for Your Dough
Our journey to a perfect loaf begins with creating a “sponge” – a pre-ferment that serves multiple vital purposes. This initial mixture kickstarts the yeast activity, allowing it to become highly potent and active. It also begins the process of flavor development, creating deeper, more complex notes that will infuse your entire loaf. To make the sponge, you’ll combine a portion of the whole wheat flour with warm water, a touch of maple syrup (or your chosen liquid sweetener, which acts as food for the yeast), and the active dry yeast itself. Mix these ingredients thoroughly for a good 2 to 3 minutes until a smooth, somewhat elastic batter forms. As you mix, you should actually start to feel the initial development of gluten, and the mixture may appear slightly stringy.
After mixing, it’s crucial to allow this sponge mixture to rest in a warm, draft-free place for approximately one hour. This dedicated resting period is where the magic happens: the yeast ferments actively, producing gases that will cause the sponge to dramatically triple in volume, becoming very bubbly, light, and wonderfully fragrant. It’s important to use a generously sized bowl at this stage to accommodate this significant expansion and prevent overflow. A well-activated sponge is the secret to a vigorous rise and an exceptional texture in your finished bread.
Kneading for Structure: Developing the Elasticity of Your Dough
Once your sponge is robust, bubbly, and fully activated, it’s time to incorporate the remaining ingredients and build the main dough. Carefully transfer the active sponge mixture into the bowl of a stand mixer fitted with a dough hook. (If you’re kneading by hand, use a large, sturdy mixing bowl.) In a separate, dry bowl, thoroughly combine the remaining two cups of whole wheat flour with the salt, ensuring the salt is evenly distributed. Now, add this seasoned flour mixture to the stand mixer bowl alongside the sponge. Begin kneading the dough on a low speed to gently combine the ingredients.
During this initial kneading phase, gradually incorporate the 2 tablespoons of oil, the ground cumin (if you’re using it for that aromatic depth), the fresh lemon juice, and the additional 2 tablespoons of water. Continue kneading for a solid 5 minutes. After this initial kneading, stop the mixer and allow the dough a brief 5-minute rest directly in the bowl. This short rest, often referred to as an “autolyse” or “resting period,” allows the flour to fully hydrate and the gluten proteins to begin linking and relaxing, making the dough much easier to work with and improving its extensibility.
Following the rest, it’s time to assess your dough’s consistency. It should feel soft and smooth to the touch, ideally slightly tacky but not overtly stiff or wet. If the dough seems too dry and resistant, add a tiny bit more water, strictly one tablespoon at a time, incorporating it fully until the desired softness and pliability are achieved. Conversely, if it’s overly sticky and unmanageable, a small sprinkle of additional whole wheat flour can help. Resume kneading for another 5 to 8 minutes on a medium-low speed (for stand mixers, a setting like ‘2’ on a KitchenAid is typically ideal). The objective here is to develop sufficient gluten, which is absolutely essential for the bread’s structural integrity, its ability to trap gases, and its eventual elasticity. You’ll know the dough is properly kneaded when a small piece can be gently pulled and stretched without immediately breaking, forming a thin, translucent “windowpane” – indicating excellent gluten development and elasticity. An optional 15-20 minute rest after this final kneading phase can further relax the gluten, making the dough even more pliable and easier to shape.
Shaping the Loaf: Preparing for the Final Rise
With the dough perfectly kneaded and optimally developed, it’s time for the crucial shaping stage. Lightly flour your clean work surface to prevent sticking. Gently press and pat the dough into a rectangular shape, aiming for dimensions of approximately 9 by 5 inches. The goal here is to create a taut surface. Carefully fold in the two shorter 5-inch sides of the rectangle towards the center, overlapping slightly. Then, starting from one of the longer sides, tightly roll the dough towards the opposite long side, much like you would roll a jelly roll. This rolling technique is essential as it creates surface tension on the loaf, which is vital for achieving a good “oven spring” (the final burst of rising in the oven) and a uniform, airy crumb structure. Once rolled, firmly pinch the seam along the bottom of the loaf to seal it completely, preventing it from unraveling during proofing and baking. Gently roll the log back and forth a little to ensure an even thickness and shape throughout its length.
Next, prepare your 9 by 5-inch bread pan. You can either line it with parchment paper for easy removal or grease it thoroughly with oil or vegan butter to prevent any sticking. Carefully transfer the shaped dough, with its pinched seam facing down, into the prepared bread pan. To encourage a beautiful, golden-brown crust and to help any desired toppings adhere securely, lightly spray the top of the dough with water. If you choose to add them, sprinkle sesame seeds or oats evenly over the top of the loaf, then lightly spray with water once more. This second spray helps to moisten the seeds, preventing them from burning and ensuring they stick to the dough during the rise and bake.

Proofing to Perfection: The Final Rise Before Baking
With your perfectly shaped loaf nestled in its pan, the next critical step is the final proofing stage, often referred to as the second rise. Cover the bread pan loosely with a clean kitchen towel to prevent the dough from drying out. Place the covered pan in a warm, draft-free place to rise. This final proofing stage is absolutely crucial for developing the bread’s characteristic airy texture and ensuring a light, tender crumb. The rising time can vary significantly, typically ranging from 50 minutes to an hour, but it ultimately depends on the ambient temperature of your kitchen. In a warmer environment, the dough will rise more quickly, while cooler temperatures will prolong the process.
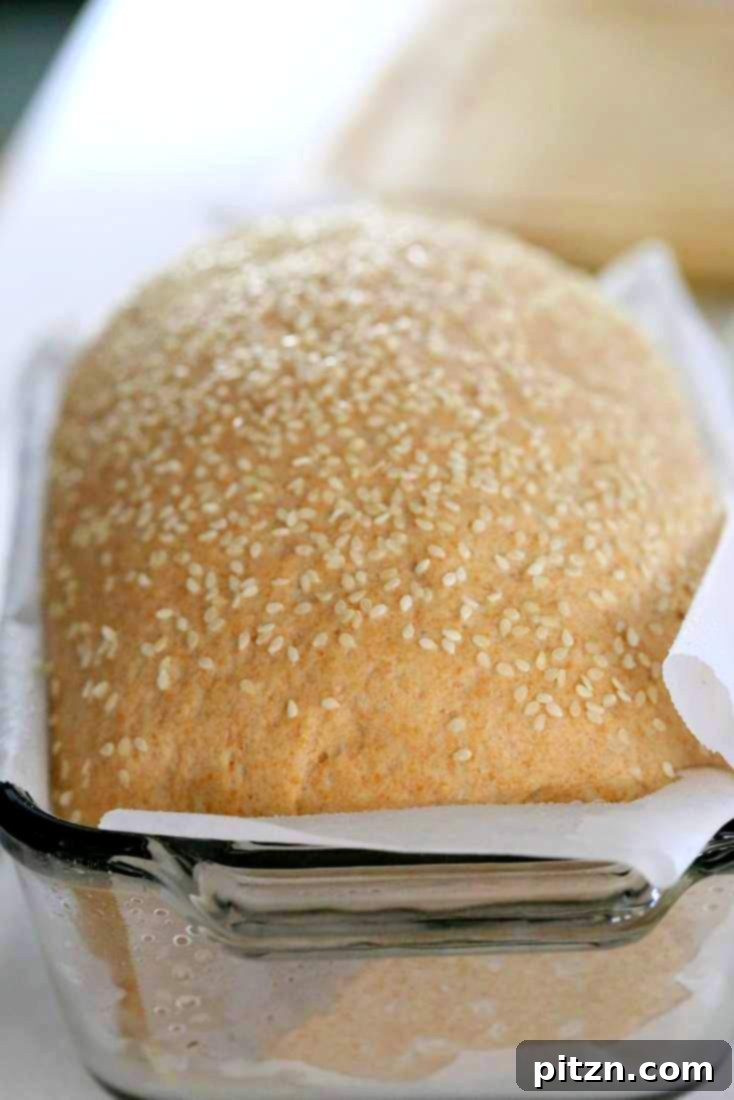
You’re looking for the dough to approximately double in size, or for the top to dome well and visibly crest above the rim of the pan. An adequately risen loaf will feel light and airy when gently poked with a floured finger; if it springs back too quickly, it needs more time; if it collapses, it’s over-proofed. Ensure you give the bread ample time to rise sufficiently to achieve that desired soft, airy crumb. Just before transferring the loaf to the oven, you can lightly spray the top with water again, followed by a very light spray of oil. This combination helps to create a crispier, more desirable crust during baking and prevents it from becoming too tough.
Baking and Cooling: The Final Touches for a Perfect Loaf
Once your loaf has achieved its ideal rise, exhibiting that perfect domed shape and light feel, it’s ready for the heat of the oven. Begin by preheating your oven to a steady 350 degrees F (180°C). Ensuring your oven is fully preheated is vital for consistent baking and optimal oven spring. Carefully place the bread pan into the preheated oven and bake for approximately 40 minutes. During this time, the internal structure of the bread sets, the crust browns, and the flavors deepen. For a precise indication of doneness, the internal temperature of a perfectly baked loaf, when measured with an instant-read thermometer, should register between 200-210°F (93-99°C). The crust should also be a rich golden brown and sound hollow when gently tapped, indicating that the bread is fully cooked through.
Once baked to perfection, carefully remove the bread pan from the oven. For an extra soft and golden crust, you can immediately brush the top of the hot loaf with a little oil or melted vegan butter. This not only adds flavor and richness but also keeps the crust tender as it cools. Allow the bread to cool in the pan for 5 to 10 minutes; this brief period helps the crust firm up slightly and makes the loaf easier to handle. After this initial cooling, carefully remove the bread from the pan and transfer it to a wire rack.
The cooling process on a wire rack is just as critically important as the baking itself. It’s absolutely crucial to let the bread cool completely, and we mean completely, before attempting to slice into it. Slicing warm bread can compress the delicate crumb structure, resulting in a gummy, dense texture that is difficult to cut neatly and doesn’t showcase the bread’s true airiness. A sharp serrated knife is your best tool for achieving clean, even slices once the bread has cooled entirely, allowing you to appreciate the soft interior you’ve worked so hard to create. This thoughtfully developed recipe is inspired and adapted from Dave’s Whole Wheat Bread, a testament to its proven methodology and delicious results.
100% Whole Wheat Sandwich Bread Recipe
Vegan Richa
2 hrs
45 mins
2 hrs 45 mins
12
Bread
American

Print Recipe
Ingredients for Your Homemade 100% Whole Wheat Bread
Sponge:
- 1 cup whole wheat flour
- 1 cup warm water (approximately 105-115°F / 40-46°C)
- 2.5 tbsp maple syrup or other liquid sweetener of choice
- 3 teaspoon active dry yeast (Note: 2.25 tsp works well if using new, strong yeast with high activity)
Main Bread Dough:
- 2 cups whole wheat flour
- 1 tsp salt
- 2 tbsp neutral oil (e.g., olive oil, canola oil, sunflower oil)
- 1 to 1.5 tsp fresh lemon or lime juice
- 1/4 tsp ground cumin (optional, for subtle aromatic depth)
- 2 tbsp additional water (as needed for dough consistency, may vary)
- Oil or vegan butter (as needed for greasing the pan and brushing the baked loaf)
- Sesame seeds or oats (optional, for topping the loaf)
Detailed Instructions for Baking Your Fluffy Whole Wheat Loaf
-
1. Prepare the Sponge: In a large mixing bowl, combine 1 cup whole wheat flour, 1 cup warm water (ensure it’s not too hot to kill the yeast), maple syrup, and active yeast. Whisk or mix thoroughly for 2 to 3 minutes until a smooth, slightly elastic batter forms. You should start to feel the gluten developing, and the mixture may appear slightly stringy.
-
2. Proof the Sponge: Cover the bowl loosely with plastic wrap or a clean kitchen towel and let the sponge sit in a warm, draft-free place for about 1 hour. During this time, the yeast will activate vigorously, and the sponge should visibly triple in volume, becoming very bubbly and fragrant. Ensure your bowl is large enough to accommodate this expansion.
-
3. Mix the Main Dough: Transfer the active, bubbly sponge to the bowl of a stand mixer fitted with a dough hook (or a large mixing bowl if kneading by hand). In a separate bowl, combine the remaining 2 cups of whole wheat flour with the salt, mixing them well. Add this flour mixture to the stand mixer. Begin kneading on low speed. While kneading, gradually incorporate the 2 tablespoons of oil, ground cumin (if using), lemon juice, and the additional 2 tablespoons of water. Continue kneading for 5 minutes.
-
4. Rest and Assess Dough Consistency: After the initial 5-minute knead, stop the mixer and let the dough rest for 5 minutes. This brief rest period helps the flour fully hydrate and the gluten to relax. After resting, carefully check the dough’s consistency: it should be soft and smooth, ideally slightly tacky to the touch but not stiff or overly sticky. If it feels too dry or resistant, add a bit more water, 1 tablespoon at a time, until the desired pliable texture is achieved. If it’s too sticky, sprinkle in a small amount of whole wheat flour.
-
5. Final Knead for Gluten Development: Resume kneading for another 5 to 8 minutes on medium-low speed (e.g., setting 2 on a KitchenAid). The dough is properly kneaded when it feels smooth, elastic, and, when a small portion is gently pulled, it stretches considerably into a thin, translucent “windowpane” before tearing. This indicates excellent gluten development. For hand kneading, continue until the dough is smooth and resilient. Optionally, you can let the dough rest for another 15-20 minutes at this point to further relax the gluten and make shaping easier.
-
6. Shape the Loaf: Lightly flour your work surface. Gently press the dough into a rectangular shape, approximately 9 by 5 inches. Fold the two shorter 5-inch sides inward towards the center, overlapping slightly. Then, starting from one of the longer sides, tightly roll the dough towards the opposite long side, much like a jelly roll. Firmly pinch the seam along the bottom to seal the loaf. Gently roll the log a little to ensure an even thickness and shape.
-
7. Second Rise (Proofing): Prepare a 9 by 5-inch bread pan by greasing it or lining it with parchment paper. Place the shaped dough, seam-side down, into the prepared pan. Lightly spray the top of the dough with water. If desired, sprinkle sesame seeds or oats evenly over the top, then spray with water again to help them adhere and prevent burning. Cover the pan with a clean kitchen towel and let it rise in a warm, draft-free place for 50 minutes to 1 hour, or until the dough has nearly doubled in size and domes nicely above the pan edge. The exact time will depend on your kitchen’s ambient temperature.
-
8. Preheat Oven and Bake: While the bread is in its final proof, preheat your oven to 350 degrees F (180°C). Once the dough is adequately risen, carefully place the bread pan into the preheated oven and bake for 40 minutes.
-
9. Cool and Slice: Remove the bread pan from the oven. For a softer crust, immediately brush the top of the hot bread with a little oil or melted vegan butter. Let the bread cool in the pan for 5 to 10 minutes before carefully transferring it to a wire rack to cool completely. It is absolutely crucial for the bread to cool entirely before slicing with a serrated knife to ensure a clean cut, prevent gumminess, and achieve proper crumb structure.
-
10. Storage Recommendations: Store your homemade 100% whole wheat bread in an airtight bread container on the counter for up to 2 days to maintain freshness. For longer storage, refrigerate for up to a week. For even longer preservation, slice the cooled bread and freeze it in an airtight freezer bag or container for up to 3 months, taking out slices as needed.
Baker’s Notes & Customization Tips for Your Whole Wheat Bread
Enhancing Texture with Vital Wheat Gluten: For an even quicker and more efficient gluten formation, a more elastic and easier-to-handle dough, and significantly fewer crumbs when slicing your bread, consider adding 1 tablespoon of vital wheat gluten to the “Main Bread Dough” flour (the 2 cups of whole wheat flour). This natural protein boost helps create a robust, yet tender structure that’s perfect for a clean slice.
Deepening Flavor and Color: To achieve a richer, more complex flavor profile and a slightly darker, more appealing crust, incorporate 2 teaspoons of unsulfured molasses into the dough mixture alongside the other wet ingredients. Molasses adds a subtle sweetness and a beautiful caramel hue.
Citrusy Twist: For a delightful and refreshing citrus aroma and flavor throughout your loaf, replace the 2 tablespoons of additional water with 2 tablespoons of fresh orange juice in the main dough. If you choose this variation, you can also omit the lemon juice to avoid overpowering the orange flavor.
Flour Variations and Adjustments: If you’re experimenting with different brands or types of whole wheat flour, such as white whole wheat flour (which has a milder flavor and softer texture) or Indian chapati atta, you might find that the water absorption varies slightly. Always pay attention to your dough’s consistency and adjust the water quantity as needed, adding sparingly, to achieve a soft, pliable, and slightly tacky dough.
Hand Kneading Tips for Optimal Gluten Development: If you’re kneading your bread dough by hand instead of using a stand mixer, you’ll generally need to knead for a few minutes longer to achieve the same level of gluten development. To aid in strengthening the gluten network, try incorporating a technique known as “slap and fold”: vigorously throw the dough onto your clean counter several times, then fold it back on itself between kneading intervals. This vigorous action helps develop the gluten more effectively.
Nutritional values are provided as an approximation based on one serving.
Nutrition Information (per serving)
Calories: 158kcal
Carbohydrates: 24g
Protein: 4g
Fat: 5g
Sodium: 196mg
Potassium: 127mg
Fiber: 3g
Sugar: 2g
Vitamin C: 0.2mg
Calcium: 15mg
Iron: 1.1mg
Disclaimer: Nutrition information is automatically calculated and should be used as an approximation. Actual values may vary based on specific ingredients, portion sizes, and preparation methods.
Did you try this amazing 100% Whole Wheat Sandwich Bread recipe? We would love to hear from you! Please consider leaving a rating and comment below to share your experience and tips with our community. Your feedback helps us grow and inspires other home bakers!
Troubleshooting Common Whole Wheat Bread Baking Issues
Baking delicious 100% whole wheat bread can sometimes present unique challenges, but understanding the common pitfalls and their solutions can help you achieve consistent success with every loaf. Here’s a comprehensive guide to troubleshoot some of the most frequent problems home bakers encounter:
If Your Bread Dough Rises Beautifully But the Dome Falls During Baking:
- Over-Proofing / Over-Risen Dough: This is arguably one of the most common issues in bread baking. If the dough is allowed to rise for too long (becomes “over-proofed”), the yeast consumes all the available sugars and produces an excessive amount of gas. This causes the delicate gluten structure to stretch beyond its maximum capacity, becoming weak and thin. When subjected to the heat of the oven, this weakened structure simply cannot hold its shape and collapses, resulting in a sunken top. The ideal rising time is highly dependent on your kitchen’s ambient temperature and humidity. Always aim for the dough to just about double its original size, or for the dome to gently crest above the pan edge, before placing it in the oven. Anything significantly more than this often indicates over-proofing.
- Excessive Moisture in the Dough: While good hydration is key, too much moisture can be detrimental. If your dough is excessively sticky and contains too much water, it will rise readily, but the high water content makes the internal gluten structure too fragile to support the dome during baking. The excess water turns into steam within the loaf, which can further weaken the already compromised gluten structure, leading to a collapse. Ensure your dough has a soft, smooth, and slightly tacky consistency after kneading, but it should never feel wet or soupy. Adjust flour or water as needed during kneading to hit this sweet spot.
- Insufficient Kneading for Gluten Development: The strength and elasticity of the gluten network are paramount for any bread to hold its shape and achieve a good rise. If the dough hasn’t been kneaded enough, the gluten won’t be sufficiently developed to trap the gases produced by the yeast. This results in a weak internal structure that lacks the necessary elasticity and strength to support the loaf, especially during the oven spring phase. While a strong gluten network can sometimes compensate for minor issues like slight over-proofing or excess moisture, a poorly kneaded dough will almost certainly lead to a collapsed dome or a dense, heavy loaf. Knead the dough until it is smooth and elastic, consistently passing the “windowpane test” (where a small piece of dough can be gently stretched thin enough to see light through it without tearing). This typically means at least 5-7 minutes of vigorous kneading with a stand mixer, and often longer if kneading by hand.
If Your Bread Dough Does Not Rise Much (or at all):
- Inactive or Dead Yeast: Yeast is a living microorganism, and its viability is the single most crucial factor for successful bread rising. If your yeast is old, expired, or was improperly handled, your bread simply won’t rise. Always check the expiration date on your yeast package. Furthermore, extreme temperatures can kill yeast: water that is too hot (above 130°F / 54°C) will instantly kill it, while very cold water will significantly slow its activity to a crawl. Another common mistake is adding salt directly onto active yeast, as salt can inhibit or kill yeast. Always mix salt thoroughly with the flour before combining it with the yeast mixture. If in doubt, proof your yeast separately in a small amount of warm water and sweetener to ensure it’s active before adding it to the rest of the ingredients.
- Ambient Temperature Too Cold: Yeast activity thrives in warm environments, ideally between 75-85°F (24-29°C). If your kitchen or the area where you’re proofing your dough is too cold, the yeast will become sluggish and inactive. This means the dough will take a very long time to rise, or it may not rise sufficiently at all. To remedy this, find a warmer spot for proofing, such as a slightly warm oven (turned off, with just the oven light on), a sunny windowsill, or near a warm appliance. You may also need to significantly extend the rising time, monitoring the dough until it approximately doubles in size, even if it takes much longer than the recipe suggests.
- Dough Was Too Stiff / Lacked Sufficient Moisture: A dry, stiff dough restricts the yeast’s ability to expand and create the necessary air pockets for a good rise. If the dough has insufficient moisture, the gluten strands will be too rigid and won’t be able to stretch effectively to accommodate the gases produced by the yeast. This results in a dense, tight crumb with very little rise. If you notice your dough is stiff and dry after kneading, consider gently spritzing it with water every 10-15 minutes during the rising period to help incorporate some much-needed moisture. Simultaneously, allow the dough to rise for a longer duration than initially planned, continuing until it reaches the desired doubled size. A well-hydrated dough is generally softer and more extensible, leading to a better rise.
Expert Tips for a Consistently Softer, More Moist Whole Wheat Bread:
To consistently achieve a wonderfully soft, moist, and utterly delightful 100% whole wheat bread, keep these expert tips in mind during your baking process. They will help you refine your technique and yield a superior loaf every time:
- Increase Healthy Fats: Incorporating a bit more oil (you can increase the total amount up to 3 tablespoons) into your dough can significantly contribute to a softer crumb and improved moisture retention in your finished bread. Fats work by tenderizing the gluten network, making the bread more pliable, less prone to drying out, and giving it a more luxurious mouthfeel.
- Implement a Pre-Shaping Rest: After your final kneading session, resist the urge to immediately shape the dough. Instead, allow the dough to rest on your countertop (covered to prevent drying) for at least half an hour before proceeding to shape it into a loaf. This “bench rest” or “intermediate proof” allows the gluten to relax after the intensive kneading, making the dough much easier to handle, shape, and contributes to a more even rise and a finer, more tender texture in the final product.
- Thorough Kneading is Paramount: Never underestimate the importance of adequate kneading, whether you’re using a stand mixer or kneading by hand. Proper kneading is absolutely essential for developing the gluten network within the dough, which is the structural framework responsible for trapping the gas produced by the yeast. A well-developed gluten structure creates a strong yet elastic framework that allows the bread to rise beautifully, expand without tearing, and hold more air, ultimately resulting in a lighter, softer, and more open-textured loaf. Ensure your dough passes the windowpane test for optimal results.
- Achieve Optimal Hydration: While troubleshooting advises against *excessive* moisture, aiming for the correct hydration level is crucial. Whole wheat flour naturally absorbs more water than refined flour due to its bran and germ content. Therefore, don’t be afraid to add a little extra water, tablespoon by tablespoon, if the dough feels too stiff or dry during the kneading process. A well-hydrated dough yields a more tender, moist crumb and allows for better gluten development and expansion.
- Introduce Steam During Baking: For a crisper, more professional-looking crust that paradoxically contributes to a softer interior crumb, consider creating steam in your oven during the first 10-15 minutes of baking. You can achieve this by placing a shallow metal tray filled with hot water on the bottom rack of your oven when you preheat it, or by carefully spritzing the oven walls with water (avoiding the light bulb) immediately after placing the bread inside. The steam keeps the crust soft and pliable initially, allowing the loaf to expand more fully before the crust sets.
With these comprehensive tips, combined with the detailed step-by-step recipe, you’re now incredibly well-equipped to bake a truly exceptional 100% whole wheat sandwich bread that’s soft, flavorful, wholesome, and incredibly satisfying. Enjoy the incomparable goodness and pride of homemade bread, a perfect staple for any meal!