
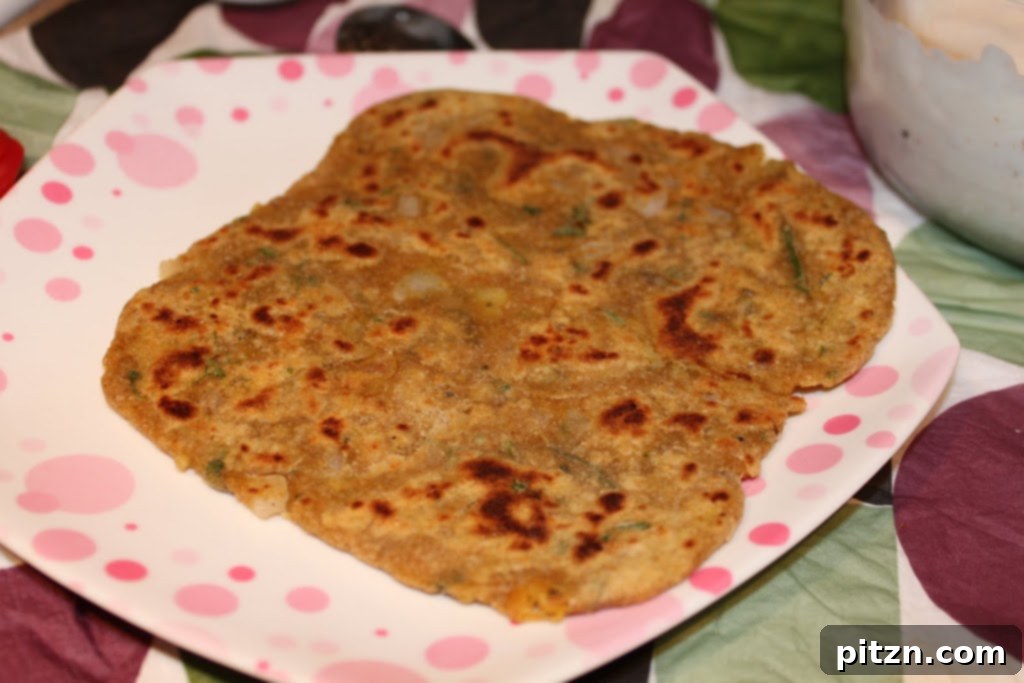
Mastering the Art of Gobi Paratha: A Comprehensive Guide to Stuffed Indian Cauliflower Flatbread
Indian cuisine is renowned for its vibrant flavors, aromatic spices, and diverse range of dishes that cater to every palate. Among its many culinary treasures, the humble yet incredibly satisfying paratha holds a special place. A type of unleavened flatbread, parathas are a staple across India, particularly popular for breakfast, lunch, or even as a light dinner. While simple in concept, the magic of parathas often lies in their versatility and the myriad of delicious fillings they can encapsulate. From the beloved Aloo Paratha (potato-stuffed) to Mooli Paratha (radish-stuffed), each variant offers a unique culinary experience. Today, we delve into the world of Gobi Paratha, a delectable cauliflower-stuffed flatbread that promises to tantalize your taste buds with its earthy flavors and comforting texture.
What is Gobi Paratha?
Gobi Paratha translates directly to “cauliflower paratha,” with ‘gobi’ meaning cauliflower in Hindi. This popular North Indian dish features a soft, whole wheat flatbread generously stuffed with a spiced, grated cauliflower and onion mixture. It’s a testament to how simple ingredients, when combined with the right spices and techniques, can create an extraordinary meal. Gobi Paratha is cherished for its wholesome nature, providing a good source of fiber and essential nutrients, making it a favorite for health-conscious food lovers and comfort-food seekers alike.
The beauty of Gobi Paratha lies not just in its taste but also in its ability to be a complete meal on its own. Served hot off the griddle, it’s often accompanied by a dollop of butter, a tangy pickle (achaar), or a cooling yogurt dip (raita), which together create a harmonious balance of flavors and textures. Whether you’re a seasoned chef or a novice in the kitchen, mastering Gobi Paratha is a rewarding culinary journey that connects you with the heart of Indian home cooking.
Why You’ll Love Making Homemade Gobi Paratha
There’s an unparalleled satisfaction that comes with preparing traditional dishes from scratch, and Gobi Paratha is no exception. Beyond the joy of creating something delicious, homemade parathas offer several advantages:
- Freshness and Flavor: You control the quality of ingredients, ensuring the freshest cauliflower and most aromatic spices for an unbeatable taste.
- Customization: Adjust the spice levels to your preference, making it milder for kids or spicier for an extra kick. You can also experiment with additional herbs or vegetables in the filling.
- Healthier Option: By preparing it at home, you can control the amount and type of oil used, making it a healthier alternative to store-bought or restaurant versions.
- Cultural Connection: Engaging in the process of making parathas is a delightful way to experience and share a piece of Indian culinary heritage with family and friends.
- Comfort Food: A warm, steaming Gobi Paratha is the epitome of comfort food, perfect for a cozy breakfast or a hearty meal on a chilly day.
The Essential Components of Gobi Paratha
Crafting the perfect Gobi Paratha involves two main components: the soft, pliable dough and the flavorful, perfectly seasoned cauliflower filling. Each component requires attention to detail to ensure a successful and delicious outcome.
1. The Perfect Paratha Dough
The foundation of any great paratha is its dough. It needs to be soft, elastic, and easy to roll without tearing, yet sturdy enough to hold the filling. The standard paratha dough is simple, requiring just a few basic ingredients.
Ingredients for Dough:
- 2 cups whole wheat flour (atta)
- 1/2 teaspoon salt
- 1 tablespoon oil or ghee (clarified butter)
- Approximately 3/4 to 1 cup warm water (adjust as needed)
Method for Dough:
- In a large mixing bowl, combine the whole wheat flour and salt.
- Add the oil or ghee and rub it into the flour with your fingertips until the mixture resembles coarse crumbs. This helps in making the parathas soft.
- Gradually add warm water, a little at a time, and knead until a soft, smooth, and pliable dough forms. The dough should not be sticky.
- Cover the dough with a damp cloth and let it rest for at least 20-30 minutes. This resting period is crucial as it allows the gluten to relax, making the dough easier to roll and the parathas softer.
2. Crafting the Flavorful Cauliflower Filling
The heart of the Gobi Paratha lies in its filling. The key to a non-soggy and flavorful filling is properly preparing the cauliflower and balancing the spices. This is where the original recipe’s crucial tip about managing moisture comes into play.
Ingredients for Gobi Filling:
- 2 cups grated cauliflower (from about 1 medium head)
- 1/2 cup finely chopped onion
- 1-2 green chilies, finely chopped (adjust to taste)
- 1 inch ginger, grated
- 1/2 teaspoon turmeric powder
- 1 teaspoon red chili powder (adjust to taste)
- 1 teaspoon coriander powder
- 1/2 teaspoon garam masala
- 1/2 teaspoon dry mango powder (amchur), optional but recommended for tang
- Fresh coriander leaves, chopped (about 2 tablespoons)
- Salt to taste
- Oil or ghee for cooking parathas
Method for Gobi Filling:
- Address the Moisture: This is the most critical step for Gobi Paratha. Grate the cauliflower and finely chop the onion. Combine them in a bowl and sprinkle with about 1/2 teaspoon of salt. Let this mixture sit for 10-15 minutes. During this time, the salt will draw out a significant amount of water from the cauliflower and onions.
- Squeeze out Excess Water: After 10-15 minutes, gather the cauliflower and onion mixture in a clean muslin cloth or a strong paper towel. Squeeze out as much water as possible. This step is non-negotiable for preventing soggy parathas, as excess moisture will make the dough difficult to roll and the paratha prone to tearing.
- Prepare the Spiced Filling: Transfer the squeezed cauliflower and onion mixture to a dry bowl. Add the chopped green chilies, grated ginger, turmeric powder, red chili powder, coriander powder, garam masala, dry mango powder (if using), and chopped fresh coriander leaves. Mix everything thoroughly.
- Salt at the Last Minute (Optional but Recommended): As mentioned in the original content, for best results, avoid adding the remaining salt to the entire filling mixture until just before you are about to stuff each individual dough ball. This prevents further moisture release while the filling sits. If you are quick, you can add all the salt at step 3, but be aware of potential sogginess if the filling sits for too long.
3. The Art of Stuffing and Rolling Gobi Paratha
Stuffing and rolling can seem daunting at first, but with a little practice, you’ll get the hang of it. The goal is to enclose the filling completely without tearing the dough and to roll it into an even, thin disc.
Method for Stuffing and Rolling:
- Divide the Dough: Divide the rested dough into equal-sized balls, slightly larger than a golf ball. Keep them covered to prevent drying.
- Form a Pouch: Take one dough ball and flatten it slightly. Using your fingers or a rolling pin, roll it into a small disc, about 3-4 inches in diameter, ensuring the edges are slightly thinner than the center.
- Add the Filling: Place 1-2 tablespoons of the Gobi filling in the center of the rolled-out dough. If you opted to add salt at the last minute, sprinkle a pinch of salt over the filling now.
- Seal the Dough: Gently bring the edges of the dough together over the filling, pinching them to seal it completely. Ensure there are no gaps. Remove any excess dough from the top if needed.
- Flatten Gently: Gently flatten the stuffed dough ball with your palm, making sure the filling is evenly distributed inside.
- Dust and Roll: Lightly dust your rolling surface and the stuffed dough ball with whole wheat flour. Roll out the dough gently and evenly into a circular disc, about 6-8 inches in diameter. Apply even pressure and avoid pressing too hard, which can cause the filling to break through. If the dough starts to stick, dust with a little more flour.
4. Cooking Your Gobi Paratha to Golden Perfection
Cooking the paratha correctly is essential for achieving that characteristic golden-brown, crispy exterior and soft, fluffy interior.
Method for Cooking:
- Heat the Tawa/Griddle: Heat a flat griddle (tawa) or a non-stick pan over medium-high heat.
- Cook First Side: Once hot, place the rolled paratha onto the tawa. Cook for about 30-60 seconds until you see small bubbles appearing on the surface and the dough looks slightly dry.
- Flip and Oil: Flip the paratha to the other side. Drizzle about 1/2 to 1 teaspoon of oil or ghee around the edges and on top of the paratha. Spread it evenly using a spatula.
- Cook Second Side: Cook for another 1-2 minutes until golden brown spots appear.
- Flip and Oil Again: Flip the paratha once more. Drizzle oil or ghee on the first side that was cooked with oil. Cook for another 1-2 minutes, pressing gently with the spatula to ensure even cooking and to encourage puffing. The paratha should turn golden brown and develop light crispy spots.
- Serve Hot: Remove from the tawa and serve immediately. Repeat with the remaining dough and filling.
Serving Suggestions: Elevate Your Gobi Paratha Experience
Gobi Parathas are incredibly satisfying on their own, but their flavors are truly enhanced when paired with traditional Indian accompaniments. The interplay of tastes and textures creates a complete and memorable meal.
Traditional Accompaniments:
- Indian Pickles (Achaar): A must-have! The tangy, spicy, and sometimes sweet flavors of Indian pickles, such as mango pickle, mixed vegetable pickle, or lemon pickle, cut through the richness of the paratha beautifully.
- Raita (Indian Yogurt Dip): A cooling counterpoint to the spiced paratha. Raita is typically made with whisked yogurt and can be plain, or flavored with cucumber, mint, onion, or boondi (fried gram flour pearls). It provides a refreshing contrast and aids digestion.
- White Butter (Safed Makkhan): A generous dollop of fresh, unsalted white butter melting on a hot paratha is a simple indulgence that adds a creamy richness.
- Chutney: Green coriander-mint chutney or a sweet tamarind chutney can also be excellent additions, offering fresh or tangy notes.
Beyond the Basics:
While often enjoyed for breakfast or brunch, Gobi Parathas can also be a fantastic part of a larger meal:
- With a Main Course Curry: Serve parathas alongside a hearty lentil dish (dal), chickpea curry (chole), or any vegetable curry as an alternative to rice or plain roti.
- With Tea: A hot cup of masala chai perfectly complements the warmth and spice of a Gobi Paratha, making for a perfect evening snack or a comforting start to the day.
The hot off the pan Parathas never last for more than a few minutes. They are usually consumed best hot and steaming!
Pro Tips for Flawless Gobi Parathas
Achieving consistently perfect parathas involves a few key techniques and considerations. Keep these tips in mind to enhance your paratha-making skills:
- Don’t Skip the Resting Time: The dough resting period is crucial for a soft, pliable dough that’s easy to roll and less likely to tear.
- Master Moisture Control: As highlighted, squeezing out excess water from the grated cauliflower and onion mixture is paramount. This prevents the filling from becoming watery and making the dough soggy.
- Even Rolling is Key: Roll the parathas gently and evenly. Uneven pressure can cause the filling to burst through the dough. If it’s your first time, aim for a slightly thicker paratha until you gain confidence.
- Use Enough Flour for Dusting: Don’t be shy with dusting flour while rolling, but also ensure you brush off any excess before cooking, as too much dry flour on the tawa can make the paratha tough.
- Medium-High Heat: Cook parathas on a medium-high flame. If the tawa isn’t hot enough, the parathas will turn hard and chewy. If it’s too hot, they’ll burn on the outside before cooking through.
- Gentle Pressing: While cooking, gently press the paratha with a spatula. This helps ensure even cooking and encourages it to puff up beautifully.
- Serve Immediately: Parathas are always best enjoyed fresh off the tawa. Their flavor and texture are at their peak when hot and steaming.
Variations to Explore
Once you’ve mastered the basic Gobi Paratha, feel free to experiment with these variations:
- Add Grated Paneer: For a richer and more protein-packed filling, mix in some grated paneer (Indian cottage cheese) with the cauliflower.
- Herbal Boost: Incorporate finely chopped fresh fenugreek leaves (methi) or spinach for added flavor and nutrition.
- Spicier Kick: Increase the amount of green chilies or red chili powder, or add a pinch of black pepper for a more fiery paratha.
- Different Flours: While whole wheat flour is traditional, you can experiment with a small percentage of all-purpose flour for a slightly softer texture, though it will alter the authentic taste.
- Vegan Option: Ensure you use oil instead of ghee for cooking the parathas to keep them completely vegan.
The Joy of Homemade Parathas
Making Gobi Paratha at home is more than just following a recipe; it’s an experience that fills your kitchen with the aroma of spices and creates a connection to a rich culinary tradition. The effort of kneading the dough, preparing the filling, and carefully rolling each paratha culminates in a dish that is deeply satisfying and incredibly delicious. It’s a meal that speaks of warmth, comfort, and the simple pleasures of good food shared with loved ones.
Whether you’re making them for a quick breakfast, a leisurely brunch, or as a hearty meal, Gobi Parathas are a delightful addition to any menu. Embrace the process, savor the flavors, and enjoy the authentic taste of this beloved Indian flatbread. Happy cooking!