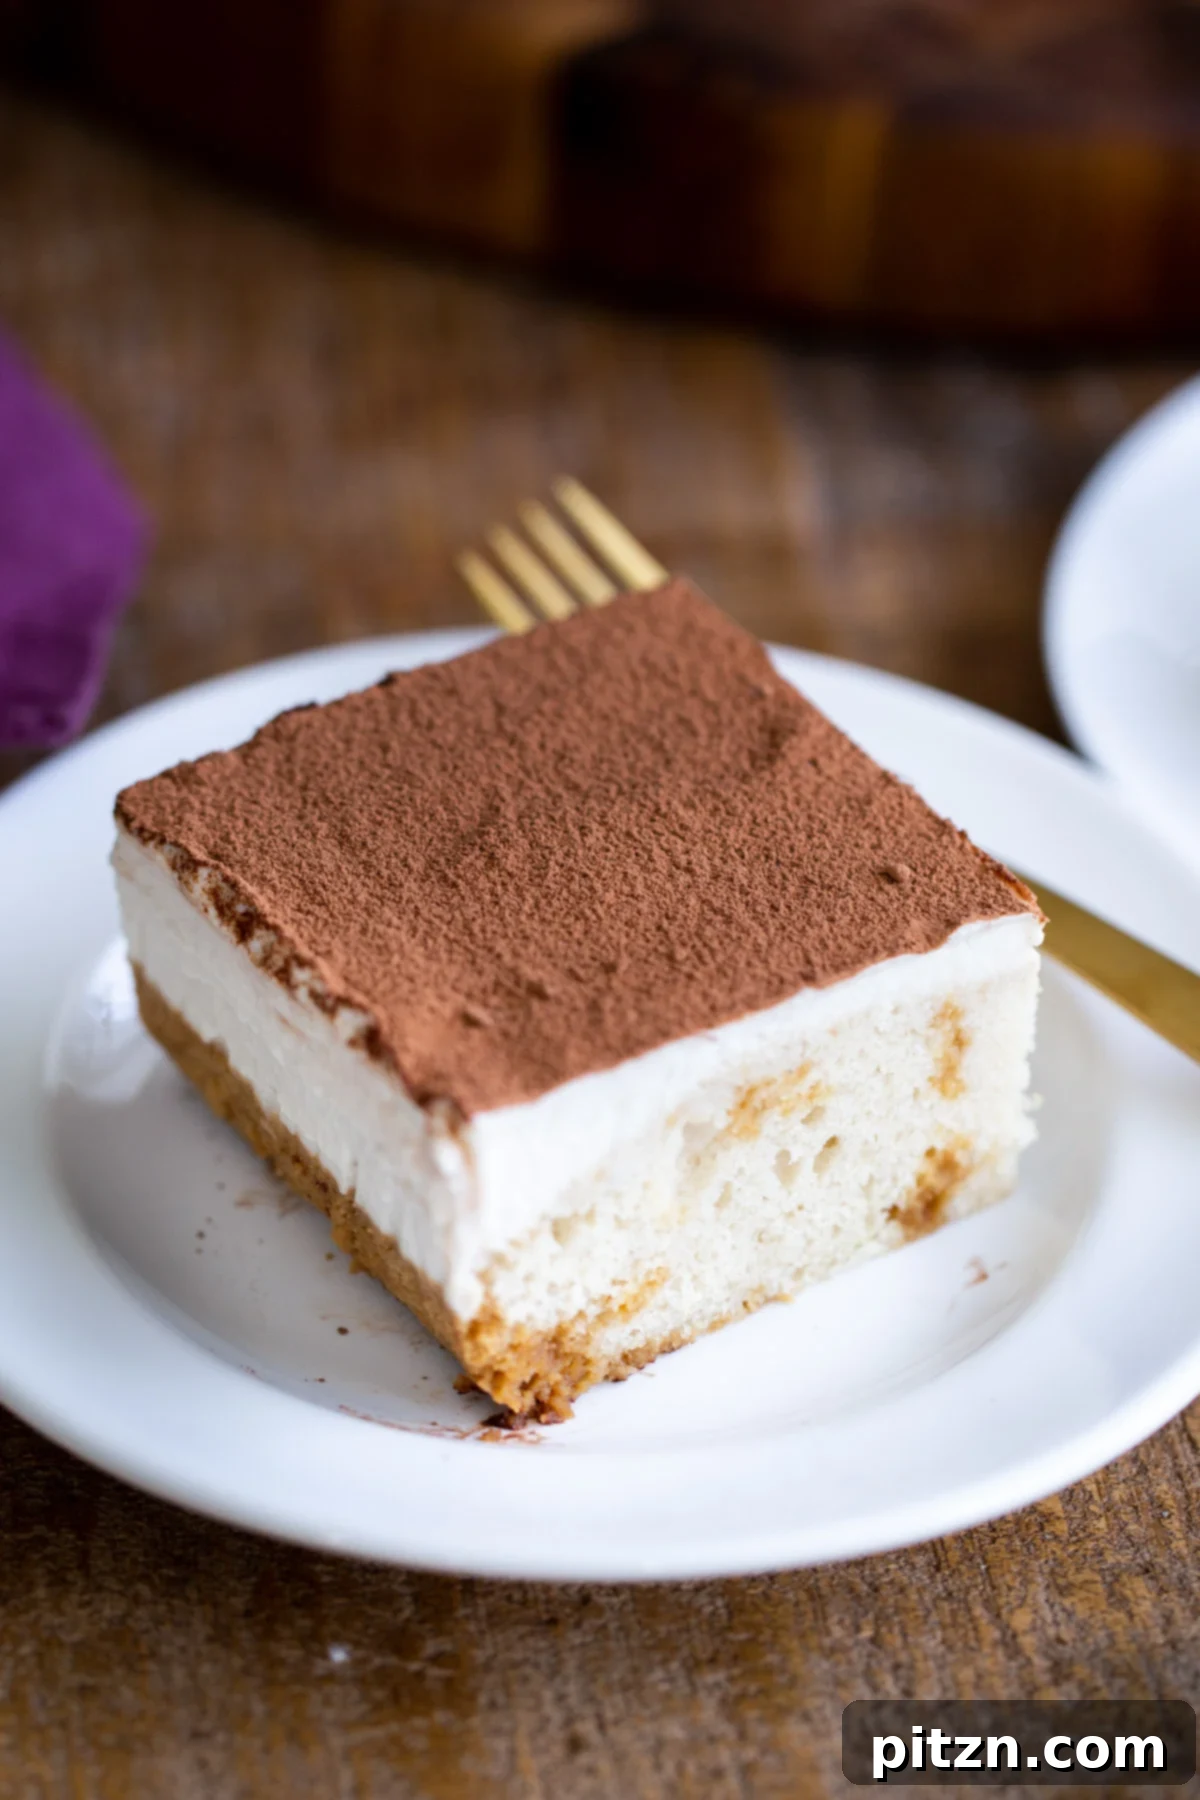
Indulge in the decadent flavors of Tiramisu without the traditional fuss or any animal products with this incredible **Vegan Tiramisu Sheet Cake**. This recipe delivers all the beloved characteristics of the classic Italian dessert – a light, airy sponge cake, generously soaked in rich coffee syrup, and crowned with a luscious, creamy homemade vegan mascarpone-style frosting, all dusted with a fine layer of cocoa. It’s an effortlessly elegant dessert that promises moist, perfect bites every single time, making it ideal for gatherings, holidays, or simply satisfying your sweet cravings. Plus, we’ve included versatile options for gluten-free and nut-free diets, ensuring everyone can enjoy a slice of this plant-based masterpiece.
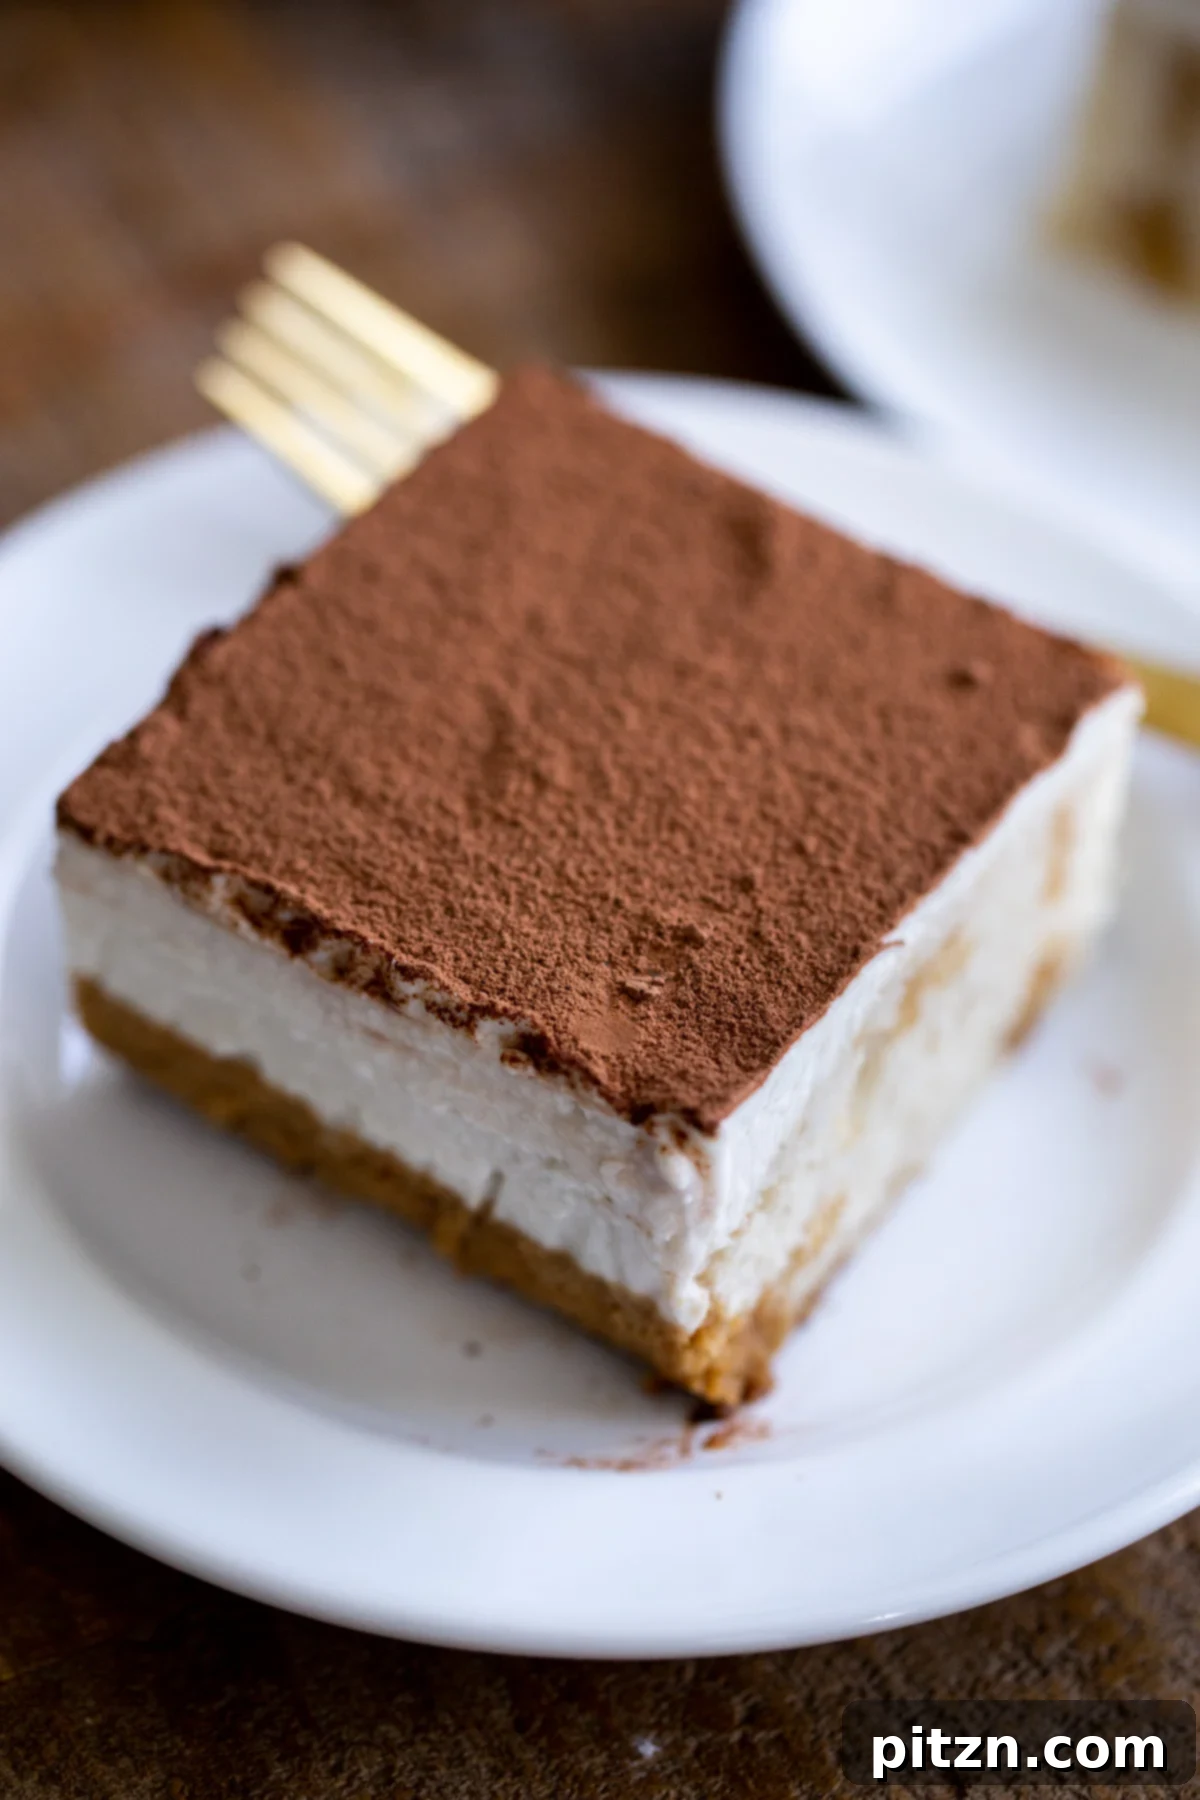
Are you yearning for the sophisticated taste of Tiramisu but find yourself short on time or simply don’t want the hassle of individually assembling ladyfinger cookies? This **easy vegan tiramisu sheet cake** is your answer! It captures every essence of the beloved Italian classic in a convenient sheet cake format. This means significantly less preparation time, a simpler layering process, and a generously sized dessert that’s perfect for feeding a large crowd without extra effort. Imagine the delight of your guests at your next holiday gathering or special event when they savor this plant-based marvel that truly lives up to its traditional counterpart.
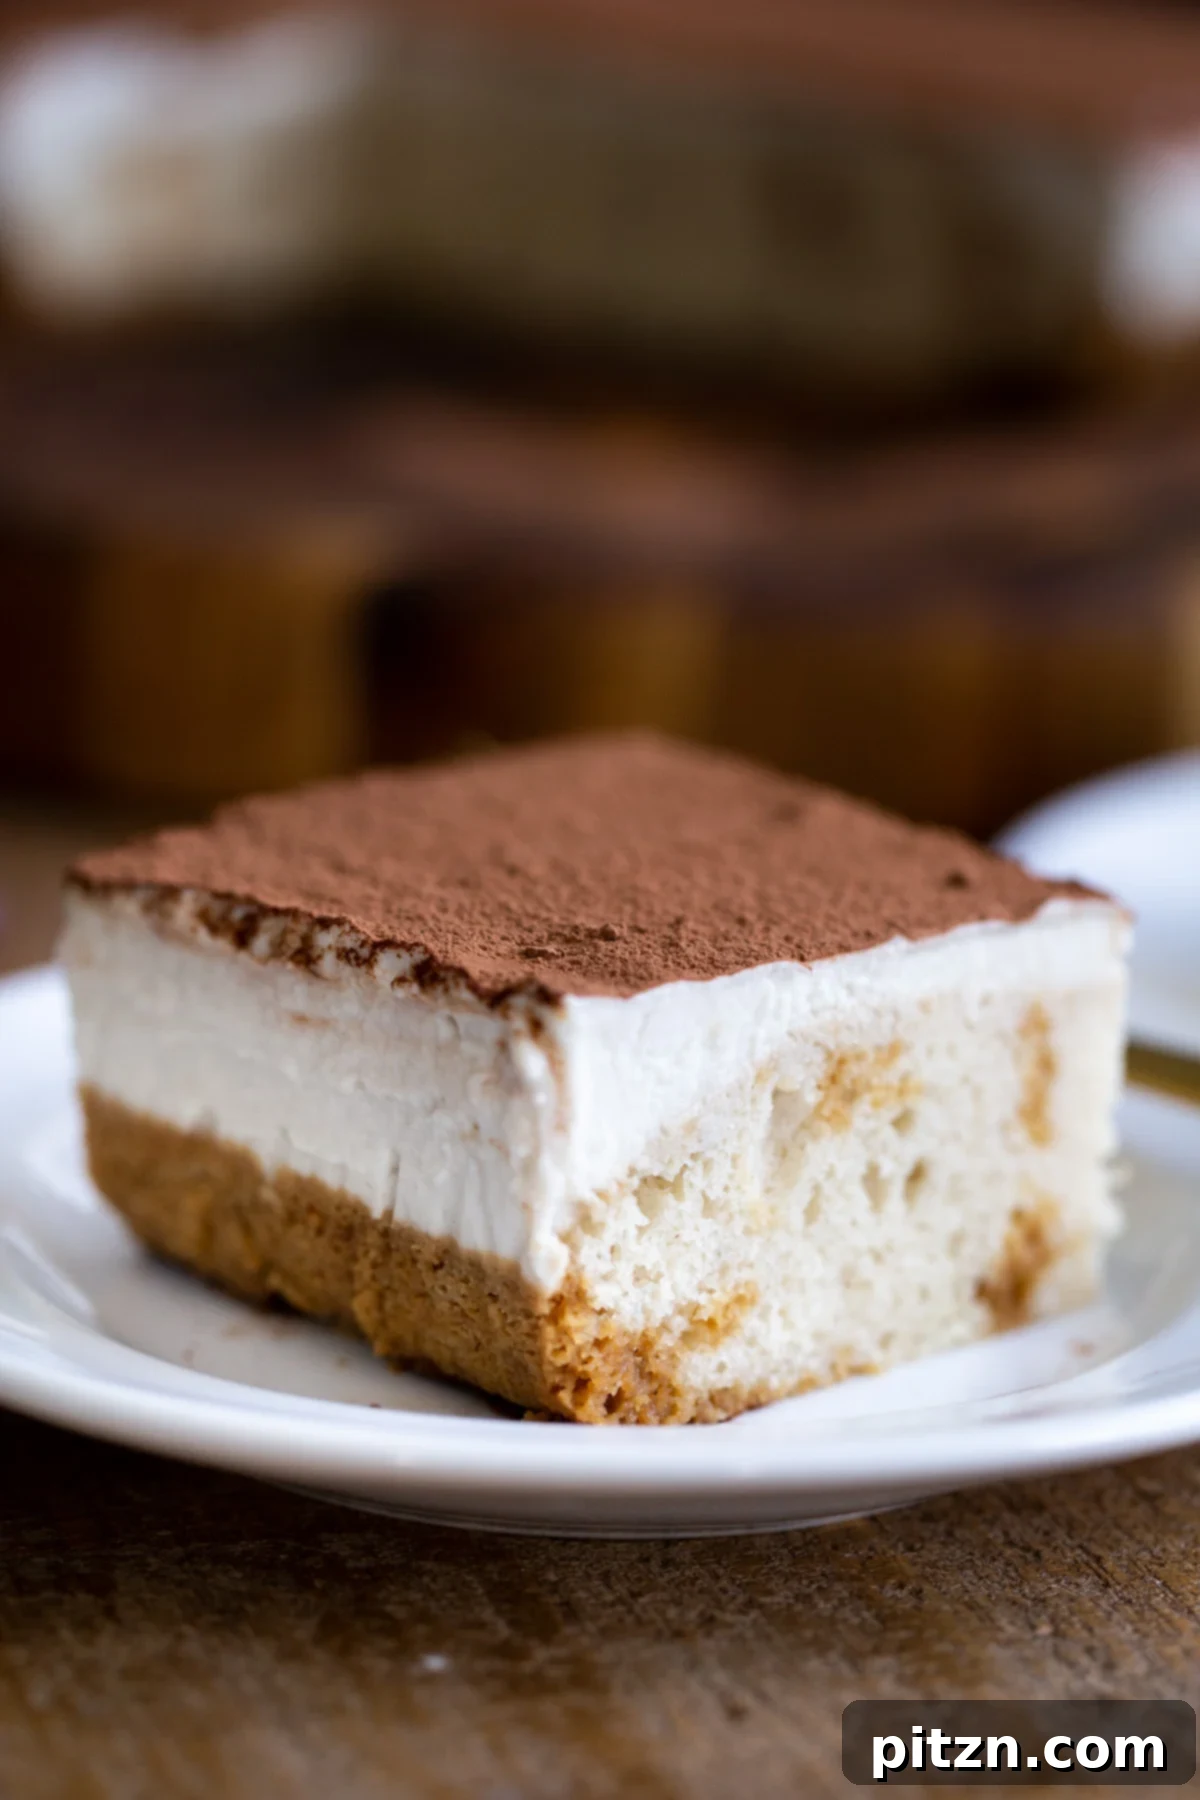
Our recipe begins with baking a quick, vanilla-scented sponge cake layer that’s thin yet remarkably fluffy. Once baked and slightly cooled, this tender cake becomes the perfect canvas for flavor. We gently poke holes across its surface, preparing it to absorb every drop of the rich, aromatic coffee syrup. This crucial step infuses the cake with irresistible moisture and that signature Tiramisu depth. The grand finale is a thick, creamy, and decadent mascarpone-style vegan topping, crafted to perfection. A final dusting of cocoa powder or delicate chocolate shavings completes this glorious dessert, making it not just a treat for the palate, but a feast for the eyes.
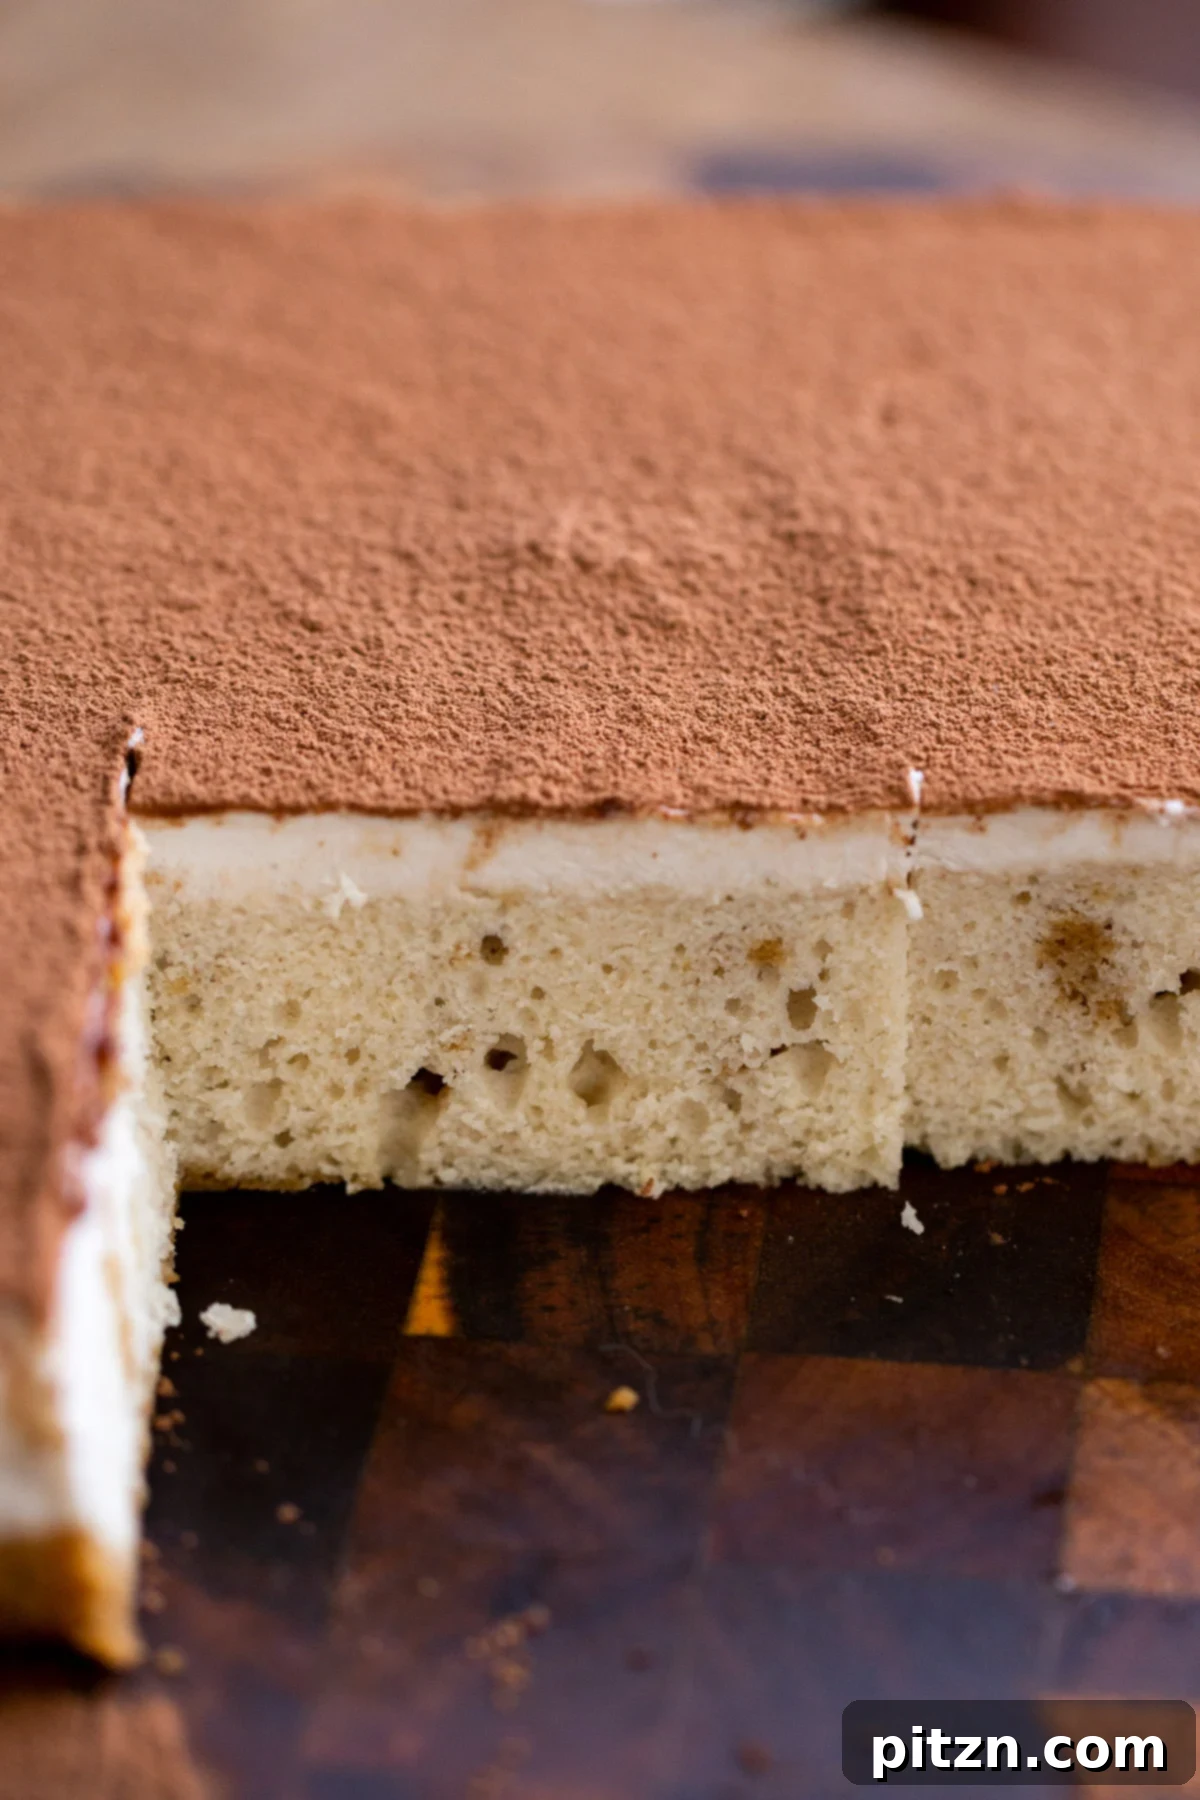
This Tiramisu sheet cake isn’t just a dessert; it’s an elegant statement piece that’s surprisingly easy to achieve. It pairs beautifully with a steaming cup of freshly brewed coffee, creating a truly luxurious experience. The convenience extends beyond preparation, as leftovers can be stored in the fridge for several days or even frozen for future indulgence, making it a fantastic make-ahead option. You have full control over the coffee intensity; simply adjust the number of holes you poke in the cake to determine how much of that luscious coffee syrup it absorbs. Once you try this recipe, you’ll undoubtedly want to keep it in your permanent collection of go-to desserts. For those with dietary considerations, detailed gluten-free and nut-free options are thoughtfully provided in the tips section and the comprehensive recipe card below.
Why You’ll Adore This Vegan Tiramisu Sheet Cake
- Simplified & Speedier Preparation: Forget the time-consuming process of dipping individual ladyfingers. Our sheet cake method streamlines the entire dessert-making experience, allowing you to whip up this showstopper in a fraction of the time. It’s perfect for busy schedules without compromising on taste.
- Effortless Transport & Serving: The sheet cake format makes this Tiramisu incredibly easy to transport to potlucks, parties, or family gatherings. Simply cover the pan, and you’re ready to go! Serving is also a breeze; just slice and lift, ensuring neat portions for everyone.
- Authentic Tiramisu Satisfaction: Despite being plant-based and made as a sheet cake, this dessert delivers on all the classic Tiramisu cravings. The harmonious blend of coffee, vanilla, and rich cream will transport you straight to Italy with every bite.
- Irresistibly Moist & Decadent: The light sponge cake, thoroughly soaked with our flavorful coffee syrup, guarantees an exquisitely moist texture. Paired with the incredibly rich and creamy vegan mascarpone frosting, each mouthful is a truly delicious and luxurious experience.
- Inclusive & Allergy-Friendly Options: We’ve ensured that almost everyone can enjoy this delightful treat. With clear instructions for making it gluten-free, nut-free, and soy-free, this recipe is incredibly adaptable, catering to various dietary needs without sacrificing flavor or texture.
More Delicious Vegan Cake Recipes to Explore:
Vegan Carrot Cake Bars
Vegan Gluten-Free Chocolate Cake
Vegan Self-Saucing Black Forest Chocolate Pudding Cake
Rasmalai Tres Leches Cake (Vegan)
Vegan Baklava Cake
Vegan Tiramisu Sheet Cake
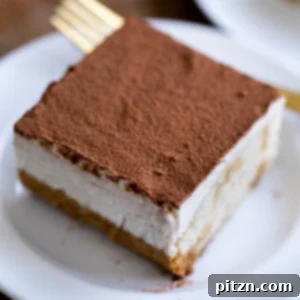
Ingredients
For the cake:
- ▢ 3/4 cup plus 2 tablespoons of all-purpose flour
- ▢ 1/4 cup sugar
- ▢ 1/2 teaspoon baking powder
- ▢ 1/8 teaspoon baking soda
- ▢ 1/8 teaspoon salt
- ▢ 2 tablespoons oil
- ▢ 2 tablespoons non-dairy yogurt or applesauce
- ▢ 1/2 teaspoon vanilla extract
- ▢ 1/2 cup or more non-dairy milk
For the coffee syrup:
- ▢ 1/2 cup coffee, (e.g., 1/2 cup of water + 1 tablespoon instant coffee or 2 espresso shots + water to make 1/2 cup)
- ▢ 2 tablespoons brown sugar
- ▢ 1 tablespoon coffee liqueur, (optional, or use 2-3 drops of almond extract for non-alcoholic version)
For the cream layer:
- ▢ 1 heaping cup of raw cashews (preferably soaked if you don’t have a high-speed blender)
- ▢ 15 oz can of full-fat coconut milk
- ▢ 3 1/2 ounces vanilla or plain non-dairy yogurt, (see substitutions in notes for soy-free or yogurt-free options)
- ▢ 1/4 teaspoon vanilla extract
- ▢ 1 tablespoon lemon juice
- ▢ 4 drops of almond extract
- ▢ 1/4 teaspoon salt
- ▢ 1/4 cup sugar
For topping:
- ▢ 1 tablespoon cocoa powder
Instructions
-
Prepare the cake batter: In a large mixing bowl, combine all the dry ingredients for the cake: the all-purpose flour, sugar, baking powder, baking soda, and salt. Whisk them thoroughly to ensure they are well distributed. Next, add the wet ingredients: oil, non-dairy yogurt (or applesauce), vanilla extract, and 1/2 cup of non-dairy milk. Mix until a smooth batter forms, resembling the consistency of a thick pancake batter. If the mixture appears too stiff, gradually add more non-dairy milk, one teaspoon at a time, until the desired consistency is reached.
-
Bake the cake: Prepare an 8×8 inch or 9×9 inch brownie pan by lining it with parchment paper or thoroughly greasing and flouring it. Pour the prepared cake batter into the pan and spread it evenly. Bake in a preheated oven at 350°F (180°C) for 22 to 24 minutes, or until a toothpick inserted into the center of the cake comes out clean, indicating it’s fully cooked.
-
Prepare for soaking: Once baked, remove the cake from the oven and let it cool in the pan for about 5 minutes. While still warm, use a fork or a skewer to poke holes all over the cake’s surface. The number of holes depends on your preference for how thoroughly soaked you want the cake to be; more holes will result in a more coffee-infused sponge. For maximum coffee absorption, you can even slice a very thin layer off the top of the cake before poking holes to expose a more porous texture.
-
Make the coffee syrup: In a small saucepan over medium heat, combine all the ingredients for the coffee syrup: coffee, brown sugar, and coffee liqueur (if using). Stir well until the sugar dissolves completely. Bring the mixture to a gentle boil, then immediately remove it from the heat. Carefully pour this warm, aromatic syrup evenly over the entire surface of the poked cake, allowing it to soak completely into the sponge.
-
Prepare the vegan cream layer: Add all the ingredients for the cream layer (raw cashews, full-fat coconut milk, non-dairy yogurt, vanilla extract, lemon juice, almond extract, salt, and sugar) into a high-speed blender. Blend until the cashews are completely broken down and the mixture is silky smooth and creamy. This may take several blending cycles; I recommend blending for 1 minute, letting it rest for 5 minutes, and then blending again (repeat 2-3 times) until absolutely no cashew grittiness remains. Taste the cream and adjust sweetness if desired.
-
Thicken the cream: Pour the blended cream mixture into a saucepan and cook over medium heat. Stir occasionally for the first 3-4 minutes, then stir more frequently to prevent lumps from forming and to ensure even thickening. Continue cooking and stirring until the mixture has noticeably thickened to a spreadable, custard-like consistency. Once thickened, remove from heat.
-
Assemble and chill: Allow the thickened cream mixture to cool for a few minutes. Then, pour it evenly over the coffee-soaked cake in the pan and spread it smoothly to create a uniform layer. Transfer the cake to the freezer and chill for 3 to 4 hours, or until the cream topping is set firm but not completely frozen solid. This chilling time is crucial for the layers to meld and for the cake to firm up for easy slicing.
-
Serve: Once chilled, carefully remove the cake from the pan using the parchment paper liner. Place it on a serving platter. Dust the top generously with cocoa powder. Slice into desired portions and serve immediately. Enjoy your homemade vegan Tiramisu sheet cake!
Video
Notes and Expert Tips
- Storage Guidelines: This delicious vegan Tiramisu sheet cake can be stored beautifully in an airtight container in the refrigerator for up to 4 days. For longer preservation, you can freeze it for up to a month. Ensure it’s tightly wrapped to prevent freezer burn.
- Serving Frozen Cake: If you’ve frozen your Tiramisu, remember to transfer it from the freezer to the refrigerator several hours before serving, ideally the morning of your event. This allows it to thaw gradually to the perfect soft and creamy consistency. Once thawed, slice and serve directly from the fridge.
- Yogurt Substitutions: If non-dairy yogurt is unavailable or you prefer an alternative for the cream layer, you can substitute it with approximately 3 ounces of silken tofu. Alternatively, increase the amount of raw cashews by 1/4 cup for an even richer, thicker cream.
- Alcohol-Free Options: For a non-alcoholic coffee syrup, simply omit the coffee liqueur. You can enhance the flavor with 2 to 3 drops of almond extract, which adds a lovely subtle depth reminiscent of the traditional taste. Kahlua can also be used as a delicious alcoholic alternative to coffee liqueur.
- Gluten-Free Adaptation: To make this Tiramisu gluten-free, use a specific flour blend for the cake. Combine 1/2 cup almond flour, 1/2 cup oat flour, and 1/4 cup potato starch, mixing them very well. Use about 1 cup of this mixture for your cake batter. Additionally, incorporate 1/4 cup of club soda into the batter to aid in lightness. If the batter seems too thin after mixing, add the remaining flour blend one tablespoon at a time until it reaches a thick pancake batter consistency. Pour into a parchment-lined baking pan and bake as directed.
- Nut-Free or Cashew-Free Alternatives: If you need a nut-free version or prefer not to use cashews, consider substituting macadamia nuts if nuts are permitted. For a completely nut-free option, increase the non-dairy yogurt in the cream layer by 1/2 cup and add an extra 1/2 cup of full-fat coconut milk to achieve a similar creamy texture.
- Coconut-Free Option: If you need to avoid coconut, replace the coconut milk in the cream layer by using an additional 3/4 cup of cashews and blending with 1 cup of water instead of coconut milk. This will still yield a rich and creamy texture.
- Oil-Free Cake: To make the cake oil-free, substitute the 2 tablespoons of oil with 2 tablespoons of applesauce or 1 tablespoon of additional non-dairy yogurt, or simply use a bit more non-dairy milk to achieve the correct batter consistency.
Nutrition Information (Per Serving)
Nutrition information is automatically calculated, so should only be used as an approximation.
Did you make this recipe? Rate and comment below!
Exploring the Ingredients: Crafting Your Vegan Tiramisu Masterpiece
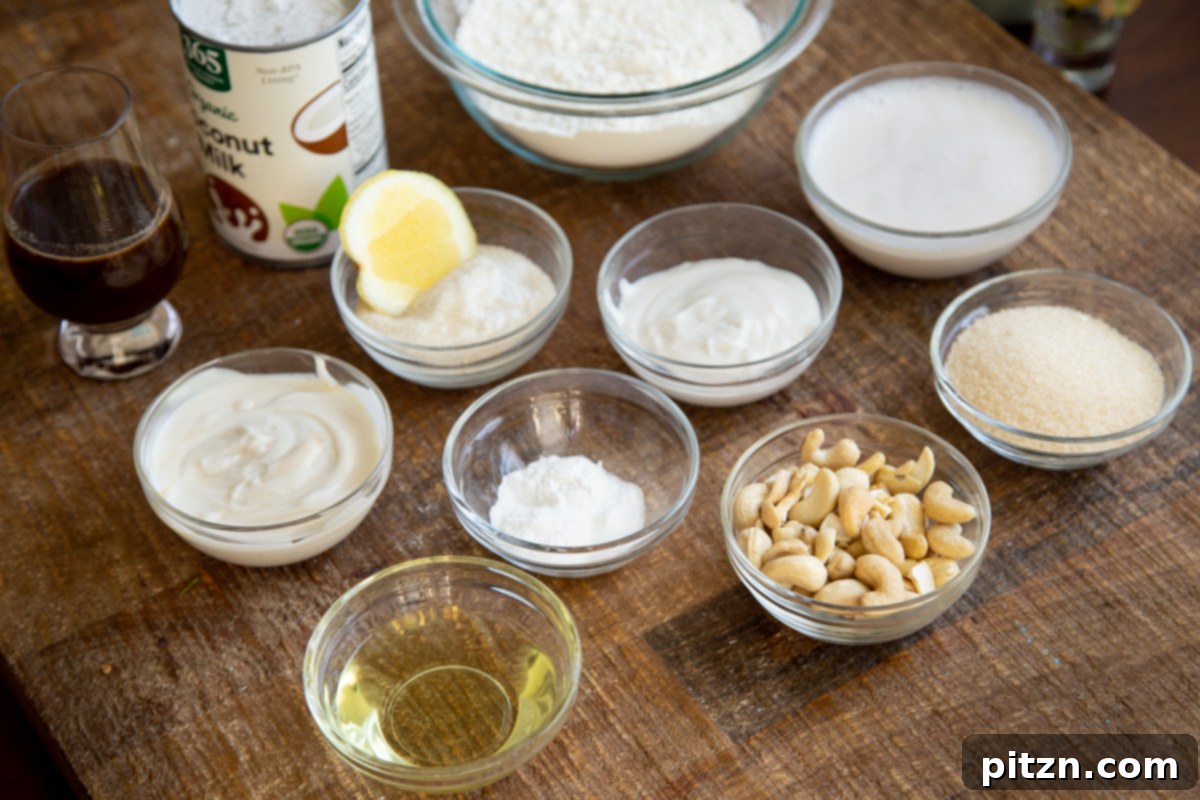
Creating this exquisite vegan Tiramisu sheet cake relies on a thoughtful selection of plant-based ingredients, each playing a vital role in achieving the authentic flavor and texture of the Italian classic.
- For the Light & Fluffy Sponge Cake: The foundation of our Tiramisu is a tender sponge cake. We use a blend of all-purpose flour for structure, complemented by sugar for sweetness and moisture. Baking powder and baking soda are the essential leavening agents that give the cake its characteristic light and airy lift. To ensure a moist and rich crumb, we incorporate a mix of non-dairy milk, a neutral-flavored oil, and non-dairy yogurt. The yogurt adds a subtle tang and helps with tenderness, mirroring the qualities often found in traditional cakes. A touch of vanilla extract infuses the cake with a warm, inviting aroma, though almond essence can also be used for a slightly different, equally delightful note.
- The Indulgent Coffee Syrup: No Tiramisu is complete without its iconic coffee soaking. Our homemade syrup is a rich concoction featuring strong coffee, which can be easily made from instant coffee powder mixed with hot water, or for an intensified flavor, two shots of espresso topped up with water to make half a cup. Brown sugar is added to the coffee, creating a beautifully balanced sweetness that enhances the coffee’s depth. For an authentic Italian touch and a hint of sophistication, coffee liqueur is an optional but highly recommended addition, imparting a wonderful boozy warmth. If you prefer to keep it alcohol-free, a few drops of almond extract offer a pleasant alternative.
- The Rich & Creamy Vegan Mascarpone Layer: The star of this vegan Tiramisu is undoubtedly the luscious, thick cream layer that mimics traditional mascarpone. This is ingeniously crafted from a base of raw cashews, which, when blended and cooked, create an incredibly smooth and rich texture. Full-fat coconut milk contributes to the creamy consistency and adds a subtle richness. Non-dairy yogurt (vanilla or plain) introduces a desirable tang and helps balance the richness, offering a hint of acidity similar to dairy mascarpone. Vanilla extract and almond extract work in harmony to provide depth of flavor, while fresh lemon juice brightens the overall taste. A touch of salt enhances all the sweet and creamy notes, and additional sugar ensures the perfect level of sweetness.
- The Elegant Finishing Touch: To complete this culinary masterpiece, a generous dusting of cocoa powder is sprinkled over the finished cream layer. This not only provides a beautiful visual contrast but also adds a subtle bitter chocolate note that perfectly complements the sweet and creamy layers, making each bite truly balanced and satisfying.
Essential Tips for Vegan Tiramisu Success
Achieving the perfect vegan Tiramisu sheet cake is easier than you think, especially with these helpful tips designed to ensure a flawless and delicious outcome every time.
Can I make this without yogurt?
Absolutely! If you wish to make this cake without non-dairy yogurt, you have a couple of excellent alternatives for the cream layer. You can use approximately 3 ounces of silken tofu, which will contribute to the creaminess and subtle tang. Another option is to simply increase the amount of raw cashews by 1/4 cup, ensuring an even richer and thicker mascarpone-style cream. Both options will yield fantastic results.
What can I use instead of coffee liqueur?
For those who prefer to omit alcohol, there are great substitutes for coffee liqueur. You can simply leave it out entirely, or add 2 to 3 drops of almond extract to the coffee syrup. Almond extract offers a sophisticated aroma that beautifully complements the coffee flavor. If you do enjoy a boozy kick but want an alternative to coffee liqueur, Kahlua is a fantastic choice that works wonderfully in Tiramisu.
Can I make this Gluten-Free?
Yes, crafting a delicious gluten-free vegan Tiramisu sheet cake is entirely possible! For the cake base, we recommend a special flour blend: combine 1/2 cup of almond flour, 1/2 cup of oat flour, and 1/4 cup of potato starch. Mix these flours thoroughly to ensure even distribution. When preparing your cake batter, use about 1 cup of this gluten-free flour mixture. A key tip for gluten-free baking is to incorporate 1/4 cup of club soda into your batter; the extra carbonation helps provide a lighter texture. Mix well, and if the batter appears too thin, add the remaining flour blend one tablespoon at a time until you achieve a consistency similar to a thick pancake batter. Then, pour it into a parchment-lined baking pan and bake as instructed.
Nut-Free or Cashew-Free Cream Layer: For those with nut allergies or avoiding cashews, you can still achieve a wonderful creamy layer. If other nuts are an option, macadamia nuts can be used as a substitute for cashews, as they also blend into a rich cream. For a completely nut-free alternative, increase the non-dairy yogurt by 1/2 cup and add an extra 1/2 cup of full-fat coconut milk to your cream recipe. This will help maintain the desired thickness and luxurious texture.
Coconut-Free Cream Layer: If coconut is not suitable for your diet, simply increase the raw cashews in the cream recipe by 3/4 cup and use 1 cup of water for blending instead of coconut milk. This adjustment will ensure the cream remains wonderfully thick and smooth.
Oil-Free Cake: To make the cake oil-free, substitute the 2 tablespoons of oil with 2 tablespoons of unsweetened applesauce, or 1 tablespoon of additional non-dairy yogurt. Alternatively, you can simply use a bit more non-dairy milk to achieve the correct batter consistency, ensuring your cake remains moist and tender.
How to Make Vegan Tiramisu Sheet Cake: Step-by-Step Guide
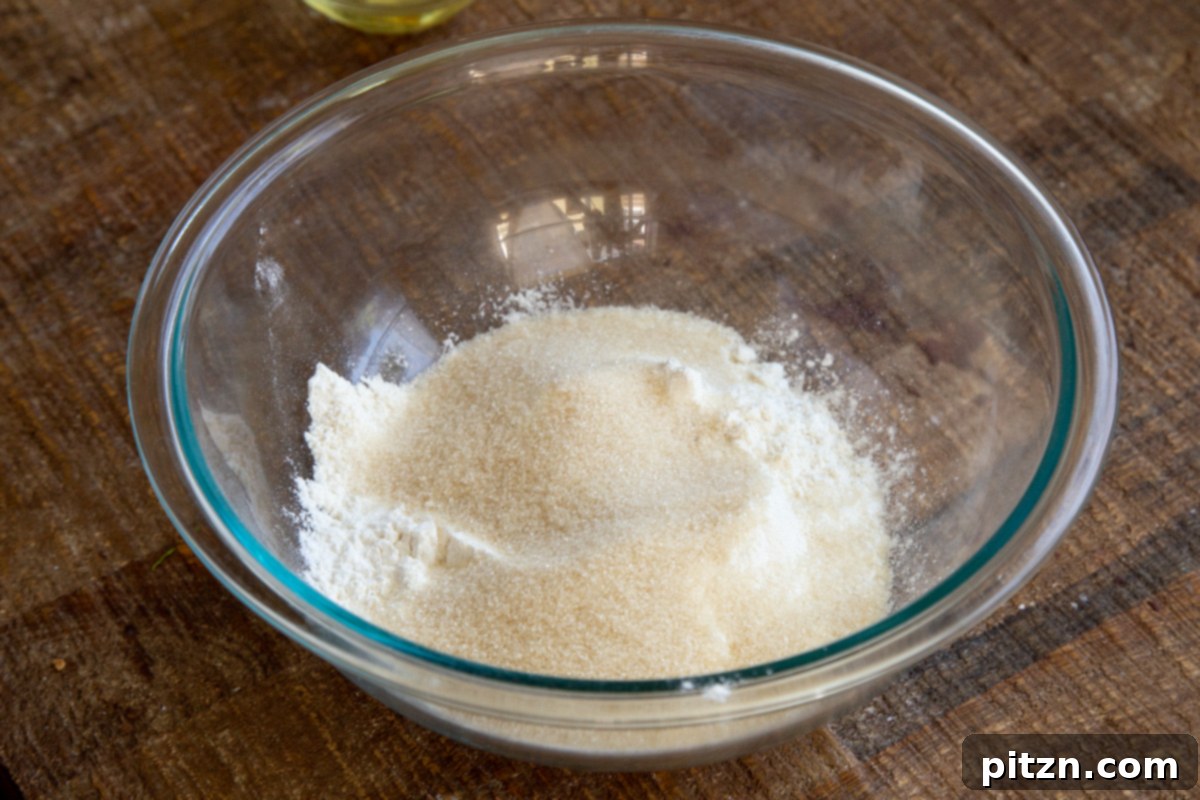
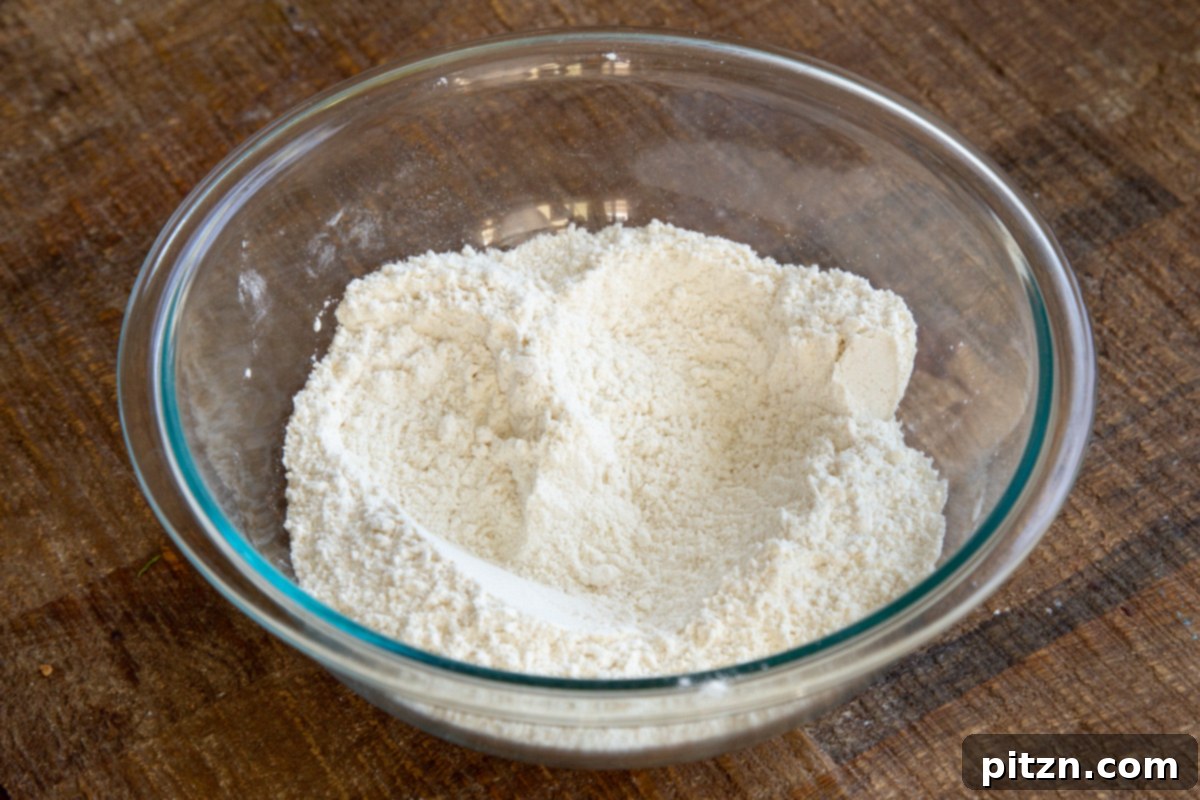
Step 1: Prepare the Cake Batter. Begin by gathering all your dry cake ingredients: all-purpose flour, sugar, baking powder, and salt. Add these to a spacious mixing bowl and whisk them thoroughly until they are well combined and no lumps remain. This ensures an even rise and texture in your finished cake.
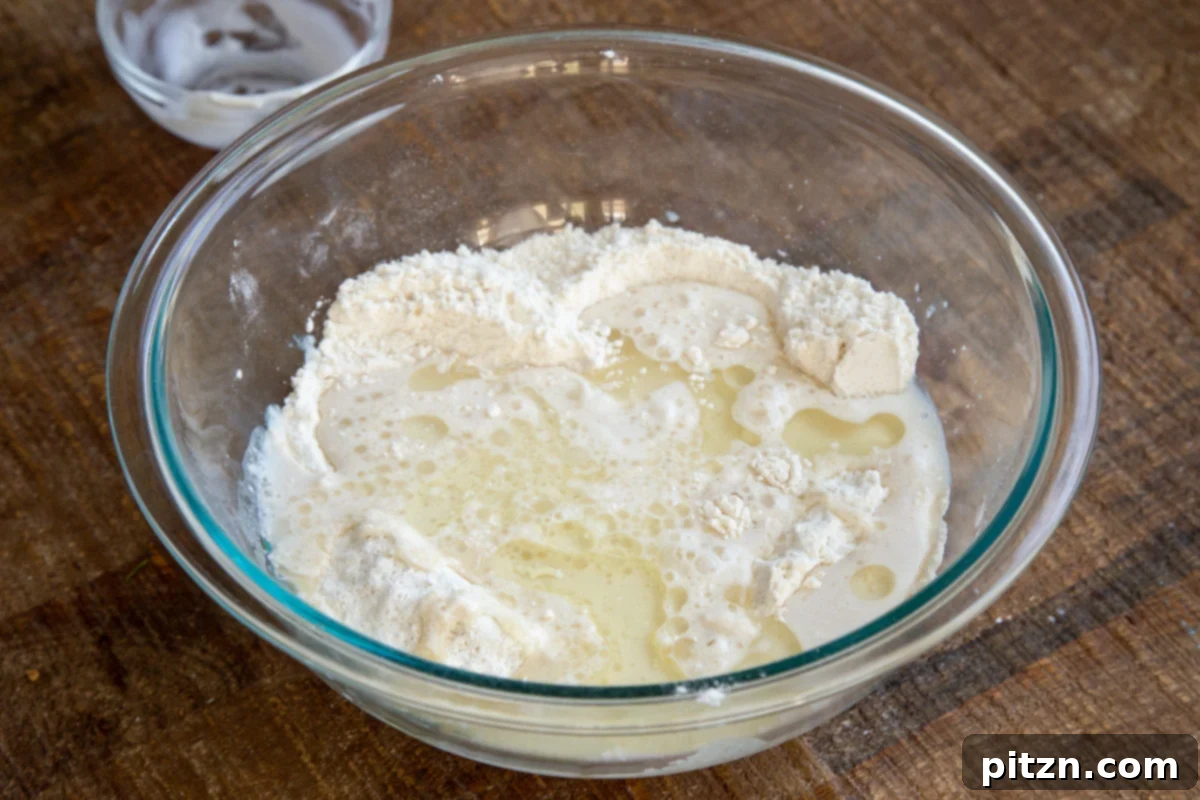
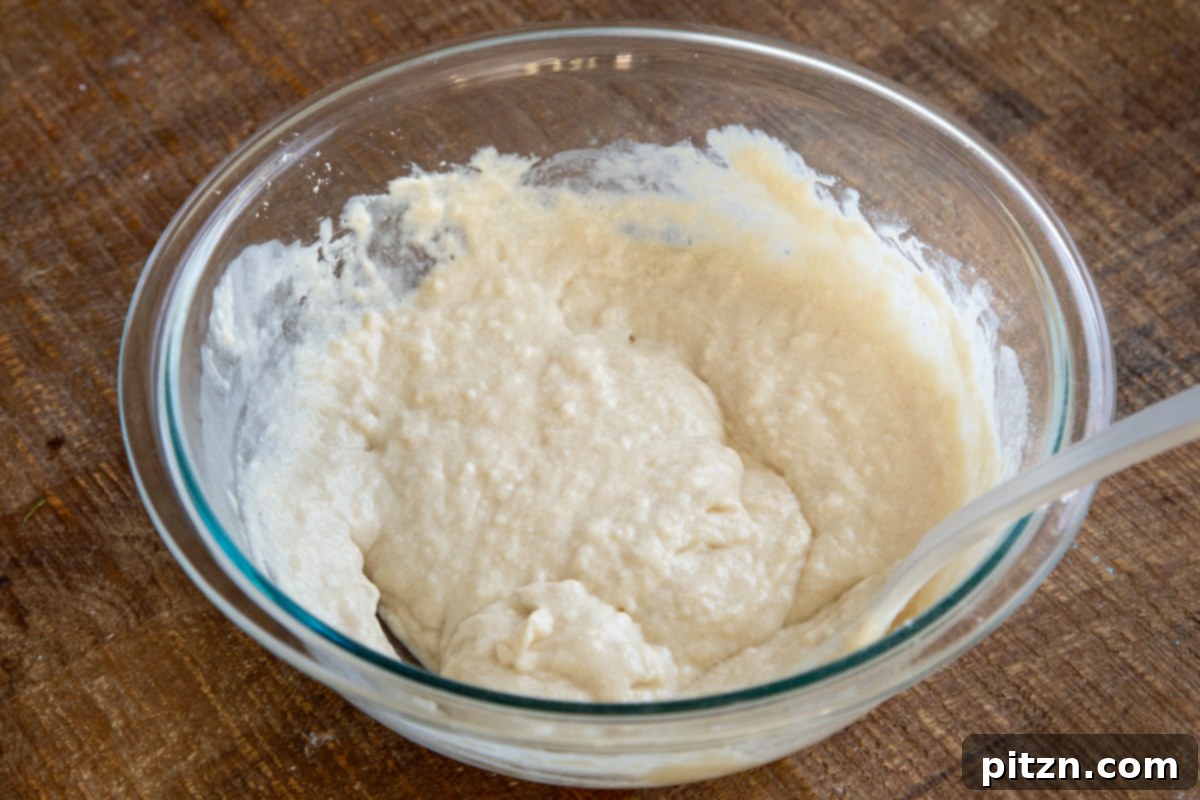
Step 2: Combine Wet and Dry Ingredients. To the mixed dry ingredients, add the wet components: the oil, non-dairy yogurt, vanilla extract, and 1/2 cup of non-dairy milk. Gently fold and mix these ingredients until a smooth, cohesive batter forms. The ideal consistency should be similar to that of a thick pancake batter – not too runny, but easily pourable. If you find the mixture is too stiff, gradually incorporate additional non-dairy milk, adding one teaspoon at a time, until the perfect batter consistency is achieved.
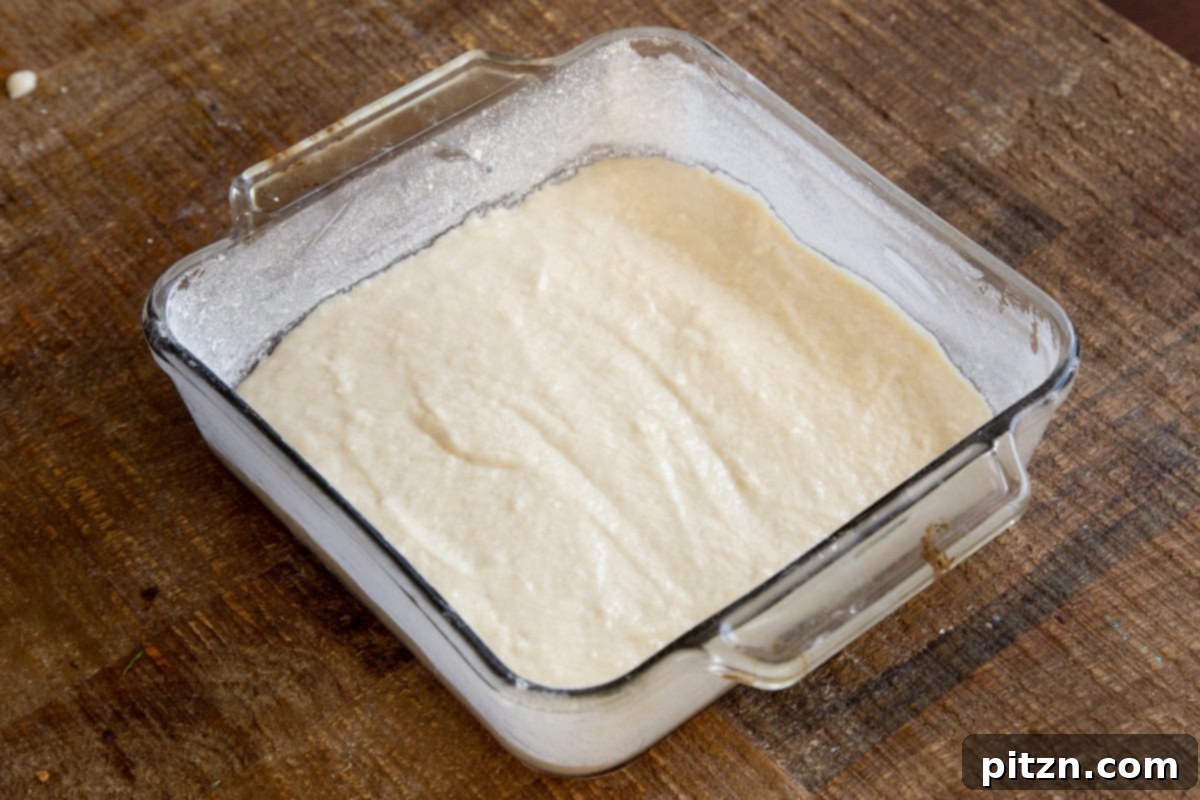
Step 3: Bake the Sponge Cake. Prepare an 8×8 inch or 9×9 inch brownie pan by lining it with parchment paper, leaving an overhang on the sides for easy lifting. Alternatively, you can grease and flour the pan thoroughly. Pour the prepared cake batter into the pan, spreading it out evenly to create a uniform layer. Bake in a preheated oven at 350°F (180°C) for approximately 22 to 24 minutes, or until a toothpick inserted into the center emerges clean, indicating the cake is perfectly baked.
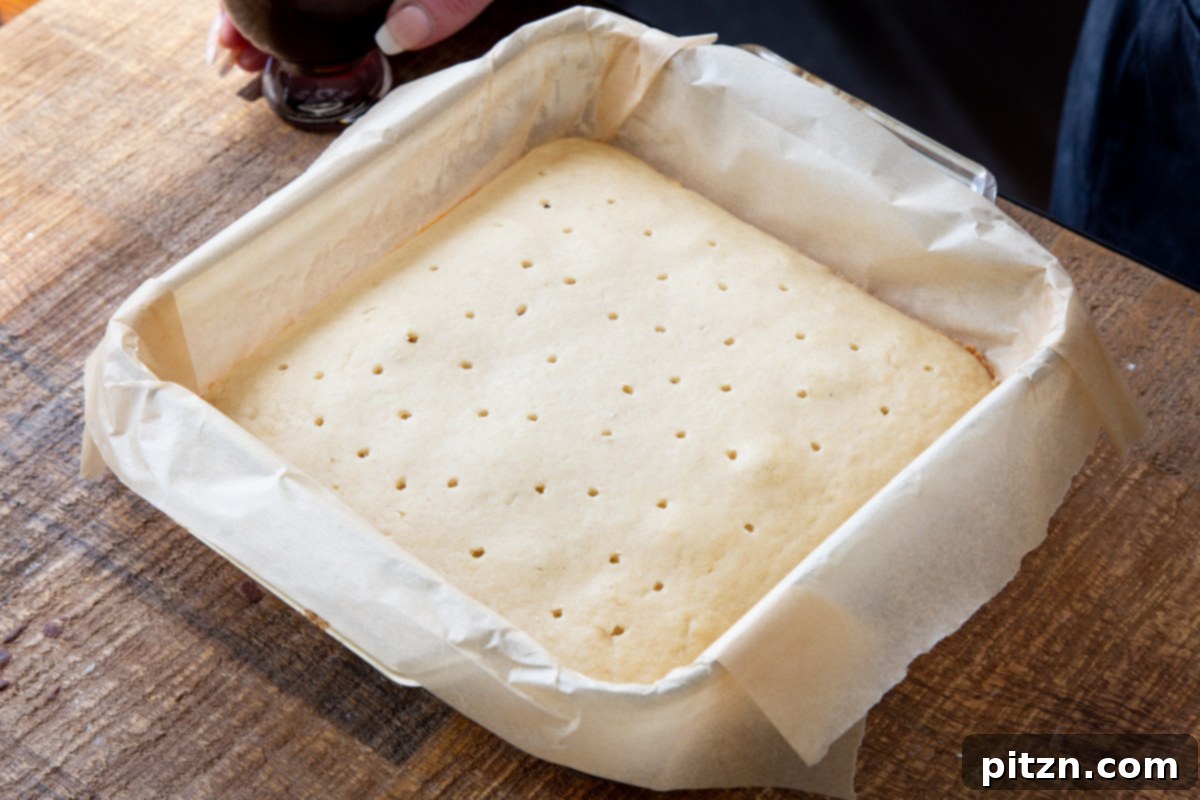
Step 4: Prepare the Cake for Soaking. Once the cake is baked, remove it from the oven and allow it to cool in the pan for about 5 minutes. While still slightly warm, use a fork or a skewer to generously poke holes all over the cake’s surface. The more holes you create, the more coffee syrup the cake will absorb, leading to a richer, moister Tiramisu. I personally love to poke holes approximately every 1/2 inch across the entire cake. For an even more intense coffee infusion, consider slicing off a very thin top layer of the cake before poking holes; this exposes a more porous texture, allowing for maximum syrup absorption.
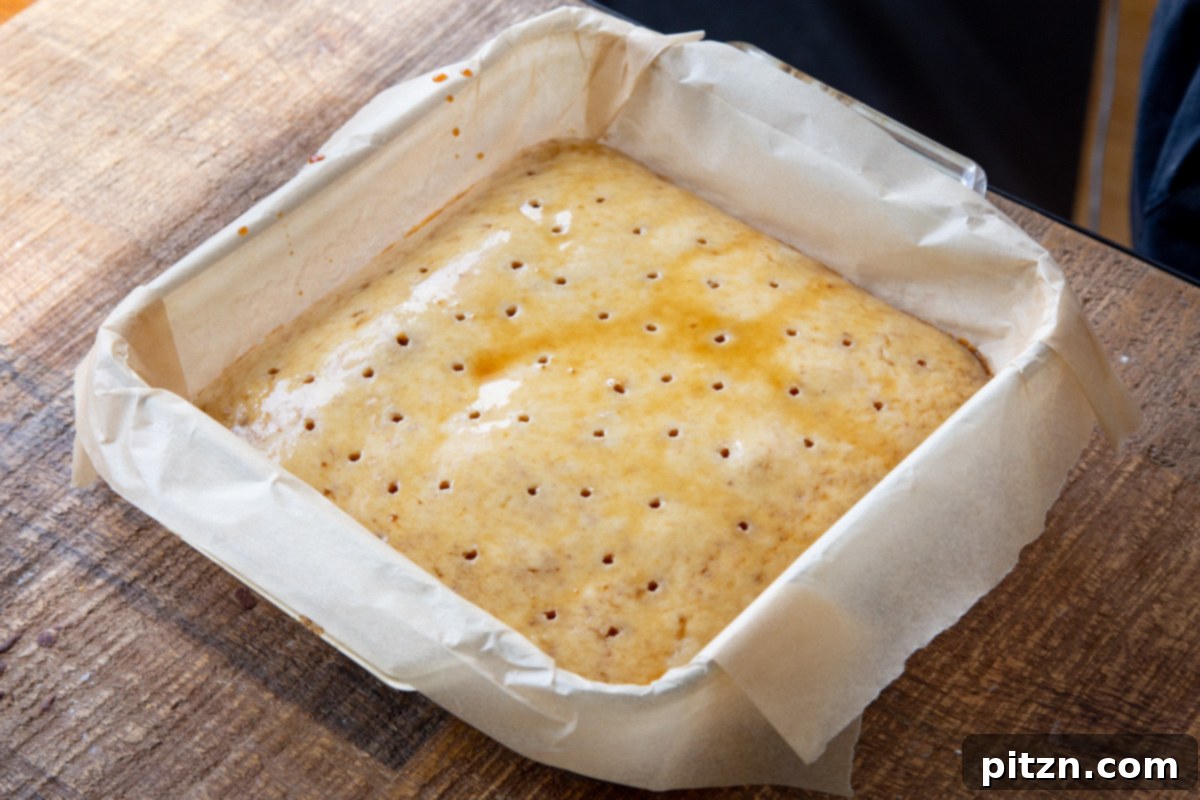
Step 5: Create and Apply the Coffee Syrup. In a small saucepan, combine all the ingredients for your coffee syrup. This includes your prepared coffee (whether instant or espresso-based), brown sugar, and optionally, coffee liqueur. Mix everything thoroughly over medium heat until the sugar has fully dissolved and the mixture comes to a gentle boil. Remove the saucepan from the heat immediately. While the cake is still warm and poked with holes, pour the entire coffee syrup mixture evenly over its surface. Allow the cake to fully absorb the syrup; this step is crucial for that classic Tiramisu moisture and flavor.
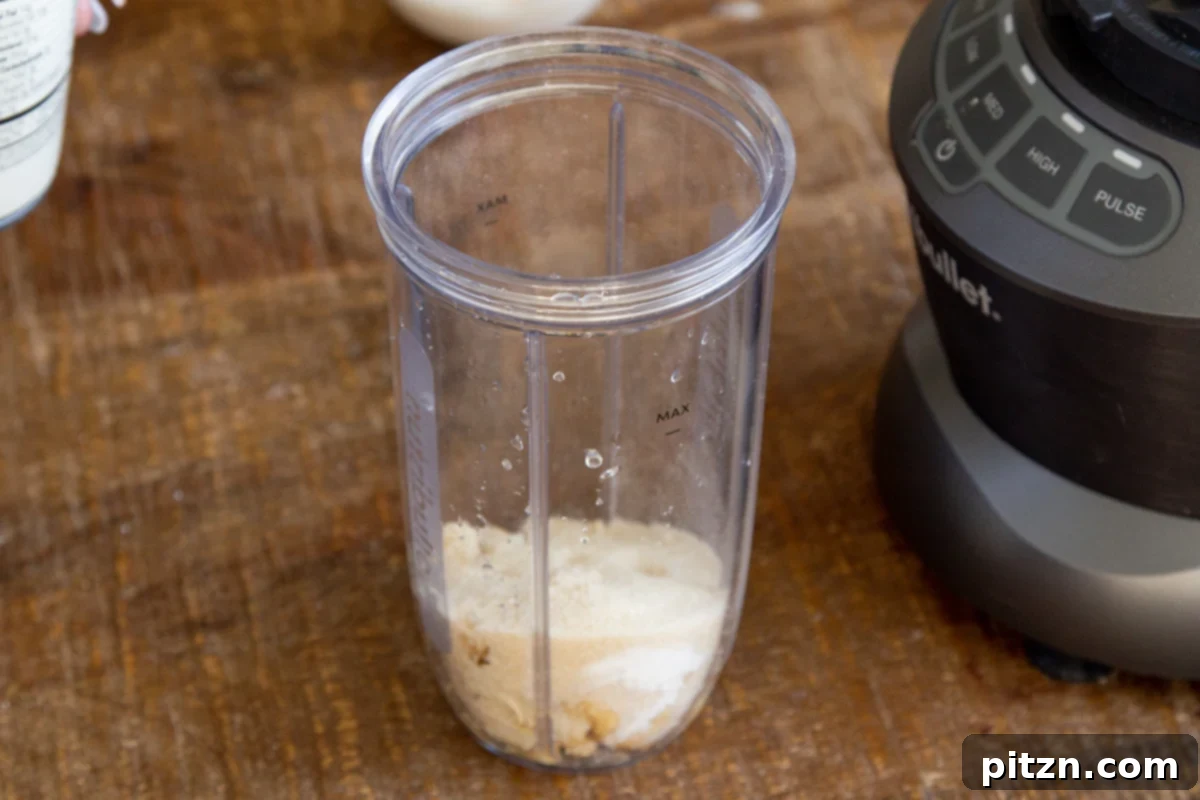
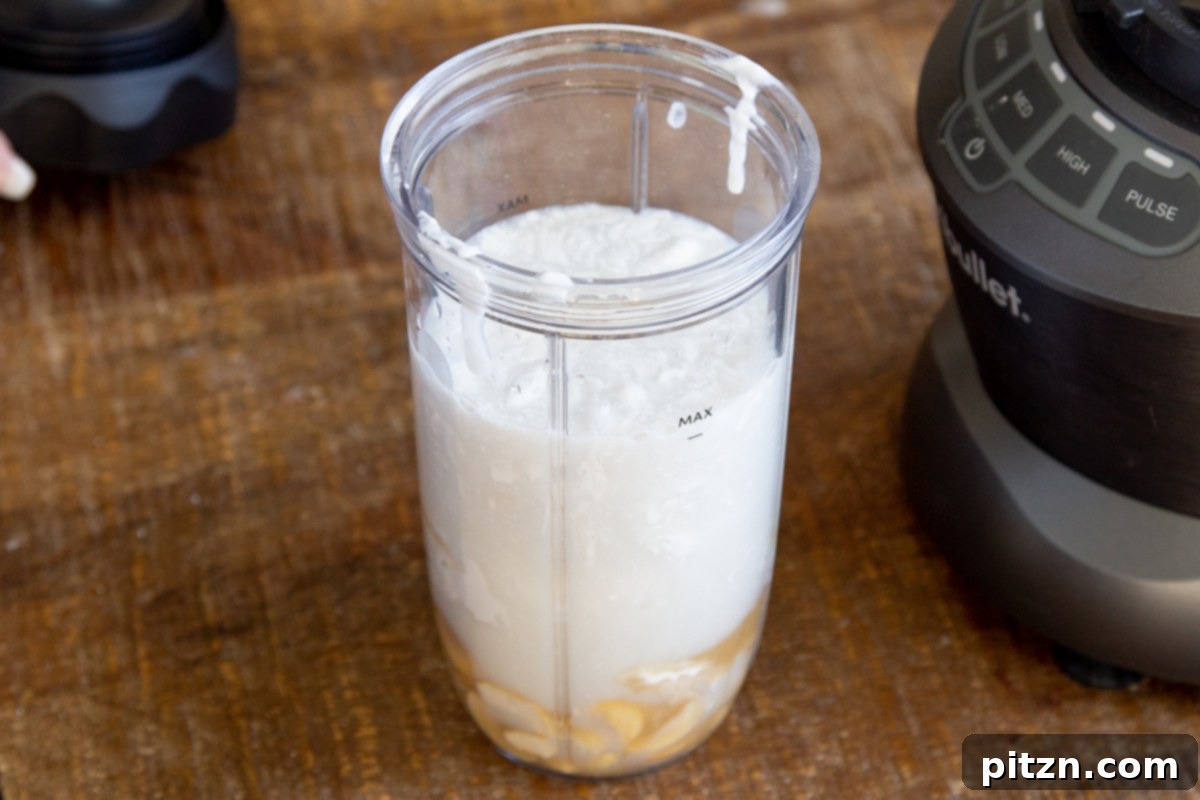
Step 6: Prepare the Cream Layer. Place all the ingredients for the creamy mascarpone-style layer into a high-speed blender. This includes the raw cashews (preferably pre-soaked if you don’t have a very powerful blender), full-fat coconut milk, non-dairy yogurt, vanilla extract, lemon juice, almond extract, salt, and sugar. Blend thoroughly until the cashews are completely broken down, and the mixture transforms into a wonderfully smooth and creamy consistency. Achieving this perfect smoothness often requires patience: blend for about 1 minute, then let the mixture rest for 5 minutes, and repeat this blending cycle 2 to 4 times. This stop-and-start method helps to ensure that no gritty cashew pieces remain. Once blended, taste the cream and adjust the sweetness to your preference. Remember to check the recipe notes for substitution ideas if you have dietary restrictions.
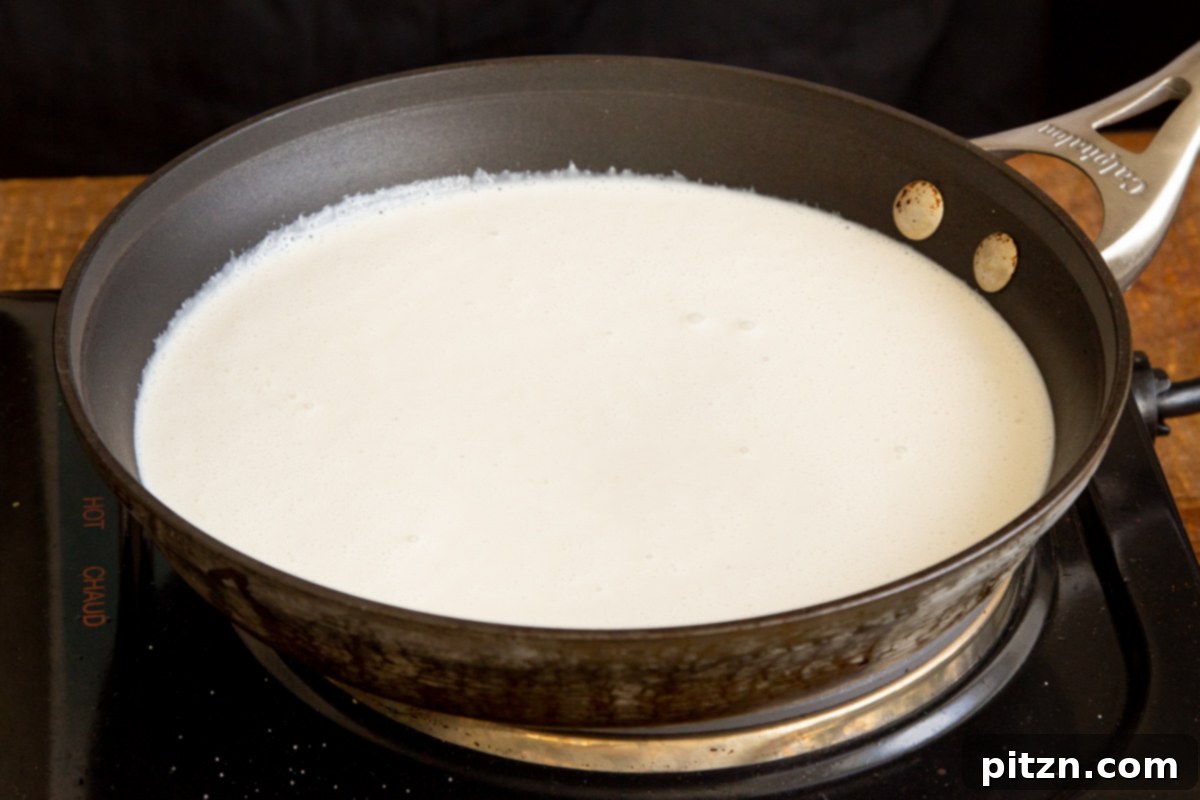
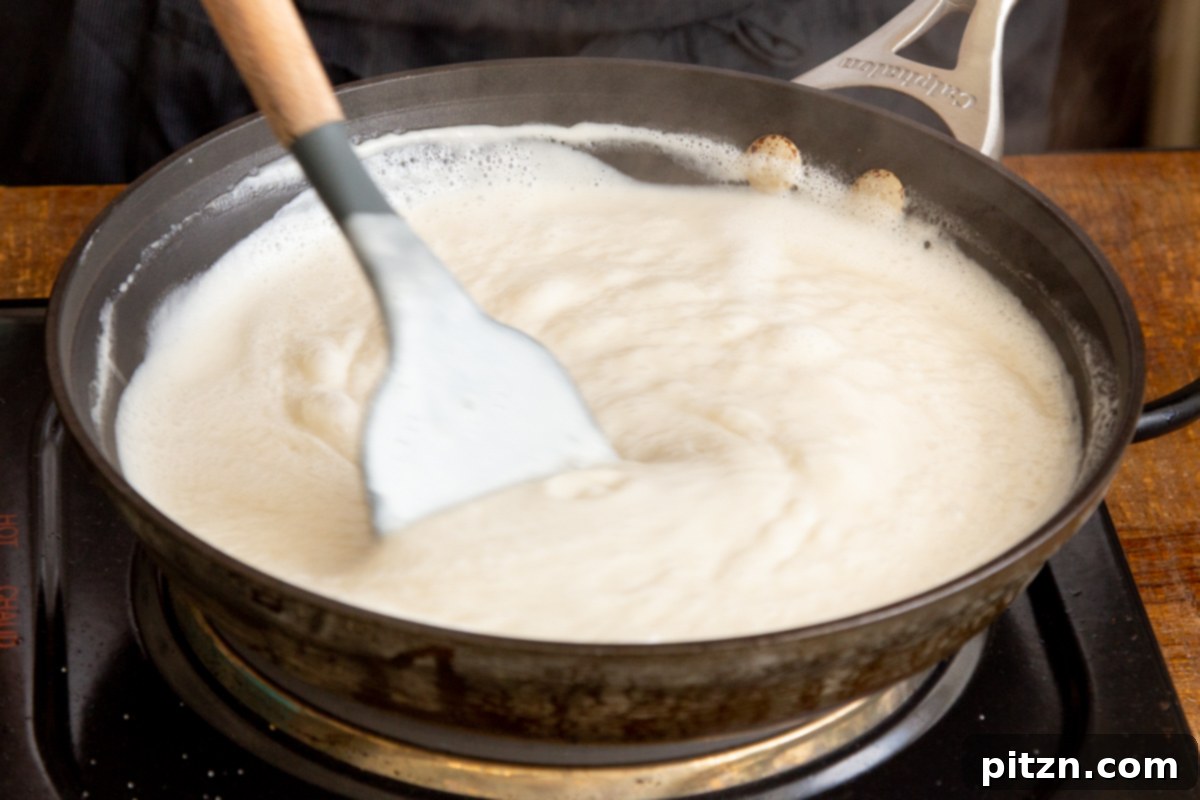
Step 7: Thicken the Cream. Pour the blended cream mixture into a saucepan and cook it over medium heat. Initially, stir occasionally for the first 3 to 4 minutes. After this, increase your stirring frequency, stirring almost continuously to prevent any lumps from forming and to ensure the cream thickens evenly. Continue to cook and stir until the mixture has reached a noticeable custard-like consistency, thick enough to spread but still smooth. Once it has thickened appropriately, remove the saucepan from the heat.
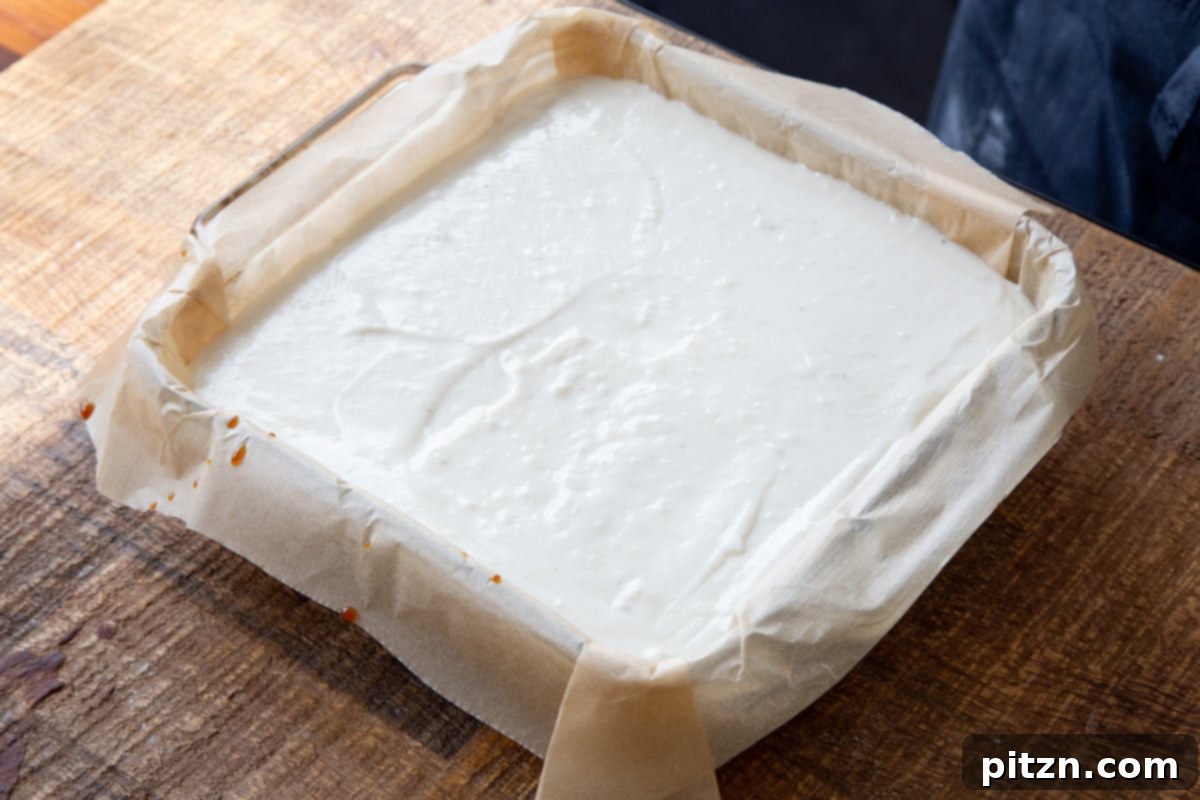
Step 8: Assemble and Chill the Cake. Allow the thickened cream mixture to cool for a few minutes until it’s slightly warm but no longer piping hot. Then, carefully pour this rich vegan mascarpone cream evenly over the coffee-soaked cake in the pan, spreading it smoothly to create a beautiful, uniform layer. Once assembled, transfer the entire cake to the freezer and let it chill for 3 to 4 hours. This crucial freezing time allows the cream layer to set firmly, creating distinct layers and making the cake easier to slice. You want the top to be set and firm, but not entirely frozen solid.
Step 9: Finish and Serve. Once the cake has been sufficiently chilled and the cream top is set, remove it from the freezer. Using the parchment paper liner, carefully lift the cake out of the pan and transfer it to a serving board or platter. (Alternatively, you can choose to keep the cake in the pan and serve it directly from there). For the final flourish, generously dust the entire top surface of the cake with cocoa powder. Now, your magnificent vegan Tiramisu sheet cake is ready to be sliced into elegant portions and served. Enjoy every rich, coffee-infused, and creamy bite!
Storage and Serving Suggestions
This vegan Tiramisu sheet cake is not only delightful to make but also incredibly convenient when it comes to storage and serving, making it a perfect make-ahead dessert.
Refrigeration: Any leftover cake can be stored in an airtight container in the refrigerator for up to 4 days. The flavors tend to deepen and meld even further overnight, often making it taste even better the next day.
Freezing: For longer storage, this cake freezes beautifully for up to one month. To freeze, ensure the cake is fully chilled and set. You can either freeze it as a whole sheet (if space allows and it’s well-wrapped) or slice it into individual portions before wrapping each slice tightly in plastic wrap and then aluminum foil. Place the wrapped portions in a freezer-safe bag or container to prevent freezer burn.
Serving from Frozen: If you’ve frozen the cake, plan to move it from the freezer to the refrigerator at least 4-6 hours before you intend to serve it, or ideally, the morning of your event. This allows it to thaw gently to a perfectly soft and creamy consistency. Once thawed in the fridge, take it out, slice, and serve. A slice of this vegan Tiramisu sheet cake is exquisitely complemented by a steaming cup of your favorite coffee or a rich espresso.